4
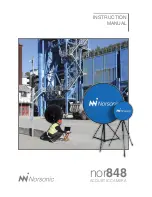
Norsonic Nor848
Instruction Manual
The length of the
leg may be adjusted
Adjust the height
Tilt adjustment
DC input
Pulse inputs
Power On LED
Socket for LAN-
cable
Power ON/OFF
Spare (Not used)
Do not place the dish on a hard surface with
the front pointing downwards as this may harm
the optical camera!
Optical camera
Microphone
Assembling and setup
The assembling and setup of the acoustic camera Nor848
is simple and takes just a few minutes:
• Unfold the legs of the tripod fully. Place the tripod on a
flat, horizontal plane and mount the microphone dish
on top of it. The tripod may optionally be equipped with
wheels for easy movement. Greater stability is ensured
by placing one of the legs in the same direction as the
microphone dish. One of the legs may optionally be
extended.
• Power the camera with DC input from the mains adap-
tor or from the optional battery pack
• Place the computer on a suitable table adjacent to the
microphone dish
• Connect the microphone dish to the computer using a
LAN-cable
• Switch on the power to the microphone dish. You can
tell whether the dish has power from the lit LED on the
front just above the optical camera and the LED on the
rear side adjacent to the Power switch. The LEDs will
light some seconds after power On
• Switch on the power to the computer (mains or battery)
• Start the application program by clicking the icon
“Norsonic Acoustic camera”
• After a few seconds the connected microphone dish
will be listed in the upper left hand side of the pro-
gram. Click on the field “Connect” to select the mi-
crophone dish as data source. Live pictures from
the current measurement are shown in real time.
Содержание Nor848
Страница 1: ...INSTRUCTION MANUAL nor848 ACOUSTIC CAMERA ...
Страница 3: ...nor848 ACOUSTIC CAMERA ...
Страница 18: ...15 Norsonic Nor848 Instruction Manual ...


