3.
Re-install the CPU board by reversing steps 3 through 6.
4.
Restore electrical power to the melter, and then switch
the melter on. If the chip was properly installed, all “8s” and
then the software version number will appear across the
control panel displays.
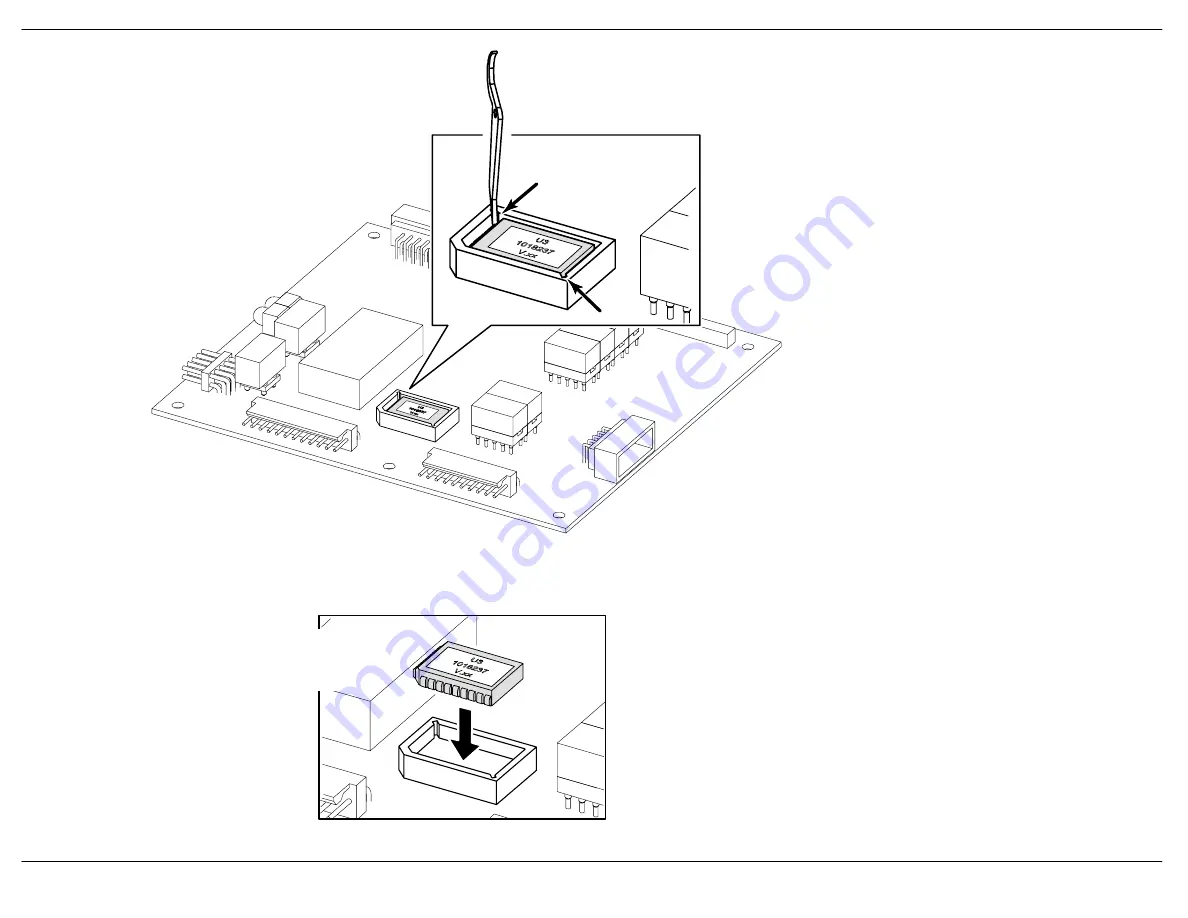
Remove and Replace the IC Chip
CAUTION: When inserting the new IC chip, ensure that
the notched edge of the chip faces the notched edge of the
receptacle. Incorrectly inserting the IC chip will result in
permanent damage to the chip.
1.
Insert the small end of the chip removal tool into one of the two
corner notches in the IC receptacle, and then gently pry the chip up.
Repeat this action in the second notch until the chip is free.
2.
With the notched corner of the new IC chip facing
the notched corner of the IC receptacle, insert the new
IC chip into the receptacle.


