


6. Program | 27
KEYBoarD SPLIT SETTINgS
after a split has been activated, use the
ZONE SELECT
buttons (accessed
with
SHIFT
) beneath each instrument’s (or the Extern’s) value Dial to as-
sign an instrument to one or more zones. The four Zone LEDs beneath
the instrument’s Level rotary will indicate the assignment.
CHooSINg a SPLIT PoSITIoN
The Keyboard Split position page allows for assigning each of the three
split points a keyboard split position, or for deactivating a split point by
setting it to
Off
. There are 10 keyboard split positions to choose from,
ranging from
F2
to
C7
. To adjust a split point, give it focus by pressing
its corresponding soft button (
Low
,
Mid
or
High
), corresponding to the
three first
PROGRAM
buttons, and turn the dial.
LEDs are provided above the keyboard, indicating which split positions
are active at all times.
SPLIT WIDTH SETTINgS
Normally the transition between two keyboard zones is “straight”, in
that there is no overlap between the sounds selected for each zone. By
adjusting the
Split Width
setting for a split point, the sounds can instead
be mixed or “cross-faded” across the split point, producing a smoother
transition between the sounds.
To adjust Split Width, keep the
ON/SET
button held down and press the
4
soft button, corresponding to the
PROGRAM 4
button. This will bring
up Keyboard Split
width
page, where the width or “cross-fade” range of
each split point can be set.
Select the split point to adjust by pressing its soft button (
Low
,
Mid
or
High
) and turn the dial to change its setting.
Off
: With the
Off
setting there will be no cross-fade between sounds at
the split point.
Sml
: The
Sml
setting represents a width of 12 semitones, meaning that
the sound
below
the split point will reach 6 notes
above
it, after which it
will be completely faded out. Sounds
above
the split point will similarily
reach 6 notes
below
it.
Lrg
: The
Lrg
setting provides a width of 24 semitones, 12 below the
split point and 12 above it.
M
Both panels use the same KB Zone configuration. Instrument
assignments are individual for each panel.
KEYBoarD ZoNES EDITor
Thee
KB ZONES
editor allows for a clear overview and easy set-up of
keyboard zones and how sound engines are assigned to them. a set-up
using the organ (
O
), Piano (
P
), Synth (
S
) and Extern (
E
) sections on Pan-
el a, and the Piano section of Panel B may look like the example below.
The position and length of each bar indicates which keyboard zone(s)
that section has been assigned to.
To adjust which zones a sound engine (or the Extern section) is assigned
to, the
ON/OFF
buttons for each section and the
Zone
soft buttons are
used in combination. as an example here is how to set up the Piano in
Panel B so that it covers zones 2 and 3:
1
make sure the Piano section on Panel B is turned on.
2
Press
SHIFT
+
KB ZONES
(Program 5 button) to open the editor
window.
3
The display will indicate which zones the Piano sound is currently
assigned to. Unless a KB Split has been set up previously, this will
most likely be all four zones (the entire keyboard).
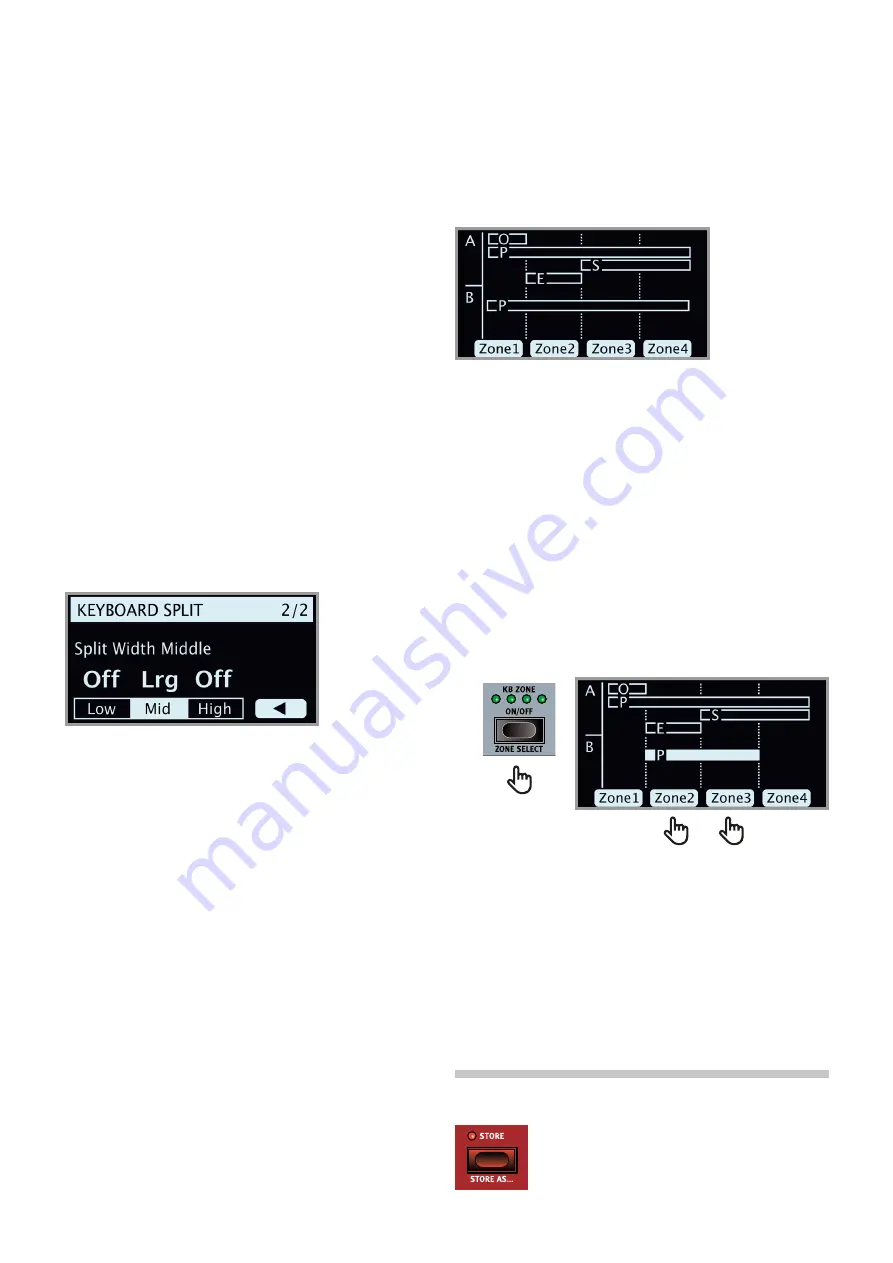
4
Press and hold the Piano
ON/OFF
button on Panel B and then
press the
Zone 2
and
3
soft buttons (Program 2 and 3 buttons).
The Piano sound will now be assigned to Zone 2 and 3. Using our
previous example, this is what that will look like:
You could also turn the Program dial, while holding down the
Piano On/Off button. This will scroll through all the possible Zone
combinations.
Depending on the Zone combination selected, the necessary Split
points will be assigned automatically. Their exact position and width
needs to be set from the
SPLIT SET
page however (see the previous
section).
Setting up the organ, Synth and Extern sections is done in the same
way.
STorE
The
STORE
button is used for storing an edited
program or song to a location in the program banks.
Storing a program or song will overwrite the existing
data in the selected memory location. For how to store
Synth Presets


