background image

GB 23

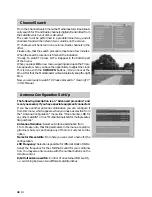
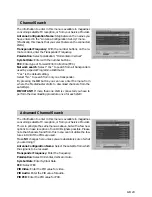
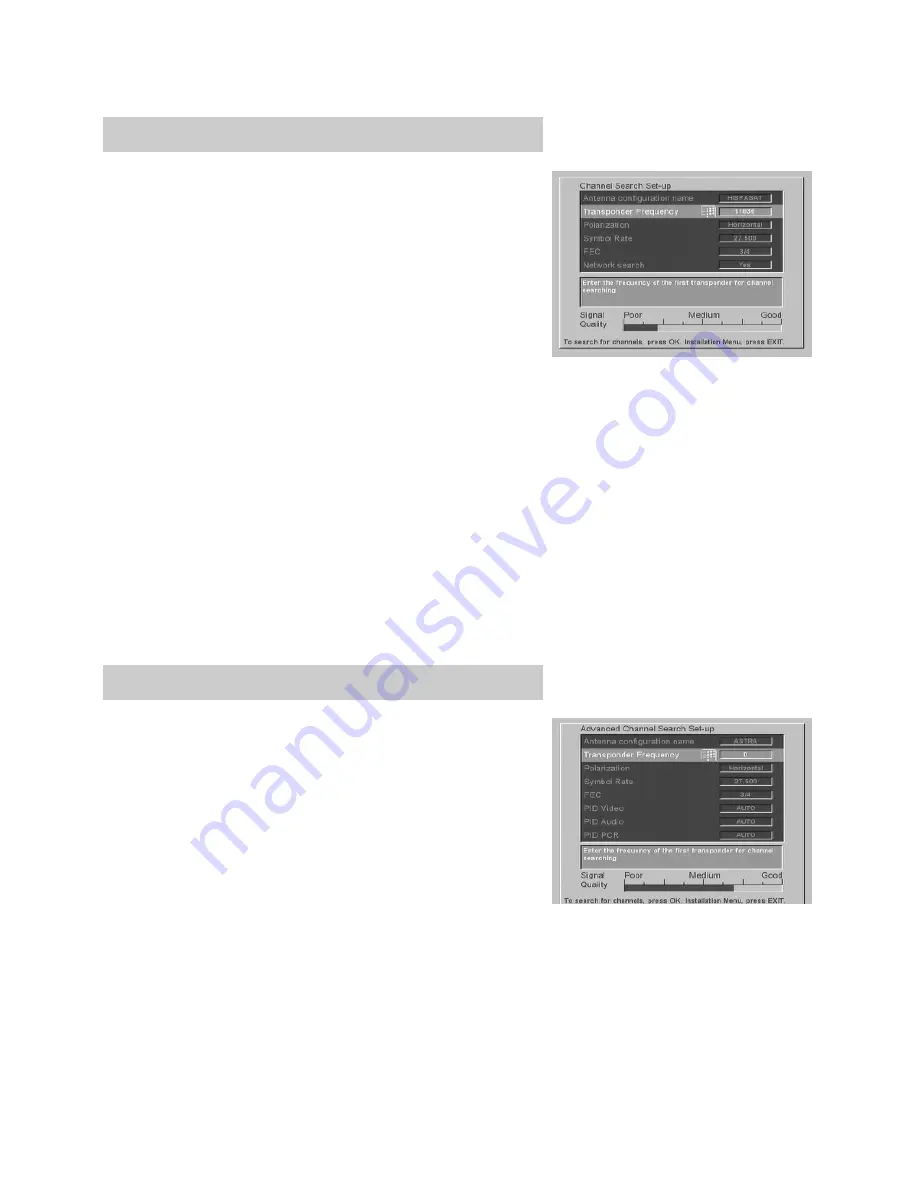
Channel Search

The information to enter in this menu is available in magazines
concerning satellite TV reception, or from your Service Provider.

Antenna Configuration Name

: Step between the names you

have entered in the “Antenna Configuration Set-Up” menu.
(Practically, this means that you select between the connected
LNBs).

Transponder Frequency

: With the number buttons on the re-

mote control, enter the Transponder Frequency.

Polarization

: Select polarization; “Horizontal or Vertical”

Symbol Rate

: Enter with the number buttons.

FEC

: Enter type of Forward Error Correction (FEC).

Network search

: Select “Yes” to search from all transponders

used by a special Programme Distributor.
“Yes” is the default setting.
Select “No” to search from only one transponder.

By pressing the 

OK

 button you can now enter the menu from

where the Mediamaster starts to download channels from the
satellite(s).

IMPORTANT!

 If more than one LNB is connected you have to

perform the downloading procedure once for each LNB!

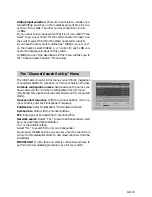
Advanced Channel Search

The information to enter in this menu is available in magazines
concerning satellite TV reception, or from your Service Provider.

This is in principle the same menu as above, but with a few new
options to make reception of non DVB signals possible. Please
note that channels found from this menu can not utilise the fea-
tures in DVB if the PIDs are used.

Make 

NO

 changes here unless you are absolutely sure of what

you are doing!!

Antenna Configuration Name

: Select the satellite from which

the signal is to be received.

Transponder Frequency

: Enter the frequency.

Polarization

: Select Horizontal, Vertical or Auto.

Symbol Rate

: Enter Symbol Rate.

FEC

: Select FEC.

PID Video

: Enter the PID value for video.

PID Audio

: Enter the PID value for audio.

PID PCR

: Enter the PID value for PCR.

Содержание Mediamaster 9602 S

Страница 1: ...GB 1 Owner s Manual Mediamaster 9602 S 9610 S ...

Страница 2: ...GB 2 ...

Страница 3: ...e limit with your Mediamaster It s easy to use always at your command and adaptable for future advances To begin with you will find it necessary to read these in structions but you will soon find yourself competent with out them Contents For your safety 3 lnstallation of the Mediamaster 4 Overview of connections 5 Front panel 5 Connecting to different units 6 CA module and Smart Card 8 Switching o...

Страница 4: ... an Owner s Manual for the Mediamaster Installation of the Mediamaster About the SCART sockets On the back side the Mediamaster is equipped with 3 SCART sockets See figure When you connect external sets to any of these sockets always use fully featured SCART Cables There are slimmed cheap SCART cables on the market but it is not so sure that e g your Videorecorder will work OK with some of those c...

Страница 5: ...C 15 50 Hz LNB Satellite dish input F connector Overview of connections RS232 for a printer PC or a high speed modem TELEPHONE LINE for modem connection to the telephone jack CTRL VIDEO for an IR diode cable connec tion to a video recorder SCSI 9610 S for a CD ROM player or other high speed data equipment Slot for the CA module with Smart Card to turn the Mediamaster on off standby to step up and ...

Страница 6: ... TV and a Video Recorder Refer to your video recorder manual for full instructions Connect one SCART cable between the TV and the TV SCART socket on the Mediamaster Connect the other SCART cable between the video recorder and the VCR SCART socket on the Mediamaster Connect a RF cable from the RF output on the video recorder to the TV aerial input on the TV Connect the ordinary TV aerial directly t...

Страница 7: ... recorder to the TV aerial input on the TV Connect the ordinary TV aerial directly to the RF input socket on the video recorder TV if no VCR In order to switch the signal from the dish between the ana logue and digital receivers you need a Nokia Smart priority switch see diagram Connect a coaxial cable between output A on the NOKIA Smart priority switch accessory to the LNB socket on the analogue ...

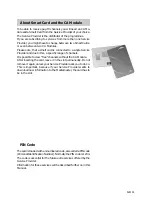
Страница 8: ...Smart Card If you want to watch the TV programmes from your Service Provider you must use the CA module Conditional Access with the Smart Card The CA module give you e g access to special menus from your Service Provider If no CA module is used you can only watch free TV pro grammes More about this later Note The mains plug must not be plugged in before insert ing the CA module Insert your card fu...

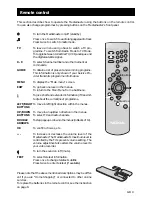
Страница 9: ... To move in an up down direction in the menus BUTTONS To select TV and radio channels DOUBLE To step page up or down in the menus in blocks of 10 ARROWS OK To confirm choices etc To increase or decrease the volume level of the Mediamaster The Mediamaster s maximum level is controlled by the TV s present volume setting The volume adjustment also alters the volume level to your video recorder To tur...

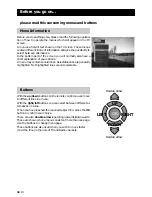
Страница 10: ...faster 10 at the time in the lists of TV and Radio channels Menu Information Before you do anything else please read the following explana tion of how to operate the menus which will appear on the TV screen A menu is a field of text shown on the TV screen These menus contain different kinds of information and give the possibility to select between alternatives In the bottom part of the screen you ...

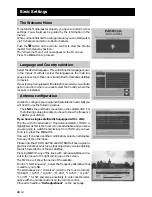
Страница 11: ...e to this a specific range of channels It is possible to view free channels without the CA Module After inserting the card leave it in the slot permanently Do not remove it again unless your Service Provider asks you to do so This is important because if your Service Provider wants to download new information to the Mediamaster the card has to be in the slot PIN Code The card is loaded with a 4 nu...

Страница 12: ...On line LNB Frequency select the frequency alternative that is valid for your LNB The alternatives are Universal which is the most common DiSEqC 9 750 10 000 10 050 10 750 11 200 11 475 5 150 and also a possibility to enter another alter native with the number buttons on the remote control Proceed to headline Dish adjustment on the next page Language and Country selection Select the desired langua...

Страница 13: ... or 2 type or 2 A 0 12 V switch Both of these automatically switch between two LNBs but there is one big difference between them The DiSEqC switch can be located close to the LNBs which means you have only one cable down to the Mediamaster The 0 12 V switch must be located close to the Mediamaster which means you will have two cables one from each LNB all the way down to the Mediamaster If you hav...

Страница 14: ...o watch TV Please proceed to Viewing TV in this Manual Antenna Configuration Set Up The following description is an Advanced procedure and is only necessary if you have special equipment connected If you have another antenna combination you can configure it from this menu which appears when you make a selection from the Antenna Configuration menu line One antenna LNB for any other satellite or lin...

Страница 15: ...u will find in magazines concerning satellite TV reception or from your Service Provider Antenna configuration name Step between the names you have entered in the Antenna Configuration Set Up menu Practically this means that you select between the connected LNBs Transponder Frequency With the number buttons on the re mote control enter the Transponder Frequency Polarization Select polarization Hor...

Страница 16: ... receive information dur ing 4 5 seconds of the current programme This information in cludes Channel number name title and time Press while watching a channel If your Service Provider trans mits programme information you will see Correct time A small amount of information for the current and next pro gramme Alternate between Now and Next with the left right buttons Name and number of the channel F...

Страница 17: ...vel to your VCR It is possible to turn the sound on and off with the button Sound off is indicated with the same symbol on the screen List of TV and Radio channels While watching TV or listening to Radio in Radio Mode you get a programme list on the screen by pressing the OK button Change channel by stepping with the UP DOWN buttons to an other channel and then press the OK button Please also see ...

Страница 18: ... of a programme every thing shown on the screen will be registered For example If you call up a Menu from the Mediamaster on the screen the menu will be recorded Analogue Receiver If you have an Analogue Receiver connected and turn it ON the programmes from it will be shown Turn it OFF and the pro gramme from the Mediamaster will be shown You can also toggle between programmes from the Mediamaster...

Страница 19: ...t programme with the RIGHT button Use the button to get extended information Common to both the TV and Radio Guide are that the pro gramme information is only shown if your Service Provider transmit it TV Guide Depending on the software version in the Mediamaster you might have a 7 day TV Guide If not the TV Guide will have the same functionality as the Radio Guide However all receiv ers will get ...

Страница 20: ...ental Control functions you have the possibility to control the access to the Mediamaster and also to individual chan nels By entering the PIN code 1234 you reach the menu where you can lock different functions in the Mediamaster Message If the Service Provider has any special messages to the viewers they can be presented here CD 9610 S From the CD menu you can control an external CD player con ne...

Страница 21: ...bout this Menu in the chapter Installation Submenus Common interface From here you will get access to information and menus con nected to the Common Interface CA Module This information may vary a lot depending on the Service Provider Please see the documentations delivered together with your CA Module ...

Страница 22: ...ishes DiSEqC input selection There are in principle two kinds of ex ternal DiSEqC switches on the market at present One for con nection of two LNBs The other one for connection of up to 4 LNBs If you connect a two input switch you must be sure that it is of a so called Tone Burst type If this is the case select Mini A for the LNB connected to input A on the switch select Mini B for the LNB connect...

Страница 23: ...er the menu from where the Mediamaster starts to download channels from the satellite s IMPORTANT If more than one LNB is connected you have to perform the downloading procedure once for each LNB Advanced Channel Search The information to enter in this menu is available in magazines concerning satellite TV reception or from your Service Provider This is in principle the same menu as above but with...

Страница 24: ...System Settings Type of connected TV Select the appropriate TV format for your TV set 4 3 is for TV sets with normal screen 16 9 is for wide screen TV sets Fullscreen Letterbox These alternatives can be used on a 4 3 TV set Fullscreen will fill up the screen on the TV set but lose some information in the left and right sides Letterbox will give a taller picture Timeout Channel Info Used to set the...

Страница 25: ...t the Welcome Menu without erase press EXIT Receiver upgrade If your Service Provider has a new software version available for the Mediamaster you will be recommended to download it To do that select the line Receiver upgrade and follow the in structions If no software is available yet you will get the message No new software available Please note that during a download procedure you must NOT perf...

Страница 26: ... be rented for just one day Communicating your re quests therefore becomes a natural part of your daily use of the Mediamaster Examples of such services are On line services Depending on your Service Provider you may perform electronic transactions such as Home Shopping or banking via your Media master Pay Per View PPV You can get access to PPV programmes by using your Smart Card Your credit and t...

Страница 27: ...rder Access Authorisation to use the coding system to purshase order TV programmes Audio system With digital satellite reception the sound is transmitted in packages and is selected either in a special audio mode or pre selected by using instal lation set up This gives the opportunity to select be tween several different languages to a movie Amount of choices is dependent on what is available in t...

Страница 28: ... 10 kΩ VIDEO SCART Video output 1 Vpp 1 dB 75 Ω Video input 1 V pp 75 Ω Audio output 0 5 Vrms RL 10 kΩ Audio input 0 5 Vrms RL 10 kΩ Status input 0 6 12 V RL 10 kΩ SAT SCART Video input 1 Vpp 75 Ω RGB input Yes Fast blanking input Yes Audio input 0 5 Vrms RL 10 kΩ Status input 0 6 12 V RL 10 kΩ AUDIO R L Connector 2 x RCA R L Output 0 5 Vrms RL 10 kΩ Return channel Telephone line Modem Connector M...

Страница 29: ...GB 29 66 76915 12 9901 9602 S 9610 S Nokia is a registered trademark of Nokia Corporation ...

Отзывы: