


InterLynx/TS User’s Manual_________________________________________________________________
6-4
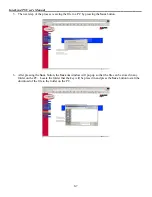
4.
Adding a new Service (GRE).
a.
Click on the
Add A Service
button to add a new Service.
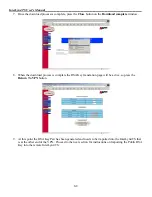
b.
In the
Name
field type
GRE
.
c.
In the
Description
field enter:
IP Protocol 47
d.
Check the
other
radio button in the
Protocol
field and type
47
in the Protocol # box.
e.
Since GRE is not Port specific, nothing is entered in the
Ports
entry field.


