07/01/06 Rev 1.0
Page 16 of 24
•
Y – Full access to a particular computer. Plus access to the
F4
,
F5
and
F6
OSD functions
•
V –Viewing access only, to a particular computer (No keyboard/mouse functionality)
•
N – No access to a particular computer – A TIMEOUT label appears if access is attempted
To give each user the desired access level:
1. Navigate to the desired computer line and User.
2. Toggle between the options using the Spacebar.
21.
Security
In the Settings window navigate to the Security line and press
Enter
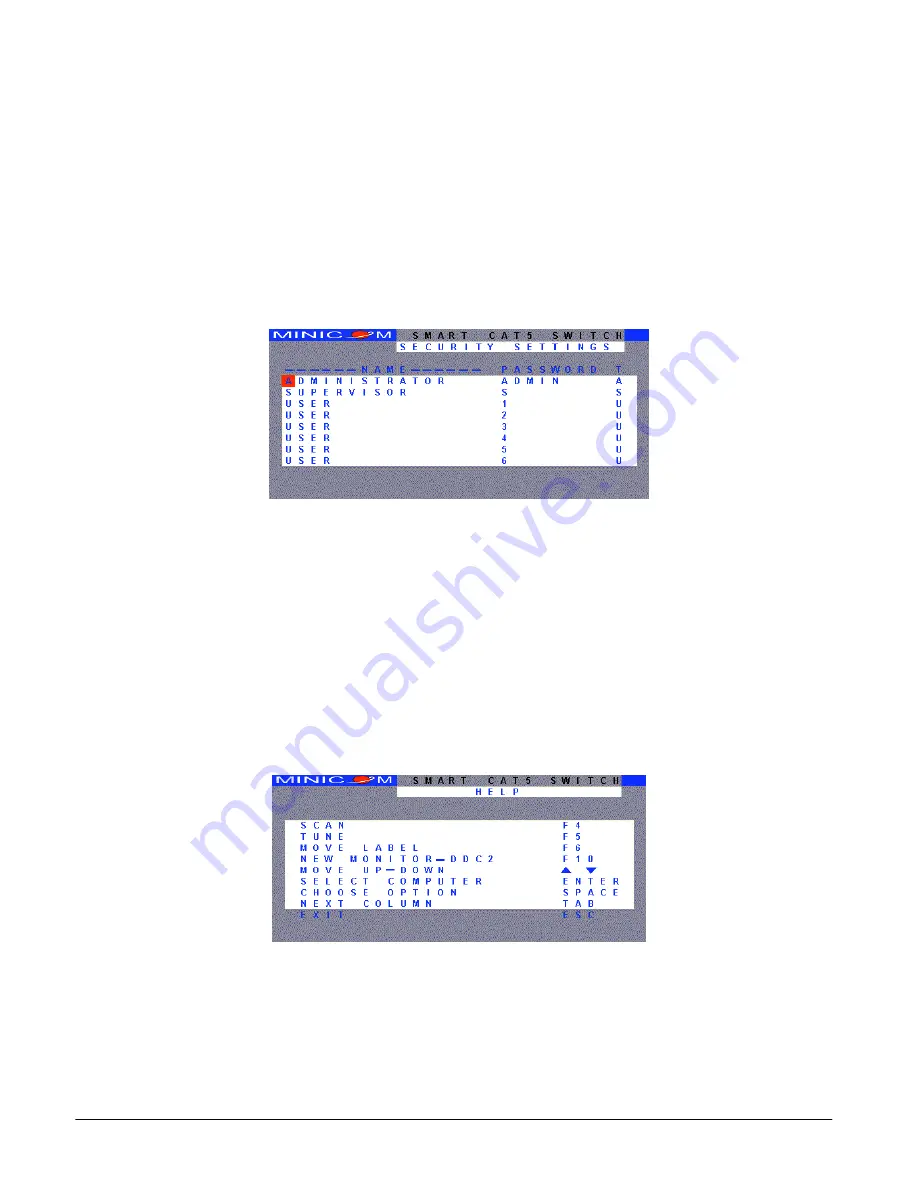
. The Security settings window
appears see Figure 8.
Figure 8 The Security settings window
The ‘T’ column on the right hand side stands for Type of password.
There can only be 1 Administrator password, 1 Supervisor password, and 6 User passwords.
To change a user name or password:
1. Navigate to the desired line and column.
2. Type a new user name / password. User authentication is done solely via the password there is no
security significance to the names.
By default the User Profile settings are full access.
22.
The OSD HELP window – F1
To access the HELP window press
F1
. The HELP window appears see Figure 9.
Figure 9 The HELP window
Please note! All the functions set out in the Help window are performed from the Main window. The Help
window is merely a reminder of the hotkeys and their functions.
23.
Scanning computers– F4
Where necessary adjust the scan time in the Time Settings window, see above.
Содержание RFT2-17-CAT5
Страница 3: ...07 01 06 Rev 1 0 Page 3 of 24 ...


