background image

23

Fault Finding

The camera is built to the highest standards and every unit is 

fully tested prior to packing so if you experience an installation 

problem you need to investigate your cabling, connections, 

power supply and monitor. If you do fail to get a picture on  

a monitor you need to check the following things.

Interference on the camera picture

This is usually caused by poor or inadequate cabling, not observing 

the correct wiring techniques (CAT5 pairs or cores mixed up) and 

for 12V DC powered cameras the use of an unregulated or poorly 

regulated power supply.

One camera picture overlaid on another using CAT5

Caused by getting camera cores and pairs mixed up.

Can’t control via 2 wire RS485

A.


RS485 wires crossed over, try swapping around.

B. 


Wrong protocol and baud rate selected, the default settings 


are ID -1, BAUD – 9600, PELCO-D.

Can’t control via coaxitron (Up the co-ax)

Ensure the PTZ protocol is set to ‘Alien TVI’ in the DVR’s settings or 

other control equipment.

No picture

The camera cannot function without the correct working 


power supply. 

Step 1

  Test that the camera has the correct voltage supplying  


it, you must do this with the camera connected so that  


there is load on the PSU. The camera should have at  


least 10.5V DC connected to it.

Step 2

   Check there is a picture coming out of the Phono  


analogue point at the camera. If there is a picture here  


but not at the DVR it could be one of the following:

   A.

  Video loss in Composite cable as run too long  


usually you would get a picture up to around  


120mtrs (Remedied by fitting a video amp).


B.

  Ensure that the BNC - BNC lead that you connect  


between the camera and monitor has no shorts or  


  open circuits. If you are making your own 


  lead, don’t forget the lead must have two wires 


connected to complete the circuit, Video and Ground.


C.


 No Video signal down CAT5 or CAT5+2. 


The camera has a Balun built in to it so you need  


a balun fitting at the remote end. Check you have  


used the correct terminals in the camera for the  


balun. Check you have used a “pair of cores” not  


individual cores from different pairs.

Содержание SEE220

Страница 1: ...SEE220 Stunning 1080p HD TVI CCTV camera with built in Balun and internal connections for neat easy installation Handbook Instructions XSEE220 Maximum IR Sensitivity XSEE220 Maximum IR Sensitivity...

Страница 2: ...clever internal connection PCB for neat and fast installation and stunning 1080p HD picture quality make the SEE220 a great first choice CCTV Dome cameras for any installation hd TvI 1080p output at...

Страница 3: ...navigate using the joystick Press again to select Conduit Entry 20mm blank supplied Cable entry also at rear through a grommet Connection Block Spring lock terminals to wire up the power input TVI CAT...

Страница 4: ...camera Prior to the end of the installation you need to additionally seal the grommet with a flexible silicone product This is because the rubber grommet may shrink or get stressed by cable movement...

Страница 5: ...easy and simple installation 2 RG59 4 No Balun required extra cores allow a DVR with RS485 to control the camera s OSD 3 CAT5 2 Requires a balun at the remote end heavy duty power cores can power mult...

Страница 6: ...6 RG59 2 Cable contains 1 co ax core 2 power cores To DVR or Monitor 12V DC or 24V AC PSU...

Страница 7: ...7 RG59 4 PTZ Combo Cable Cable contains 1 co ax core 2 power cores 2 data cores To DVR or Monitor 12V DC or 24V AC PSU RS485 Keyboard or Test Monitor to control OSD...

Страница 8: ...8 CAT5 2 Cable contains 4 pairs data cores CAT5E style 2 heavy duty power cores Balun B To DVR or Monitor 12V DC or 24V AC PSU RS485 Keyboard or Test Monitor to control OSD...

Страница 9: ...9 CAT5 Cable contains 4 pairs data cores CAT5E style Balun B To DVR or Monitor 12V DC RS485 Keyboard or Test Monitor to control OSD...

Страница 10: ...itron You can access the OSD menu via the co ax cable from a compatible DVR or test monitor Simply set the PTZ protocol to Alien TvI Coaxitron and then use the PTZ controls to navigate the cameras OSD...

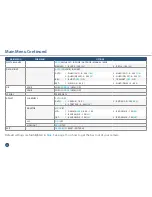
Страница 11: ...ize SET to confirm size 2 Graduation 0 2 0 3 default Backlight off Blc HSBLC BLC 1 Level low middle high 2 Area Directions to adjust position SET to confirm position directions to adjust size SET to c...

Страница 12: ...f on ext 1 delay 0 60 3 2 n d Delay 0 60 3 NR 2DNR Low Middle High Off 3DNR Low Middle High Off special see PAGE 13 adjust sharpness Auto Off Auto 1 Level 0 10 5 2 Start AGC 0 255 120 3 End AGC 0 255...

Страница 13: ...n directions to adjust size SET to confirm size 3 sensitivity 0 100 64 4 Colour Green blue White Green 5 Trans 0 00 1 00 1 00 6 Alarm 1 View Type All Off Block Outline 2 OSD View On Off 3 Alarm Out On...

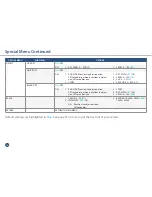
Страница 14: ...4 Level 0 100 10 5 AGC 0 15 12 6 Sens Up X2 X30 X6 Black DPC on off on 1 pos size Directions to adjust position SET to confirm position directions to adjust size SET to confirm size 2 Start 3 DPC View...

Страница 15: ...is allows the colour adjustment of the camera to be set up so objects appear a natural colour For more details on menu systems and camera adjustments download TIP 295 at systemq com Day Night This set...

Страница 16: ...1 AlienCCTv monitor with built in speakers hdMI vGA and TvI inputs and a TvI loop through Order Code LCD921 1ch Passive Baluns SendTvI or analogue signals 100m down CAT5 Order Code BAL706 Sold in pair...

Страница 17: ...cores extra CSA for powering PTZ cameras Solid copper centre core for long runs Three cables in one saves time and money Glued foil sheath provides maximum protection against interference and prevent...

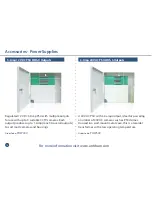
Страница 18: ...Tv cameras Each output produces up to 1 Amp max 5A overall outputs to suit most cameras and housings Order Code POW400 A 24v AC PSU with a 6 amp output ideal for powering a number of 24v AC cameras su...

Страница 19: ...best in class 5 AutoPort Plug and Play for easy internet setup 6 Compact Space Saving Case slim modern design 7 Free dynamic dNS Setup saves you time 8 Full Alarm Inputs 16 on the 16 way triggered ho...

Страница 20: ...e ONvIF 2 Compatible Coaxitron RS485 Control Network Cable Testing 12v dC Output POE Full Qwerty Keyboard Built in Torch Built in Storage For Recordings Supports 1080p 720p hd Lithium Ion Battery Incl...

Страница 21: ...off com Warning messages can be downloaded or recorded in MP3 format and stored on the removable Sd card These sounds can be used to welcome visitors deter intruders warn or inform people as they ente...

Страница 22: ...ils to members of the general public without the need for expensive personalised signage This is essential in helping ensure you comply with the data Protection Act The scheme operators can amend thei...

Страница 23: ...VR s settings or other control equipment No picture The camera cannot function without the correct working power supply Step 1 Test that the camera has the correct voltage supplying it you must do thi...

Страница 24: ...oise reduction On Off Selectable Sens up Frame Integration On Off Selectable limit 30x D Effect Freeze Mirror Neg Image Supplied voltage 12V DC 24V AC 10 Power Consumption 150mA 12V Dimensions Base 14...

Отзывы: