23
Fault Finding
The camera is built to the highest standards and every unit is
fully tested prior to packing so if you experience an installation
problem you need to investigate your cabling, connections,
power supply and monitor. If you do fail to get a picture on
a monitor you need to check the following things.
Interference on the camera picture
This is usually caused by poor or inadequate cabling, not
observing the correct wiring techniques (CAT5 pairs or cores
mixed up) and for 12V DC powered cameras the use of
unregulated or poorly regulated power supply.
One camera picture overlaid on another
using CAT5
Caused by getting camera cores and pairs mixed up.
Can’t control via 2 wire RS485
A.
RS485 wires crossed over, try swapping around.
B.
Wrong protocol and baud rate selected, the default settings
are ID -1, BAUD – 9600, PELCO-D.
Can’t control via REM088 (Up the co-ax)
Battery flat in REM088 (Check battery voltage with a meter).
No picture
The camera cannot function without the correct working
power supply.
Step 1
Test that the camera has the correct voltage supplying
it, you must do this with the camera connected so that
there is load on the PSU. The camera should have at
least 10.5V DC connected to it.
Step 2
Check there is a picture coming out of the Phono test
point at the camera. If there is a picture here but not at
the DVR it could be one of the following:
A.
Video loss in Composite cable as run too long
usually you would get a picture up to around
120mtrs (Remedied by fitting a video amp).
B.
Ensure that the BNC - BNC lead that you connect
between the camera and monitor has no shorts or
open circuits. If you are making your own
lead, don’t forget the lead must have two wires
connected to complete the circuit, Video and Ground.
C.
No Video signal down CAT5 or CAT5+2.
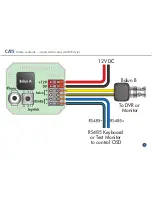
The camera has a Balun built in to it so you need
a balun fitting at the remote end. Check you have
used the correct terminals in the camera for the
balun. Check you have used a “pair of cores” not
individual cores from different pairs.


