USER MANUAL
33014816(1)2005-07 A
9
Joystick
(See Fig. J)
The joystick is used for the following functions (all of the
functions must be carried out with the safety switch pressed):
–
Hopper lifting (1, Fig. J);
–
Filter shaker (2, Fig. J);
–
Skirt opening (3, Fig. J);
–
Side broom lowering (4, Fig. J);
–
Side broom rotation (5, Fig. J);
–
Main broom lowering (6, Fig. J);
–
Main broom rotation (7, Fig. J);
–
Skirt closing (8, Fig. J);
–
Hopper lowering (9, Fig. J);
–
Main broom rotation (10, Fig. J);
–
Main broom lowering (11, Fig. J);
–
Suction fan stop (12, Fig. J);
–
Main broom rotation stop (13, Fig. J);
–
Side broom rotation stop (14, Fig. J);
–
Main broom lifting (15, Fig. J);
–
Side broom lifting (16, Fig. J);
–
Safety switch.
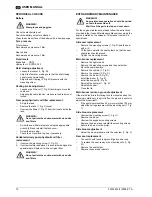
INSTRUCTIONS FOR USE
Start
–
Before starting the machine, make sure the parking
brake (5, Fig. H) is engaged.
–
Connect the battery cable socket with the machine cable
plug.
–
Be sure of the perfect connection.
–
Insert the ignition key in the ignition switch.
–
Turn the ignition key clockwise to the first position.
The battery charge indicator light should be on.
–
Turn the ignition key clockwise until the end of stroke.
When the motor is on, release the ignition key which will
automatically return to the first position.
Switching off
Turn the ignition key counterclockwise to “0” position and then
remove it. Pull the parking brake lever.
Hand pump
(See Fig. K)
–
Install the lever (1, Fig. K) in the pump.
–
Make sure that the slider is in a position that allows the
cab to be lifted. Pump to lift the cab.
–
To lower the cab, change the position of the slider.
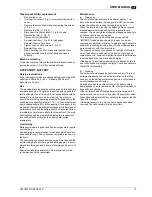
MACHINE USE
Waste collection
–
Operate the fan by pressing the push-button.
–
Main broom lowering, fan and main broom start, skirt
opening: press the push-button and release. The main
broom lowers and starts rotating. The suction fan starts
working at the same time.
–
Main broom and right side (left side optional) broom
lowering and start: press the push-button, the brooms
lower and start rotating. Hold the push-button pressed
until the ideal adhesion for the type of cleaning to be
carried out is reached.
–
In case of wet surface, turn off the fan.
–
The operating speed recommended for the sweeper,
adjusted by means of the pedal, ranges from 1 to 8 km/h,
depending on the amount of waste to be collected.
During the collection phase, the waste should be compacted
in order to maximize the load collected:
–
Stop the sweeper
–
Close the skirt
–
Re-open the skirt and re-start the sweeper
NOTE
Machines with the EC marking are provided
with safety devices should the operator leave
the driver’s seat.
The machine cannot be started unless the
operator is sitting in position.
NOTE
Before trying to start the machine again, turn
the ignition key back to “0” position.
As soon as the machine has been started,
check the battery charge and oil pressure
warning lights are off.
WARNING!
Lift the cab manually.
NOTE
After lowering the cab, maintain the slider in
the middle position.
Содержание SR 1700 2WD B
Страница 3: ...33014816 1 2005 07 A B C ...
Страница 4: ...D E 1 1 2 16 18 17 4 14 11 3 8 6 10 9 6 8 7 12 13 15 5 ...
Страница 85: ...33014816 1 2005 07 A J 14 13 12 8 11 10 3 3 4 5 6 7 3 16 1 2 9 8 15 ...
Страница 86: ...33014816 1 2005 07 A K L M N O P 1 1 1 1 2 1 1 ...
Страница 87: ...33014816 1 2005 07 A Q R S T U V 1 3 1 2 1 1 1 1 2 ...
Страница 88: ...33014816 1 2005 07 A W X Y Z AA AB AC 1 1 1 1 1 1 ...
Страница 89: ...33014816 1 2005 07 A AD ...
Страница 90: ...33014816 1 2005 07 A AE ...
Страница 91: ...33014816 1 2005 07 A AF ...
Страница 92: ......
Страница 93: ...33014816 1 2005 07 A F 2 1 11 4 6 8 7 12 9 5 10 3 ...
Страница 94: ...G 3 5 8 7 4 6 11 1 12 9 2 10 13 ...
Страница 95: ...33014816 1 2005 07 A H I 10 12 2 3 7 9 4 1 5 11 8 4 1 5 11 8 2 9 13 10 12 3 7 6 6 ...

