background image

 40 - FORM NO. 56041516 - ConvertaMAX

 28/34, I-MAX

 28HD/34HD, BA 750/850

WET SCRUBBING

1

Follow the instructions in the Preparing The Machine For Use section of this manual.

2

Turn the Master Key Switch (20) ON.  This will display the control panel indicator lights, reference the Battery Condition Indicator (17) and Hour Meter
(18).

3

Release the Operator Hand Brake (16) if installed.

4

Press the Solution Button (23) and hold for 5 seconds.  This is done to pre-wet the floor.  Note:  This will help prevent scarring of the floor surface when
starting to scrub with dry brushes.

5

Press the Normal Scrub Button (29) for moderate scrub deck pressure or the Heavy Scrub Button (27) for the highest pressure mode.  Note refer to the
machine control description section to the have more detailed explanation of this and other control panel functions.

6

When either the Normal Scrub Button (29) or Heavy Scrub Button (27) are selected, the brushes and squeegee automatically are lowered to the floor.
The machine’s scrub brushes rotation and solution system flow starts when the Drive Paddle (3) is activated.

7

When the Drive Paddle (3) is in the neutral position, the brushes do not run and solution is not dispensed.  Grip the Operator Control Handle (15) and
push the Drive Paddle (3) forward to start the brush motor and the solution, and to move the machine forward.  For best results, move the machine at
a slow walking speed.  Push the Solution Button (23) to turn the solution OFF while making sharp turns.  Pull the Drive Paddle (3) backward to move the
machine in reverse.  The brushes will run while moving the machine in reverse, and solution will be dispensed.

8

Begin scrubbing by moving the machine forward in a straight line at a normal walking speed and overlap each path by 2-3 inches (50-75 mm).  Adjust
when necessary the machine speed and solution flow according to the condition of the floor.

9

Adjust the Solution Flow Control Knob (10) so a thin, even layer of solution can be seen in front of the Squeegee (8).  Note the adjustment can be changed
to allow variable solution flow for different types of floors to be scrubbed.  Example: A rough or absorbent floor surface, such as unfinished concrete, well
require more solution than a smooth finished floor.

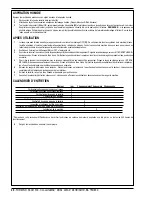
CAUTION !

To avoid damaging the floor, keep the machine moving while the brushes are turning.

10

When scrubbing, check behind the machine occasionally to see that all of the waste water is being picked up.  If there is water trailing the machine, you
may be dispensing too much solution, the recovery tank may be full, or the squeegee tool may require adjustment.

11

For extremely dirty floors, a one-pass scrubbing operation may not be satisfactory and a “double-scrub” operation may be required.  This operation is the
same as a one-pass scrubbing except on the first pass the squeegee is in the up position (press the Vacuum Button (25) to raise the pick up squeegee).
This allows the cleaning solution to remain on the floor to work longer.  The final pass is made over the same area, with the squeegee lowered to pick
up the accumulated solution.

12

The recovery tank has an automatic float shut-off to prevent solution from entering the vacuum system when the recovery tank is full.  When the float shut-
off is activated, the control system will shut down the scrub, vacuum and solution systems.  The Vacuum System Fault Indicator (24) will be lit and the
Hour Meter / Status Display (18) will display “FULL”.  To clear the display, press the Scrub OFF Button (31).  When the float closes, the recovery tank
must be emptied.  The machine will not pick up water with the float closed.  NOTE:  If the control repeatedly gives a full indication when the tank is not
full, the automatic shut-off feature can be disabled, have a qualified service technician perform this function.

13

When the operator wants to stop scrubbing or the recovery tank is full, press the Scrub OFF Button (31) once.  This will automatically stop the scrub brushes
and solution flow and the scrub deck will raise UP.  NOTE:  the vacuum/squeegee system will not be turned off when the button is only pressed once,
this is to allow any remaining water to be picked up without turning the vacuum back on.  Press the button a second time and the squeegee will raise and
the vacuum will stop after a 10 second delay.

14

Move the machine to a designated waste water “DISPOSAL SITE” and empty the recovery tank.  To empty, remove the Drain Hose (5) from it’s hanger,
then remove the plug (hold the end of the hose above the water level in the tank to avoid sudden, uncontrolled flow of waste water).  Refill the solution
tank and continue scrubbing.

NOTE:  Make sure the Recovery Tank Cover (2) is properly seated or the machine will not pick-up water correctly.

Содержание BA 750

Страница 1: ...96020 Nilfisk MODELS 56396017 56396018 Instructions For Use Bedienungsanleitung Mode d emploi Gebruiksaanwijzing ConvertaMAX 28 34 I MAX 28HD 34HD BA 750 BA 850 ConvertaMAX 28 after SN1593240 I MAX 28HD after SN1593242 ConvertaMAX 34 after SN1593243 I MAX 34HD after SN1593245 BA 750 after SN1594387 BA 850 after SN1594391 ...

Страница 2: ...he Squeegee 48 Troubleshooting 52 Controller Error Codes 56 57 Technical Specifications 64 INHALTSVERZEICHNIS Seite Einleitung 4 Ersatzteile und Service 4 Typenschild 4 Auspacken der Maschine 4 Sicherheits und Warnhinweise 7 Machen Sie sich mit Ihrer Maschine vertraut 12 13 Funktionsbeschreibung der Steuergeräte 22 25 Vorbereitung der Maschine zum Einsatz Installation der Batterien 35 Installation...

Страница 3: ...e la batterie 50 Lubrification de la machine 50 Entretien du moteur d aspiration 50 Entretien de la raclette 50 Réglage de la raclette 50 Dépannage 54 Codes d erreur du contrôleur 60 61 Spécifications techniques 65 INHOUDSOPGAVE Pag Inleiding 5 Onderdelen en service 5 Typeplaatje 5 Machine uitpakken 5 Waarschuwingen en aandachtspunten 9 Ken uw machine 16 17 Functies van de onderdelen knoppen lampj...

Страница 4: ...sein das Allerbeste aus Ihrer automatischen Nilfisk Advance Schrubbmaschine zu machen Lesen Sie es bitte vor Inbetriebnahme der Maschine sorgfältig durch Bitte beachten Sie Fettgedruckte Zahlen in Klammern weisen auf ein auf den Seiten 12 13 abgebildetes Teil hin Dieses Erzeugnis ist lediglich für kommerzielle Anwendungszwecke bestimmt ERSATZTEILE UND SERVICE Eventuell erforderliche Reparaturen so...

Страница 5: ...mmédiatement contact avec le service clientèle de Nilfisk Advance afin de faire une déclaration de dégât de fret Unefoisl emballageenlevé coupezlescourroiesenplastiqueetretirezlescales de bois situées près des roues Utilisez une rampe pour faire descendre la machine de la palette sur le sol INLEIDING Deze handleiding is een praktisch hulpmiddel om de mogelijkheden van uw Nilfisk Advance automatisc...

Страница 6: ...ty blocks or stands to support the machine Do not dispense flammable cleaning agents operate the machine on or near these agents or operate in areas where flammable liquids exist Do not clean this machine with a pressure washer Do not operate this machine on ramps or inclines of more than a 2 percent gradient CAUTION This machine is not approved for use on public paths or roads This machine is not...

Страница 7: ...einer Maschine ohne diese mit Sicherheitsblöcken oder Ständern abzustützen Tragen Sie keine brennbaren Reinigungsmittel auf nehmen Sie die Maschine nicht auf solchen Mitteln oder in der Nähe solcher Mittel in Betrieb und betreiben Sie die Maschine nicht in Bereichen in denen brennbare Flüssigkeiten vorkommen Reinigen Sie die Maschine nicht mit einem Druckreiniger Diese Maschine darf auf Rampen und...

Страница 8: ...entretien des composants électriques Ne travaillez jamais sous une machine sans y avoir placé au préalable des blocs de sécurité ou des étais destinés à soutenir la machine Nedéversezpasd agentsnettoyantsinflammables nefaitespasfonctionnerlamachineàproximitédecesagentsoud autres liquides inflammables Ne nettoyez pas cette machine avec un nettoyeur à pression Ne faites pas fonctionner la machine su...

Страница 9: ...veilig op steunen is geplaatst Gebruik geen ontvlambare reinigingsmiddelen gebruik de machine niet op of in de buurt van dergelijke reinigingsmiddelen of in een ruimte waar zich ontvlambare vloeistoffen bevinden Reinig de machine niet met een hogedrukreiniger Gebruik de machine niet op meer dan 2 graden hellende vlakken OPGELET Deze machine is niet geschikt voor werkzaamheden op de openbare weg De...

Страница 10: ...ion of an item mentioned in the text 1 Solution Tank Fill 2 Recovery Tank Cover 3 Drive Paddle 4 Solution Drain Hose Level Indicator 5 Recovery Drain Hose 6 Squeegee Adjustment Bolt 7 Squeegee Blade Latch 8 Squeegee 9 Machine Battery Connector 10 Solution Flow Control Knob 11 Speed Limit Control Knob 12 Wheel Drive Circuit Breaker 40 Amp 13 Control Circuit Circuit Breaker 10 Amp 14 Brush Deck 15 O...

Страница 11: ...System Fault Indicator 23 Solution Button 24 Vacuum System Fault Indicator 25 Vacuum Button 26 Vacuum System Indicator 27 Heavy Scrub Button 28 Heavy Scrub Mode Indicator 29 Normal Scrub Button 30 Normal Scrub Mode Indicator 31 Scrub Off Button 32 Scrub Mode Off Indicator 33 Brush Remove Button 34 Brush Remove Indicator 35 Brush Install Button 36 Brush Install Indicator 17 18 19 20 21 22 23 24 25 ...

Страница 12: ... genau festzulegen 1 Einfüllstutzen des Lösungsmitteltanks 2 Abdeckung des Auffangbehälters 3 Antriebspaddel 4 Ablass Schlauch des Lösungsmitteltanks Füllstandanzeiger 5 Ablass Schlauch des Auffangbehälters 6 Einstellschraube der Absaugleiste 7 Riegel des Absaugleistenwischblattes 8 Absaugleiste 9 Batterieanschluss 10 Einstellknopf für die Lösungsmittelzufuhr 11 Einstellknopf zur Geschwindigkeitsb...

Страница 13: ...ttelsystem 23 Lösungsmittel Knopf 24 Störmelder für das Saugsystem 25 Saug Knopf 26 Anzeiger für das Saugsystem 27 Knopf für starkes Schrubben 28 Anzeiger für die Betriebsart Starkes Schrubben 29 Knopf für normales Schrubben 30 Anzeiger für die Betriebsart Normales Schrubben 31 Aus Knopf für den Schrubbvorgang 32 Aus Anzeiger für die Betriebsart Schrubben 33 Knopf zum Entfernen der Bürsten 34 Anze...

Страница 14: ...réservoir de solution 2 Couvercle du réservoir de récupération 3 Volet d entraînement 4 Indicateur de niveau tuyau de vidange de la solution 5 Tuyau de vidange du réservoir de récupération 6 Boulon de réglage de la raclette 7 Loquet de la lame de raclette 8 Raclette 9 Connecteur de batterie de la machine 10 Bouton de contrôle du flux de solution 11 Bouton de contrôle de la vitesse 12 Disjoncteur d...

Страница 15: ...ème de solution 22 Voyant de panne du système de solution 23 Bouton de solution 24 Voyant de panne du système d aspiration 25 Bouton d aspiration 26 Voyant du système d aspiration 27 Bouton de récurage intensif 28 Voyant de récurage mode intensif 29 Bouton de récurage normal 30 Voyant de récurage mode normal 31 Bouton de récurage désactivé 32 Voyant de récurage mode OFF 33 Bouton de retrait de bro...

Страница 16: ...Vulopening van de schoonwatertank 2 Vuilwatertankdeksel 3 Voor en achteruit drukplaat 4 Afvoerslang van de schoonwatertank peilaanduiding 5 Afvoerslang van de vuilwatertank 6 Stelbout van de zuigmond 7 Klem voor de achterste wisser van de zuigmond 8 Zuigmond 9 Aansluitpunt accu s 10 Knop voor hoeveelheid schoonwater 11 Maximum snelheidsregelaar 12 Zekering van de aandrijfmotor 40 Amp 13 Zekering v...

Страница 17: ... storing in schoonwatersysteem 23 Schoonwaterknop 24 Lampje voor storing in zuigsysteem 25 Zuigknop 26 Lampje voor zuigsysteem 27 Zwaar schrobben knop 28 Lampje voor zwaar schrobben 29 Normaal schrobben knop 30 Lampje voor normaal schrobben 31 Schrobben uit knop 32 Lampje voor schrobben uit 33 Knop voor het verwijderen van de borstels 34 Lampje voor het verwijderen van de borstels 35 Knop voor het...

Страница 18: ...ockwise to tilt it forward Squeegee Blade Latch 7 Holds rear squeegee blade and straps in place release to replace rear blade Squeegee 8 Picks up solution after scrubbing Machine Battery Connector 9 Batteries plug into this connector disconnect to charge batteries Solution Flow Control Knob 10 Turn this dial to the right to decrease solution flow to the floor Turn to the left to increase the amoun...

Страница 19: ...avy scrub mode The status display will momentarily display the scrub pressure setting This is indicated by PA followed by a number Subsequent presses of the heavy scrub button will step the pad pressure setting through the allowable range up to the maximum value programmed for the heavy scrub mode Once the maximum value is reached the pressure setting will step back to normal scrub limit 1 The fac...

Страница 20: ...m System Indicator 26 This indicator will be YELLOW if the vacuum squeegee system is in the AUTO mode and the Drive Paddle 3 is in the neutral position This indicates that the vacuum system is enabled but the vacuum is currently off This indicator will be GREEN if the vacuum is currently on This indicates that the system is in the AUTO mode and the Drive Paddle 3 is not in neutral or that the vacu...

Страница 21: ...Green Indicator full charge down to 50 discharge Green Yellow Indicator 50 discharge down to 75 discharge Yellow Indicator 75 discharge down to 90 discharge Yellow Red Indicator 90 discharge down to 95 discharge Red Indicator 95 discharge down to 99 discharge Flashing Red Indicator 100 discharge scrub system will automatically shut down DESCRIPTION OF HOURMETER STATUS DISPLAY The 5 character displ...

Страница 22: ...egel des Absaugleistenwischblattes 7 Hält das hintere Absaugleistenwischblatt sowie die Bügel an Ort und Stelle beim Erneuern des hinteren Wischblattes lösen Absaugleiste 8 Nimmt nach dem Schrubben die Reinigungslösung auf Batterieanschluss 9 Die Batterien sind an diesem Steckverbinder angeschlossen Zum Aufladen der Batterien den Batteriekabelstecker abziehen Einstellknopf für die Lösungsmittelzuf...

Страница 23: ...rd durch PA gefolgt von einer Zahl angezeigt DurchnachfolgendesmehrfachesDrückendesKnopfesfürstarkesSchrubbenwirddieDruckeinstellungschrittweisedurchdenzulässigenBereichbiszumfürdieBetriebsart Starkes Schrubben programmierten Maximalwert bewegt Nach dem Erreichen des Maximalwertes wird sich die Druckeinstellung wieder im Grenzwert für normales Schrubben 1 bewegen Der vom Werk voreingestellte Maxim...

Страница 24: ... das Saug Absaugleistensystem in der Betriebsart Auto AUTO und das Antriebspaddel 3 in neutraler Position befinden Hierdurch wird angezeigt dass das Saugsystem bereit die Saugleistung jedoch momentan abgeschaltet ist Dieser Anzeiger leuchtet GRÜN wenn die Saugleistung momentan eingeschaltet ist Hierdurch wird angezeigt dass sich das System in der Betriebsart Auto AUTO und das Antriebspaddel 3 nich...

Страница 25: ...n Batterien Grüne Anzeigelampe vollständig bis 50 entladen Grüne gelbe Anzeigelampe 50 bis 75 entladen Gelbe Anzeigelampe 75 bis 90 entladen Gelbe rote Anzeigelampe 90 bis 95 entladen Rote Anzeigelampe 95 bis 99 entladen Blinkende rote Anzeigelampe 100 entladen das Schrubbsystem wird automatisch abgeschaltet BESCHREIBUNG DES STUNDENZÄHLERS ZUSTANDSANZEIGERS Die 5 ziffrige Anzeige in der oberen rec...

Страница 26: ...rière et dans le sens inverse pour la pencher vers l avant Loquet de la lame de raclette 7 Maintient la lame arrière de la raclette et les courroies en place Vous devez le défaire pour remplacer la lame arrière Raclette 8 Permet de ramasser la solution après le nettoyage Connecteur de batterie de la machine 9 Prise à laquelle vous devez connecter le chargeur pour charger les batteries Bouton de co...

Страница 27: ...tensif L affichage d état va temporairement afficher la pression de récurage Cette information se présente sous la forme suivante PA suivid unchiffre Lorsquevousappuyezàplusieursreprisessurleboutonderécurageintensif l écranaffichesuccessivementtouteslesvaleursdisponiblespour la pression et ce jusqu à la pression maximale autorisée pour le mode de récurage intensif Une fois la pression maximale att...

Страница 28: ...alors que le réservoir n est pas plein consultez la section Dépannage Voyant du système d aspiration 26 Ce voyant est JAUNE si le système d aspiration raclage est en mode AUTO et le volet d entraînement 3 en position neutre Ceci indique que le système d aspiration est activé mais ne fonctionne pas pour le moment Ce voyant est VERT lorsque le système d aspiration fonctionne Cela indique que le syst...

Страница 29: ...s des batteries ne nécessitant pas de maintenance Voyant vert pleine charge à 50 de décharge Voyant vert et jaune 50 de décharge à 75 de décharge Voyant jaune 75 de décharge à 90 de décharge Voyant jaune et rouge 90 de décharge à 95 de décharge Voyant rouge 95 de décharge à 99 de décharge Voyant rouge clignotant 100 de décharge le système de récurage est automatiquement stoppé DESCRIPTION DU COMPT...

Страница 30: ... de achterste wisser en de riempjes op hun plaats Zet deze klem vrij om de achterste wisser te vervangen Zuigmond 8 Hiermee wordt het water na het schrobben opgezogen Aansluitpunt accu s 9 De accu s worden in dit aansluitpunt gestoken Ontkoppel de accu s als u ze gaat opladen Knop voor hoeveelheid schoonwater 10 Draai deze knop naar rechts voor meer schoonwatertoevoer naar de vloer Draai deze knop...

Страница 31: ...knop drukt springt de instelling van de schrobdruk een stapje verder binnen de toegestane reeks tot aan de maximum waarde die voor de zwaar schrobben stand is geprogrammeerd Nadat de maximum waarde is bereikt springt de instelling van de borsteldruk terug naar de maximum waarde voor normaal schrobben 1 De in de fabriek ingestelde standaardwaarde voor de zwaar schrobben stand is 9 commercieel of 12...

Страница 32: ...lemen verhelpen als deze melding verschijnt wanneer de tank niet vol is Lampje voor zuigsysteem 26 DitlampjeisGEELalshetzuig zuigmondsysteemindeAUTO standstaatendevoor enachteruitdrukplaat 3 indeneutralestandstaat Hiermeewordt aangegeven dat het zuigsysteem aan staat maar op dat moment niet in werking is Dit lampje is GROEN als het zuigsysteem op dat moment in werking is Hiermee wordt aangegeven d...

Страница 33: ...en Groen lampje volledig geladen tot 50 ontladen Groen en geel lampje 50 ontladen tot 75 ontladen Geel lampje 75 ontladen tot 90 ontladen Geel en rood lampje 90 ontladen tot 95 ontladen Rood lampje 95 ontladen tot 99 ontladen Knipperend rood lampje 100 ontladen het schrobsysteem gaat automatisch uit FUNCTIES VAN DE URENTELLER STATUS DISPLAY De display met plaats voor 5 tekens rechts bovenin het be...

Страница 34: ...tthecarrierthatdelivered them or the battery manufacturer to file a damage claim 2 Turn the Master Key Switch 20 OFF and remove the key 3 Tip the recovery tank to the side locked position Remove the battery cables from inside the battery compartment 4 Carefully lift the batteries into the battery compartment and arrange them exactly as shown Secure the batteries as close to the back of the machine...

Страница 35: ...eder mit dem Transportunternehmen welches die Lieferung vorgenommen hat oder mit dem Hersteller der Batterien in Verbindung 2 Schalten Sie den Hauptschlüsselschalter 20 auf Aus OFF und entfernen Sie den Schlüssel 3 Kippen Sie den Auffangbehälter zur Seite in die verriegelte Position Entfernen Sie die Batteriekabel aus dem Inneren des Batteriefaches 4 Heben Sie die Batterien vorsichtig in das Batte...

Страница 36: ...ommage contactez immédiatement la société qui vous les a livrées ou le fabricant afin de remplir une déclaration de dégât de fret 2 Positionnez l interrupteur d allumage 20 sur OFF et enlevez la clé 3 Penchez le réservoir de récupération sur le côté et verrouillez la position Retirez les câbles de batterie hors du compartiment 4 Placez délicatement les batteries dans le compartiment de batteries e...

Страница 37: ...dat er schade is neem dan contact op met de transporteur of de fabrikant van de accu s om een schadeclaim in te dienen 2 Zet het contactslot 20 uit en haal het sleuteltje eruit 3 Kantel de vuilwatertank opzij in de vergrendelde stand Verwijder de accukabels uit de accuruimte 4 Zet de accu s voorzichtig in de accuruimte en rangschik ze precies zoals aangegeven Zet de accu s stevig en zo dicht mogel...

Страница 38: ...efindet 2 Bei der Benutzung von Kissen installieren Sie die Kissen an den Kissenhaltern 3 Platzieren Sie die Bürsten Kissenhalter unter der angehobenen Bürstenabdeckung 14 BITTE BEACHTEN SIE Die Bürsten sind nach den Bürstenantriebsmotoren zu zentrieren 4 Schalten Sie den Hauptschlüsselschalter 20 auf Ein ON und drücken Sie den Knopf zum Installieren der Bürsten 35 um die Bürsten Kissenhalter einr...

Страница 39: ...dapté à la tâche de nettoyage à effectuer Conformez vous toujours aux instructions figurant sur le récipient contenant l agent chimique PRUDENCE Veillez à n utiliser que des produits de nettoyage peu moussants et ininflammables adaptés aux machines de nettoyage BORSTELS OF PAD HOUDERS BEVESTIGEN 1 Zorg dat de borstelplaat 14 omhoog staat 2 Alsuvanpadsgebruikmaakt bevestigdepadsdanopdepad houders 3...

Страница 40: ...d damaging the floor keep the machine moving while the brushes are turning 10 When scrubbing check behind the machine occasionally to see that all of the waste water is being picked up If there is water trailing the machine you may be dispensing too much solution the recovery tank may be full or the squeegee tool may require adjustment 11 For extremely dirty floors a one pass scrubbing operation m...

Страница 41: ...s die Maschine bei Betrieb der Bürsten bewegt werden 10 Überprüfen Sie während des Schrubbens hin und wieder ob hinter der Maschine das gesamte Schmutzwasser aufgenommen wird Falls die Maschine Wasserspurenhinterlässt könnteentwederzuvielReinigungslösungverteiltwordensein derAuffangbehälterkönntevollseinoderamAbsaugleistengerät könnte eine Justierung nötig sein 11 Bei extrem verschmutzten Böden re...

Страница 42: ...ni PRUDENCE Pour éviter d endommager le sol maintenez toujours la machine en mouvement lorsque les brosses tournent 10 Lorsquevousnettoyez assurez vousque aprèsvotrepassage ilneresteplusd eausurlesol Sivousremarquezdestraînéesd eauderrièrelamachine il se peut que cette dernière dispense trop de solution que le réservoir de récupération soit rempli ou que la raclette soit mal réglée 11 Danslecasder...

Страница 43: ...ewerkte vloer OPGELET Om de vloer niet te beschadigen mag u niet stoppen met rijden terwijl de borstels nog draaien 10 Kijk tijdens het schrobben af en toe achterom of al het vuile water goed wordt opgezogen Als er water achterblijft brengt u misschien te veel schoonwater aan of kan de vuilwatertank vol zijn of moet de zuigmond worden bijgesteld 11 Bij zeer vuile vloeren is enkel schrobben soms ni...

Страница 44: ...se 4 off the elbow Direct the hose to a designated DISPOSAL SITE Rinse the tank with clean water Inspect the solution hoses replace if kinked or damaged 4 To empty the recovery tank take the Recovery Drain Hose 5 off its hanger Direct the hose to a designated DISPOSAL SITE and remove the plug Rinse the tank with clean water Inspect the recovery and vacuum hoses replace if kinked or damaged 5 Remov...

Страница 45: ... Schlauch an die vorgesehene Entsorgungsstelle Spülen Sie den Tank mit sauberem Wasser Inspizieren Sie die Lösungsmittelschläuche und erneuern Sie diese wenn sie geknickt oder beschädigt sind 4 Zum Entleeren des Auffangbehälters nehmen Sie den Ablass Schlauch des Auffangbehälters 5 aus der Halterung Leiten Sie den Schlauch an die vorgesehene Entsorgungsstelle und entfernen Sie den Pfropfen Spülen ...

Страница 46: ...l eau claire Vérifiez les tuyaux de solution et remplacez les s ils sont endommagés ou présentent une quelconque anomalie 4 Pour vider le réservoir de récupération tirez le tuyau de vidange 5 de son dispositif de rangement Dirigez le tuyau de vidange vers un SITE DE DÉCHARGE des eaux usées et enlevez le bouchon Rincez le réservoir à l eau claire Vérifiez les tuyaux de récupération et d aspiration ...

Страница 47: ... af Leid de slang naar een daartoe geschikte afvoerput Spoel de tank met schoon water uit Controleer de afvoerslang van de schoonwatertank en vervang deze als hij geknikt of beschadigd is 4 Om de vuilwatertank te legen haalt u de afvoerslang van de vuilwatertank 5 uit de beugel Leid de slang naar een afvoerput en haal de stop eruit Spoel de tank met schoon water uit Controleer de afvoerslang van d...

Страница 48: ...water 2 tablespoons of baking soda to 1 litre of water LUBRICATING THE MACHINE Once a month apply light machine oil to lubricate the drive chain all pivot points SERVICING THE VACUUM MOTOR Have your Nilfisk Advance Dealer check the carbon motor brushes once a year or after 300 operating hours IMPORTANT Motor damage resulting from failure to service the carbon brushes is not covered under warranty ...

Страница 49: ... ist leichtes Maschinenöl aufzutragen um folgendes zu schmieren Antriebskette sämtliche Drehpunkte WARTUNG DES SAUGGEBLÄSEMOTORS Bitten Sie Ihren Nilfisk Advance Händler einmal jährlich oder nach 300 Betriebsstunden die Motorkohlebürsten zu überprüfen WICHTIG Motorschäden infolge unterlassener Wartung der Kohlebürsten fallen nicht unter die Garantie Bitte beachten Sie die Angaben bezüglich der Gar...

Страница 50: ...e soude et d eau 2 cuillères à soupe de bicarbonate de soude pour 11 d eau LUBRIFICATION DE LA MACHINE Une fois par mois appliquez un peu de graisse sur chaîne de transmission tous les points de pivot ENTRETIEN DU MOTEUR D ASPIRATION DemandezàvotrerevendeurNilfisk Advancedevérifierlesbrossesdecarbonedumoteurd aspirationunefoisparanoutoutesles300heuresdefonctionnement IMPORTANT Les dommages occasio...

Страница 51: ...punten eenmaal per maand met dunne machineolie aandrijfketting alle scharnierpunten ONDERHOUD ZUIGMOTOR Laat de koolborstels van de zuigmotor eenmaal per jaar of steeds na 300 uur gebruik door uw Nilfisk Advance dealer controleren BELANGRIJK Indien er schade aan de motor ontstaat omdat de koolborstels niet gecontroleerd zijn valt deze schade niet onder de garantie Zie de garantieverklaring ZUIGMON...

Страница 52: ...Advance Moving machine too fast Slow down Not using enough solution Adjust solution control valves Inadequate solution flow Solution tank empty Fill solution tank or no solution Solution lines valves filter clogged Flush lines and clean solution filter Solution control valves not open Adjust solution control valves Solution solenoid valve Clean or replace valve Machine does not run Main system con...

Страница 53: ...herabsetzen Nicht genügend Lösungsmittel Steuerungsventile für die Lösungsmittelzufuhr justieren Unzureichende Lösungsmittelzufuhr Lösungsmitteltank leer Lösungsmitteltank füllen oder kein Lösungsmittel Lösungsmittelleitungen ventile filter Leitungen durchspülen und verstopft Lösungsmittelfilter reinigen Steuerungsventile für die Steuerungsventile für die Lösungsmittelzufuhr nicht geöffnet Lösungs...

Страница 54: ...dapté Consulter un revendeur Nilfisk Advance Déplacement de la machine trop rapide Ralentir Quantité de solution utilisée trop faible Régler les soupapes de contrôle de la solution Flux de solution inadéquat Réservoir de solution vide Remplir le réservoir de solution ou plus de solution Conduits valves et filtre de solution encrassés Rincer les conduites et nettoyer le filtre de solution Soupape d...

Страница 55: ...Machine rijdt te hard Rijd langzamer Te weinig schoonwater Kleppen voor schoonwatertoevoer bijstellen Te weinig of geen toevoer Schoonwatertank leeg Schoonwatertank vullen van schoonwater Leidingen kleppen of filter verstopt Leidingen doorspoelen en filter van de schoonwatertank reinigen Kleppen schoonwatertoevoer niet open Kleppen voor schoonwatertoevoer bijstellen Elektromagnetische klep schoonw...

Страница 56: ...r Consult service manual 8 Scrub motor severe overload See error code 7 Bad electrical connection Check all conections to scrub motors Defective scrub motor s Consult service manual 9 Scrub motor circuit open Control failure Consult service manual 10 Scrub motor contactor contacts shorted Contactor failure Consult service manual 11 Not used Contactor failure Consult service manual 12 Scrub motor c...

Страница 57: ...onsult service manual Solenoid failure Consult service manual 32 Solution solenoid overload Control failure Consult service manual 33 Solution solenoid severe overload See error code 32 Bad electrical connection Check all conections to solution solenoid Defective solution solenoid Consult service manual 34 Solution solenoid circuit open output fault Control failure Consult service manual 35 Extern...

Страница 58: ...s Schrubmotor defekt Richten Sie sich nach dem Service Handbuch 8 Schwere Überlastung des Schrubmotors Siehe Störungscode 7 Schlechte elektrische Verbindung Überprüfen Sie sämtliche Anschlüsse zu den Schrubmotoren Schrubmotor en defekt Richten Sie sich nach dem Service Handbuch 9 Schrubmotor Stromkreis unterbrochen Versagen der Steuerung Richten Sie sich nach dem Service Handbuch 10 Kurzschluß an ...

Страница 59: ...sungsmittel Solenoids Versagen der Steuerung Richten Sie sich nach dem Service Handbuch 33 Schwere Überlastung des Lösungsmittel Solenoids Siehe Störungscode 32 Schlechte elektrische Verbindung Überprüfen Sie sämtliche Anschlüsse zum Lösungsmittel Solenoid Lösungsmittel Solenoid defekt Richten Sie sich nach dem Service Handbuch 34 Stromkreis des Lösungsmittel Solenoids unterbrochen Output Fehler V...

Страница 60: ...age Moteur de récurage défectueux Consultez le manuel d entretien 8 Importante surcharge du moteur de récurage Voir code erreur 7 Mauvaise connexion électrique Vérifiez toutes les connexions vers le moteur de récurage Moteur s de récurage défectueux Consultez le manuel d entretien 9 Circuit du moteur de récurage ouvert Panne du dispositif de commande Consultez le manuel d entretien 10 Court circui...

Страница 61: ...en 32 Surcharge au niveau du solénoïde de la solution Panne du dispositif de commande Consultez le manuel d entretien 33 Importante surcharge au niveau du solénoïde de la solution Voir code erreur 32 Mauvaise connexion électrique Vérifiez toutes les connexions vers le solénoïde de solution Solénoïde de solution défectueux Consultez le manuel d entretien 34 Circuit de solénoïde de la solution ouver...

Страница 62: ...schrobmotor Defecte schrobmotor Raadpleeg de onderhoudshandleiding 8 Ernstige overbelasting bij schrobmotor Zie foutcode 7 Slechte elektrische aansluiting Controleer alle aansluitingen naar de schrobmotor s Defecte schrobmotor s Raadpleeg de onderhoudshandleiding 9 Open circuit bij schrobmotor Defect in bedieningssysteem Raadpleeg de onderhoudshandleiding 10 Kortsluiting bij contactpunten van schr...

Страница 63: ...edieningssysteem Raadpleeg de onderhoudshandleiding 33 Ernstige overbelasting bij elektromagnetische klep voor schoonwatertoevoer Zie foutcode 32 Slechte elektrische aansluiting Controleer alle aansluitingen naar de elektromagnetische klep voor schoonwatertoevoer Defecte elektromagnetische klep voor schoonwatertoevoer Raadpleeg de onderhoudshandleiding 34 Open circuit uitgangsfout bij elektromagne...

Страница 64: ...egel laut ISO 3744 beim Benutzer dB A 20µPa 70 70 70 Bruttogewicht mit Zubehör und Batterien voller Tank LBS kg 1 100 499 1 120 508 1 140 517 Vibrationen der Bedienungsarmaturen m s2 2 5m s2 2 5m s2 2 5m s2 TECHNICAL SPECIFICATIONS as installed and tested on the unit Model ConvertaMAX 34 I MAX 34HD Model No 56396019 56396020 Current A 60 65 Voltage batteries V 36V 36V Battery capacity Ah 305 305 P...

Страница 65: ...selon la norme ISO 3744 à la place de l opérateur dB A 20µPa Poids brut avec accessoires et batteries réservoir plein LBS kg 1 350 612 1 435 651 Vibrations aux commandes manuelles m s2 2 5m s2 2 5m s2 TECHNISCHE GEGEVENS op de machine geïnstalleerd en getest Type BA750 ConvertaMAX 28 BA850 I MAX 28HD Typenummer 56396017 56396015 56396018 56396016 Stroom A 65 65 81 Voltage accu s V 24V 24V 24V Accu...

Страница 66: ...C Normativa EMC 89 336 CEE 92 31 CEE 93 68 CEE Low voltage directive 73 23 EEC 93 68 EEC Harmonized standards EN 60 335 2 72 Normativa sobre baja tensión 73 23 CEE 93 68 CEE Normas armonizadas EN 60 335 2 72 Dichiarazione di conformità CEE I EU Declaração de conformidade da CE P Lavasciuga a batteria Auto lavadora a baterias È prodotto in conformità alle disposizioni contenute nelle Direttive del ...

Страница 67: ...r Lorong 19 1A 46300 Petaling Jaya Selangor Darul Ehsan 03 7568188 03 7568189 03 7568388 Fax03 7566828 NEDERLAND Nilfisk Advance B V Flevolaan 7 Postbus 341 1380 AH Weesp 0294 462121 Fax 0294 430053 NEW ZEALAND Nilfisk Advance Limited 477 Great South Road Penrose Auckland 09 525 0092 Fax 09 525 6440 SCHWEIZ SUISSE Nilfisk Advance AG Ringstrasse 19 9533 Kirchberg Wil 719 23 52 83 Fax 719 23 84 44 S...

Отзывы: