background image

57

Re
co

rd

in

g a

n

d Vi

e

w

in

g M

o

v

ie

s

Selecting Auto-Focus Mode

Auto-focus mode can be selected when shooting movies. Select 

Auto-focus mode

 in

the Movie menu, and select one of the following two modes.

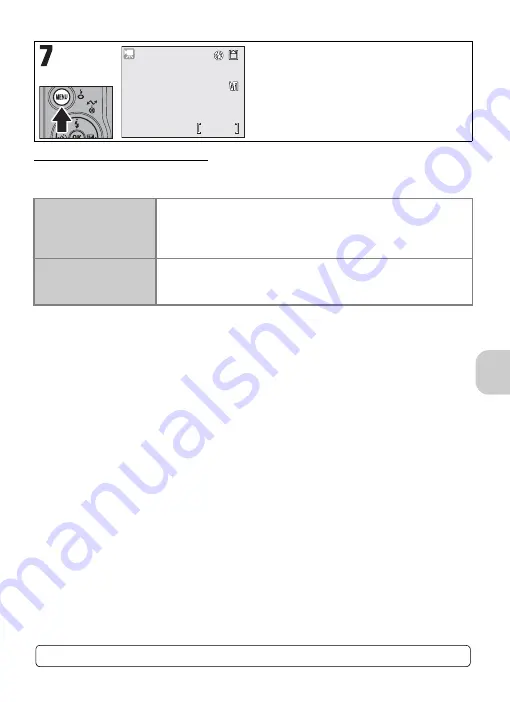
Return to Movie shooting screen.

Z

Single AF

(default setting)

The camera focuses on the center of the frame when the shutter-
release button is pressed halfway. Focus locks (AF Lock) when the
focus operation is complete (P.87). The focus will remain locked
while shooting movies.

a

Full-time AF

The camera adjusts focus continuously.
Select 

Single AF

 if the sound of the camera focusing interferes

with recording.

6m28s

6m28s

6m28s

For more information, see “Movie Options and Maximum Total Recording Time” (P.121).

Содержание 25540 - Coolpix P4 Digital Camera

Страница 1: ... 100 8331 Japan 6MA18311 01 No reproduction in any form of this manual in whole or in part except for brief quotation in critical articles or reviews may be made without written authoriza tion from NIKON CORPORATION The Nikon Guide to Digital Photography with the En DIGITAL CAMERA ...

Страница 2: ...k of Digital Equipment Corporation Adobe and Acrobat are registered trademarks of Adobe Systems Inc The SD logo is a trademark of the SD Card Association PictBridge is a trademark Face priority AF technology is provided by Identix D Lighting technology is provided by o Apical Limited All other trade names mentioned in this manual or the other documentation provided with your Nikon product are trad...

Страница 3: ...rred to as memory cards In order to make illustrations in this manual easier to understand subjects are sometimes not includ ed Illustrations and on screen text in this manual may dif fer from the actual display These notes should be read before using the camera and contain general information or information that should be read and followed to prevent malfunction This icon marks tips additional in...

Страница 4: ...e 24 Step 1 Select X mode 24 Step 2 Turn camera on 24 Step 3 Frame picture 25 Step 4 Focus and shoot 26 Viewing Pictures 27 Deleting Pictures 27 Using the Flash 28 Taking Pictures with the Self Timer 30 Selecting Focus Option 31 Exposure Compensation 32 Selecting Scene Mode 33 Scene Mode 33 Additional Shooting Options 41 Using Exposure Control 41 Selecting Image Quality and Size 43 Using ISO Sensi...

Страница 5: ...ying Back Voice Memos 55 Deleting Voice Memos 55 Recording and Viewing Movies 56 Selecting Movie Options 56 Selecting Movie Options 56 Selecting Auto Focus Mode 57 Recording Movies 58 Recording a Time Lapse Movie 59 Movie Playback 60 TV Computer or Printer Connection 61 Connecting to a TV 61 Connecting to a Computer 62 Connecting to a Printer 67 Connecting the Camera to a Printer 68 Printing Pictu...

Страница 6: ...uction 88 The Playback Menu 89 Navigating the Picture Selection Screen 90 Navigating the Choose Date Screen 91 List by Date 92 D Lighting 92 Slide Show 93 Delete 94 Protect 94 Transfer Marking 95 Small Pic 96 Copy 97 The Set up Menu 98 Menus 99 Welcome Screen 99 Date 100 Monitor Settings 101 Date Imprint 102 Shot Confirmation 104 AF Assist 104 Sound Settings 105 Auto Off 105 Format Memory Card 106...

Страница 7: ...5 Technical Notes 109 Optional Accessories 109 Caring for Your Camera 110 Error Messages 113 Troubleshooting 116 Appendix 119 Specifications 127 Index 131 ...

Страница 8: ...ap with care Do not place strap around the neck of an infant or child Keep out of reach of children Particular care should be taken to prevent infants from putting the batteries or other small parts into their mouths Do not disassemble Touching the internal parts of the camera or battery charger could result in injury Repairs should be performed only by qualified technicians Should the camera or b...

Страница 9: ...d AC adapters provided or sold by Nikon for the purpose to main tain compliance with product regula tions Removing memory cards Memory cards may become hot during use Observe due caution when removing memory cards from the camera Handle moving parts with care Be careful that your fingers or other objects are not pinched by the lens or other moving parts CD ROMs The CD ROMs on which the software an...

Страница 10: ...s equipment has been tested and found to comply with the limits for a Class B digital de vice pursuant to Part 15 of the FCC rules These limits are designed to provide reasonable pro tection against harmful interference in a resi dential installation This equipment generates uses and can radiate radio frequency energy and if not installed and used in accordance with the instructions may cause harm...

Страница 11: ... FCC rules Notice for customers in the State of Cal ifornia WARNING Handling the cord on this product will expose you to lead a chemical known to the State of California to cause birth defects or other reproductive harm Wash hands after handling Nikon Inc 1300 Walt Whitman Road Melville New York 11747 3064 U S A Tel 631 547 4200 Notice for customers in Canada CAUTION This class B digital apparatus...

Страница 12: ...session of material that has been digitally copied or reproduced by means of a scanner digital camera or other device may be punishable by law Items prohibited by law from being copied or reproduced Do not copy or reproduce paper money coins securities government bonds or local govern ment bonds even if such copies or reproduc tions are stamped Sample The copying or reproduction of paper money coi...

Страница 13: ...e camera with you on a trip take a test shot to ensure that the camera is functioning normally Nikon will not be held liable for damages or lost profits that may result from product malfunction Internal Memory and SD Memory Card This camera uses both internal memory and an SD memory card for storing pictures If you insert a memory card into the camera pictures will automatically be stored on the c...

Страница 14: ...ed Lens cover Vibration reduction f button P 48 Self timer lamp P 30 AF assist illuminator LED P 26 110 127 Shot confirmation LED P 104 Mode dial X Auto shooting mode P 24 M E Exposure mode P 41 b Scene mode P 33 T Movie mode P 56 a Setup mode P 98 Z Image mode P 43 e ISO Sensitivity mode P 45 c White balance mode P 46 To select a mode align the mode icon with q next to the mode dial Interface con...

Страница 15: ...o A V out P 61 Multi selector Press the multi selector up down left or right to highlight pictures and menu items then press d to select The buttons on the multi selector are also used to J Display the Flash menu P 28 I Display the exposure compen sation setting screen P 32 Flexible program when the mode dial is set to M P 41 Aperture settings when the mode dial is set to E P 42 g Transfer picture...

Страница 16: ...movie 58 121 18 Aperture 42 19 Focus area7 26 86 20 Shutter speed 41 21 Image quality 43 22 Image size 43 23 Exposure compensation 32 24 Saturation control 85 25 Image adjustment 84 26 Image sharpening 84 27 White balance 46 28 Continuous shooting mode 80 29 Best Shot Selector BSS 82 30 Noise reduction 88 31 White balance bracketing8 83 32 Bracketing9 83 1 Appears when taking a picture in F PANORA...

Страница 17: ...4 12 3 9 6 7 Playback 1 Current folder 123 2 File number and type 123 3 Internal memory Memory card indicator 26 4 Battery level indicator1 24 5 Volume indicator 60 6 Voice memo recording guide 55 7 Voice memo playback guide 55 8 Current frame number Total number of frames 49 9 Length of movie 60 10 D Lighting icon 92 11 Movie playback icon 60 12 Voice memo indicator 55 13 Image quality 43 14 Imag...

Страница 18: ...nd follow the warnings and notices on pages 6 and 7 of this manual The supplied power cable is intended solely for use with the MH 61 and is for domestic use only It may be necessary to purchase another cable for use abroad consult with a local Nikon authorized retailer or service representative Note on the Battery Before using the EN EL5 battery read and follow the warnings and notices on pages 6...

Страница 19: ...arging is complete remove battery from charger and unplug wall plug from power outlet Unplug the wall plug from the power outlet when not in use Blinks Battery is charging On Charging is complete Flickers The battery is charging beyond the designated tempera ture range Ambient temperature should be in the range of 0 to 40 C 32 to 104 F A charging error has occurred Immediately unplug the wall plug...

Страница 20: ... correctly as described on the label at the entrance of the battery chamber and insert the battery Inserting the Battery Inserting the battery upside down or back wards could damage the camera Confirm that the battery is orient ed correctly The orange battery latch is pushed aside when the battery is inserted The latch will close when the battery is fully inserted Confirm that the battery latch is...

Страница 21: ...the battery chamber memory card slot cover Move the battery latch in the direction of the arrow to eject the battery which can then be removed by hand Note that the battery may become hot during use Observe due caution when removing it 3 Close battery chamber memory card slot cover Close the cover 1 and slide it until it latches 2 Confirm that the cover is closed firmly Alternative Power Sources T...

Страница 22: ...mory card 1 Confirm that camera is off and open battery chamber memory card slot cover Slide the cover until it stops 1 and open it 2 2 Insert memory card Insert the memory card terminal first in the direction of the arrow shown on the label at the entrance to the memory card slot until it clicks Inserting Memory Cards Inserting the card up side down or back wards could damage the camera or the ca...

Страница 23: ...s in the lock position Unlock by sliding the switch to the write position before taking editing or de leting pictures transferring images to a computer or formatting the memory card 4 Turn camera on The power lamp will light and the monitor will turn on Formatting Memory Cards When the screen at left is displayed press the multi selec tor up to highlight Format and then press d Do not turn the cam...

Страница 24: ...ghlight Yes TIME ZONE menu is displayed To turn daylight saving time on or off see Note on Daylight Saving Time P 23 for details Display map of world time zones The multi selector is used in the following steps The buttons needed to perform a task in each step are shown in white For example Press d is shown at left OK OK DATE Set time and date No Yes OK DATE Set time and date No Yes OK TIME ZONE L...

Страница 25: ...ed item blinks Edit Day order of Day Month and Year may differ in some areas Select Month Edit Month Repeat steps 10 and 11 to edit Year hour and minute Highlight D M Y Select date display order Exit DATE menu Camera is now ready for use London Casablanca HOME TIME ZONE OK Back DATE D M Y 01 01 2006 00 00 M 01 00 00 DATE D Y 15 2006 M 01 00 00 DATE D Y 15 2006 05 00 00 DATE M D Y 15 2006 M Y 15 05...

Страница 26: ...ch to turn the camera off the power on lamp will go out 1 Rotate mode dial to X 2 Turn camera on The power on lamp will light and the monitor will turn on 2 Check battery level and number of exposures remaining 1 2 F2 7 F2 7 1 60 1 60 120 120 F2 7 1 60 120 No icon Battery is fully charged w Battery is low Charging the battery is recom mended WARNING BATTERY EXHAUSTED Battery is exhausted Charge th...

Страница 27: ...l of magnification of 14 Digital zoom simply enlarges the center area of the picture to fill the frame using a digital process and may produce a slightly grainy image while optical zoom increases the amount of visible details An indicator on the monitor shows the amount of zoom when zoom buttons are pressed The zoom indicator will turn yellow when digital zoom is in effect To cancel digital zoom p...

Страница 28: ...while the shutter release button is held in this position In X mode the camera focuses on the subject at the center of the frame P 86 When the sub ject is in focus the focus indicator p and focus area will be outlined in green When the camera is unable to focus the focus indica tor and focus area will blink red Change the composition and try again 4 Press shutter release button the rest of the way...

Страница 29: ...ly through your pictures press and hold the multi selector Pictures may be displayed briefly at low resolution while being read from memory Press i again to return to Shooting mode Press T to delete current picture A confirmation dialog is displayed Highlight Yes and press d to delete the picture Highlight No and press d to return to the Playback screen without deleting the picture Pressing T in S...

Страница 30: ... subject at distances of less than 0 4 m 1 ft 4 in When taking close ups check the results after each shot Mode Description When to use z Auto default setting Flash fires automatically when lighting is poor Best choice for most situations A Auto with red eye reduction Pre flashes are fired several times at low intensity before the main flash to reduce red eye If red eye is detected after a picture...

Страница 31: ...menu Highlight option Selected flash option is indicated by icon on monitor To exit without changing the flash mode wait five seconds without pressing d Checking the Flash Status The flash lamp and flash indicator P 14 on the monitor show the flash status when the shutter release button is pressed half way On The flash fires when a picture is taken Blinks The flash is charging Wait until the lamp ...

Страница 32: ...hutter release button the rest of the way down to start timer Pictures are taken 3 or 10 seconds after the shutter release button is pressed The countdown timer on the monitor turns yellow and shows the number of seconds remaining until the shutter is released Press the shutter release button again to stop the self timer The self timer lamp will blink until one second before the picture is taken a...

Страница 33: ...foreground objects such as windows M Focusing limit The camera can focus on sub jects from 2 m 6 ft 7 in to infinity Use when subject is 2 m 6 ft 7 in or further from the lens The camera will focus faster than when set to Autofocus Avail able only when the mode dial is set to M or E F Macro close up When the F icon on the shoot ing display turns green and the zoom position is set to wide angle the...

Страница 34: ...ographing an expanse of sunlit water sand or snow or the background is much brighter than the main subject Select positive values if the main subject looks too dark The camera tends to give more exposure when the large areas of the frame are very dark for example when photographing a forest of dark green leaves or when the background is much darker than the main subject Select negative values if t...

Страница 35: ...le you can adjust an image in B PORTRAIT to make skin tones appear brighter Selecting a Scene The menu option set most recently appears selected Rotate mode dial to b Default setting is A PORTRAIT FACE AF Display Scene menu Highlight scene To exit without changing the current selection press m Display Advanced options menu If there are no options the selected scene mode is set and the screen retur...

Страница 36: ...itor while shooting To see the results play back the picture Highlight option Set option and return to Shooting mode If Advanced option is set to Effect 1 or Effect 2 the selected effect 1 or 2 appears next to the scene mode icon Effect 1 Effect 2 Normal PORTRAIT OK Help Exit F2 7 F2 7 1 60 1 60 120 120 F2 7 1 60 120 ...

Страница 37: ...Effect 1 Skin tones appears brighter causing faces to stand out Effect 2 Softens the overall image Digital zoom is not available C PARTY INDOOR Captures the effects of candlelight and other indoor background lighting In dimly lit surroundings turn Vibration reduction P 48 on and hold the camera steady to prevent camera shake D NIGHT PORTRAIT Use for a natural balance between the main subject and b...

Страница 38: ...res with this function Settings for the flash self timer focus zoom and exposure are determined by the first shot in each series Using a tripod makes it easier to compose overlapping shots G NIGHT LANDSCAPE Slow shutter speeds are used to produce stunning nightscapes Effect 1 Nightscapes are captured more vividly Effect 2 Point sources of light radiate out and cause the night scape to stand out Th...

Страница 39: ...alisti cally The camera focuses at infinity The focus indicator lights when ever the shutter release button is pressed halfway Noise reduction turns on automatically at slow shutter speeds and it will take longer than usual to store the picture To prevent blurring mount the camera on a tripod or rest it on a flat level surface K FIREWORKS SHOW Slow shutter speeds are used to capture the expanding ...

Страница 40: ...lash photography is prohibited for example in museums and art galleries or in other settings where you do not want to use the flash Best Shot Selector P 82 turns on automatically reducing the effects of inadvertent camera movement Photography may be prohibited altogether in some locations Be sure to obtain permission first In dimly lit surroundings turn Vibration reduction P 48 on and hold the cam...

Страница 41: ...f the frame Rotate mode dial to b Default setting is A PORTRAIT FACE AF If you have already selected a differ ent scene press m to select A K blinks in the center of the monitor Frame picture using size of K as a guide When the subject s face becomes the same size as K the camera recognizes it and frames with a double yellow border If the camera detects multiple faces the closest will be framed by...

Страница 42: ...mately 1 3 of the picture is shown super imposed Settings for white balance and exposure are determined by the first shot Take next shot Compose the next shot to overlap with the previous picture Take next shot Repeat steps 4 and 5 until all shots in the series have been taken End series Shooting will also end by changing the mode or entering Standby mode PANORAMAASSIST OK Help Exit F2 7 F2 7 1 60...

Страница 43: ...asterisk appears next to M and the set values of the shutter speed and aperture also appear To deactivate Flexible program press the multi selector left or right until the shutter speed and aperture are displayed in white or rotate the mode dial to a different setting Turning the camera off also deactivates Flexible program Mode Description When to use M Programmed auto Sets shutter speed and aper...

Страница 44: ...he effective diameter a value based on the physical opening in the lens and the amount of light passing through Lower f numbers indicate an increase in the amount of light passing though and higher f numbers indicate a de crease The smallest number in a lens aperture range is the maximum aperture and the largest number is the minimum aperture The aperture for this camera s lens focal length 7 5 to...

Страница 45: ... lower compression ratio decreases and pictures cannot be printed at large sizes without a loss of quality The less a picture is compressed the larger the image size becomes As a result fewer pictures can be stored in the internal memory or on the memory card However less compression increases the image quality Image Size Larger pictures create larger image files and are suitable for printing in l...

Страница 46: ...tate mode dial to X b M or E The current image quality and size are dis played on the monitor Image Quality or Size in the Shooting Menu Image quality and size can also be set in the Shooting menu P 78 IMAGE MODE Help Image quality Image size OK IMAGE MODE Image size Image quality OK Help IMAGE SIZE 1 2 OK 2592 1944 2048 1536 1024 768 640 480 3264 2448 F2 7 F2 7 1 60 1 60 120 120 F2 7 1 60 120 ...

Страница 47: ...y ISO Sensitivity Setting When Using Flash A setting of 400 is intended for use with natural lighting Select Auto 50 100 or 200 when using the flash P 28 Rotate mode dial to e SENSITIVITY menu is displayed Highlight option and press d If ISO Sensitivity is set to an option other than Auto rotate mode dial to M or E The current setting is shown in the shooting display Setting ISO Sensitivity from t...

Страница 48: ...setting other than Auto or Flash set the flash to B Flash Cancel P 28 Rotate mode dial to c WHITE BALANCE menu is displayed Highlight option and press d If white balance is set to an option other than Auto rotate mode dial to M or E The current setting is shown in the shooting display Setting White Balance from the Shooting Menu White balance can also be set using the White balance option in the S...

Страница 49: ...e Preset white balance cannot be used when AUTO BRACKETING is set to WB bracketing If the mode dial is set to c the lens does not extend when turning the camera on The lens extends only after pressing d when you select White bal preset in the WHITE BAL ANCE menu Cancel default setting Maintains the most recent value and uses it for white balance Measure To measure a new value for white balance pla...

Страница 50: ... display stabilizes before shooting There may also be a slight display lag after a picture is taken Turn Vibration reduction off when using a tripod Depending on the situation camera shake may not be completely reduced even if Vibration re duction is set W Normal default setting Suitable for normal shooting conditions The camera detects and smoothes out panning movements Vibration reduction reduce...

Страница 51: ...nails j t P 50 View Playback menu m P 76 Record Play voice memo Shutter release button P 55 View histogram display for still pictures d P 51 Play movie for movies d P 60 Exit to Shooting mode i Viewing Pictures When the camera is off pressing i for approximately one second will turn the camera on in Full screen playback mode To view the pictures in the internal memory remove the memory card 1 1 10...

Страница 52: ...can be performed in Thumbnail playback mode Highlight picture Change number of pictures displayed j t k v Delete highlighted picture T P 27 Exit to Full screen playback mode d P 49 View Playback menu m P 76 Exit to Shooting mode i Thumbnail Playback Press j t or k v in Thumbnail playback mode to switch between the 4 9 and 16 thumbnail display To exit to Full screen playback mode press k v in the 4...

Страница 53: ...he dialog shown at right Highlight Yes and press d to delete the selected picture P Delete the voice memo only P 55 P is dis played only when selecting a picture with a voice memo View histogram of next picture View histogram of previous picture Delete picture T P 27 View thumbnails j t P 50 Exit to Full screen playback mode d P 49 View Playback menu m P 76 Exit to Shooting mode i 1 60 1 60 F2 7 F...

Страница 54: ...be viewed The location of the area viewed in relation to the full im age is displayed on a 3 3 navigation grid in the lower right hand corner of the screen The following operations can be performed in Quick playback zoom Switch to Playback zoom mode j t k v P 53 View other areas of picture Delete picture T P 27 View Playback menu m P 76 Exit to Full screen playback mode d P 49 Crop picture Shutter...

Страница 55: ...ations can be performed while pictures are zoomed in Playback Zoom Playback zoom is not available with movies P 58 copies created using the Small pic option P 96 or cropped copies of 320 240 pixels or smaller P 54 Zoom in k v Zoom out j t View other areas of picture Delete picture T P 27 View Playback menu m P 76 Exit to Full screen playback mode d P 49 Crop picture Shutter release button P 54 Exi...

Страница 56: ...Quick playback zoom Display desired portion of image Press k v or j t to zoom the pic ture in and out Use the multi selector to scroll the picture until the desired portion of the image is displayed Confirmation dialog is displayed Highlight Yes Cropped copy is created x x3 0 3 0 x3 0 Zoom Zoom Zoom Scroll Scroll Scroll x x2 0 2 0 x2 0 Zoom Zoom Zoom Scroll Scroll Scroll OK OK Save this image Save...

Страница 57: ...k Play back ends when the voice memo ends or the shut ter release button is pressed again Pictures with voice memos are marked with the N P icon in Full screen playback mode Press j t or k v to adjust the volume Deleting Voice Memos Select a picture with a recorded voice memo and press T Highlight P and press d to delete the voice memo only Notes on Voice Memos Voice memo file names are the same a...

Страница 58: ...pse movie 640 480 30 Rotate mode dial to T Movie menu is displayed Highlight Movie options MOVIE OPTIONS menu is displayed Highlight option Press the multi selector left to return to the previous screen Set option and return to Movie menu 2m51s 2m51s 2m51s Movie options OK Exit Help Movie options OK Exit Help OK Exit MOVIE OPTIONS Small size 320 Smaller size 160 Time lapse movie TV movie 640 OK Ex...

Страница 59: ... setting The camera focuses on the center of the frame when the shutter release button is pressed halfway Focus locks AF Lock when the focus operation is complete P 87 The focus will remain locked while shooting movies a Full time AF The camera adjusts focus continuously Select Single AF if the sound of the camera focusing interferes with recording 6m28s 6m28s 6m28s For more information see Movie ...

Страница 60: ...t when recording a time lapse movie Self timer P 30 is OFF WHITE BALANCE P 46 is Auto Metering P 79 is Matrix While recording a movie only digital zoom up to 2 can be used time lapse movie up to 4 Adjust the zoom before recording When recording starts the optical zoom position is fixed Only W Normal is available for Vibration reduction P 48 Rotate mode dial to S The monitor shows the available rec...

Страница 61: ...dial The monitor automatically turns off and the power lamp blinks between frames to save power and turns on immediately before the camera takes the next shot Highlight Time lapse movie in MOVIE OPTIONS menu P 56 and press d Highlight option and press d Set option and return to the MOVIE OPTIONS menu Return to Movie shooting screen Start recording Press the shutter release button to start recordin...

Страница 62: ...nds movie while d is pressed U Advances movie while d is pressed R Pauses playback S Returns to Full screen playback mode Pause V Rewinds paused movie one frame W Advances paused movie one frame z Resumes playback S Returns to Full screen playback mode Playback Volume The zoom buttons control the volume during playback except when playing a time lapse movie Press j t to decrease the volume and k v...

Страница 63: ...opean coun tries 1 Set Video mode option in INTERFACE menu of Set up menu P 107 Select NTSC or PAL to match your TV video standard 2 Turn camera off and connect supplied EG CP14 A V cable hereafter A V cable Connect the yellow plug to the video in jack on the TV and the white plug to the audio in jack 3 Set TV to video input For more information see the manual for the TV 4 Press i for approximatel...

Страница 64: ...he PictureProject Reference Manual on CD 1 Start your computer Confirm that PictureProject has been installed on your computer 2 Set USB option in INTERFACE menu of Set up menu P 107 Select PTP or Mass storage depending on your computer s operating system P 64 3 Turn camera off and connect supplied UC E6 USB cable as illustrated Operation via a USB hub has not been tested by Nikon 4 Turn camera on...

Страница 65: ...de By default all pictures are automatically marked for transfer Two options control transfer marking Auto transfer in the Set up menu P 107 Select On to mark all new pictures for transfer Transfer marking in the Playback menu P 95 Select pictures for transferring by marking with the E icon PictureProject Transfer Button To transfer both marked and unmarked pictures to the computer click Transfer ...

Страница 66: ...ndows If your computer s operating system is Windows 2000 Professional Windows Millen nium Edition Me or Windows 98 Second Edition SE select Mass storage for the USB option for connecting the camera to a computer If PTP is selected disconnect the camera as described below Windows 2000 Professional A dialog will be displayed welcoming you to the Found New Hardware Wizard Click Cancel to close the d...

Страница 67: ...ing Images Stored in the Internal Memory Remove the memory card from the camera before connecting the camera to the computer Transferring Images Stored on the Memory Card To transfer images stored on the memory card insert the memory card into the camera before connecting to a computer When the SD memory card s write protect switch is in the lock position data transfer using d Transfer g is not av...

Страница 68: ...ea and select Safely remove USB Mass Storage Device from the menu that appears Windows 2000 Professional Click the Unplug or Eject Hardware icon in the notification area and select Stop USB Mass Storage Device from the menu that appears Windows Millennium Edition Me Click the Unplug or Eject Hardware icon in the notification area and select Stop USB Disk from the menu that appears Windows 98 Secon...

Страница 69: ...P 130 selected pictures can be printed using Print set P 72 For more information see the manual for the printer Take the memory card containing the pictures to a digital photo lab To print pictures using Print set check that the photo lab supports DPOF Transfer the pictures to a computer For more information see Connecting to a Computer P 62 and the manual for your software or printer Take picture...

Страница 70: ... P 107 2 Turn camera off 3 Turn printer on 4 Connect supplied UC E6 USB cable as illustrated Operation via a USB hub has not been tested by Nikon 5 Turn camera on After the PictBridge welcome screen the picture recorded most recently will be displayed in PictBridge playback mode OK USB PTP Mass Storage UC E6 USB cable 5 5 5 5 5 ...

Страница 71: ...7 mm Only sizes supported by the current printer will be displayed Select Default to print using the paper setting in the printer Select picture to print in PictBridge playback mode P 68 To select a picture in thumbnail view P 50 press j t Display PictBridge menu Confirm settings and print pictures Press the multi selector up or down to highlight an option and press d to select 5 5 5 5 5 Exit Star...

Страница 72: ...ress the multi selector down when the number of copies is 1 Exit Print selection Paper size Print all images PRINT MENU DPOF printing OK Print selection Select pictures and set the number of copies Go to step 3 Print all images Prints one copy of all the pictures in the internal memory or on the memory card The camera returns to the PRINT MENU when print ing is complete DPOF printing Print picture...

Страница 73: ... are displayed To return to the PRINT SELECTION screen press m Start printing The camera returns to the PRINT MENU when printing is complete To cancel printing press d 1 1 1 2 2 2 3 3 3 4 4 4 5 5 5 Start print 0 0 6 PRINTS Back Cancel Printing 0 0 2 0 0 6 ...

Страница 74: ...create a print order L Choose date Set a print order to print all pictures taken on the same date w Delete print set Cancel all print settings Highlight Print set in Playback menu P 89 and press d Highlight Print selected and press d Highlight picture to be printed Select current picture Press the multi selector up to display 1 number of copies and the w icon on the selected picture Canceling the ...

Страница 75: ...pictures in the print order highlight Date and press d A y will be displayed in the check box To print the shutter speed and aperture on all pictures in the print order highlight Info and press d A y will be displayed in the check box To cancel the selected option highlight it and press d To complete the print order highlight Done and press d In PRINT SET menu P 72 highlight Choose date and press ...

Страница 76: ...ure press the multi selector left when the number of cop ies is 1 Repeat steps 3 and 4 to select other dates Set Date and Info options To print the recording date on all pictures in the print order highlight Date and press d A y will be displayed in the check box To print the shutter speed and aperture on all pictures in the print order highlight Info and press d A y will be displayed in the check...

Страница 77: ... the date is imprinted it cannot be deleted from the image When the Date and Info options in Print Set and Date imprint are set only the date from the Date imprint option will be printed even when using a printer that supports DPOF If an Error Occurs If an error message is displayed check the printer and resolve the problem as directed in the printer manual Highlight Resume and press d to re sume ...

Страница 78: ...ting Playback and Movie menus To display the Shooting menu P 78 Rotate mode dial to M or E Press m To display the Playback menu P 89 Press i Press m To display the Movie menu P 56 Rotate mode dial to S Press m To display the Set up menu P 98 Rotate the mode dial or press i to exit the Set up menu Rotate mode dial to a WHITE BALANCE OK Exit Help List by date OK Exit Help Movie options OK Exit Help ...

Страница 79: ...menu item Display options Highlight option Select highlighted option Make selection Move cursor left Move cursor down Move cursor up Move cursor right Metering OK Exit Help METERING Center weighted Spot Spot AF area Matrix OK Exit METERING Center weighted Spot Spot AF area Matrix OK Exit Metering OK Exit Help ...

Страница 80: ...anging exposure or white balance P 83 F Image adjustment Adjust picture contrast P 84 M Image sharpening Control how much outlines in your pictures are sharpened in the camera P 84 P Saturation control Adjust vividness of the color of a picture P 85 W Sensitivity Select ISO Sensitivity P 45 X Image quality Select image quality P 43 b Image size Select an image size for displaying or printing P 43 ...

Страница 81: ... the entire frame but assigns the greatest weight to the center area Suitable for portraits Use with AF lock P 87 to meter off center subjects o Spot Measures light in an area shown by a square in the center of the monitor The subject in the metering target area will be correctly exposed even when the background is much brighter or darker Use with AF lock P 87 to meter off center subjects p Spot A...

Страница 82: ... all photos in the sequence are stored The number of exposures remaining is shown in the shoot ing display y 5 shot buffer While the shutter release button is pressed pictures can be taken at a rate of up to approximately 1 8 fps When the shutter release button is released continuous shoot ing will stop Only the last five images taken during each continuous shooting burst will be recorded in the i...

Страница 83: ...lf timer Ultra HS During shooting progress is shown on the monitor from S to E To in terrupt shooting before 100 pictures have been recorded lift your fin ger from the shutter release button During shooting pressing T while the y icon appears displays the de lete confirmation dialog From this screen you can delete all the pic tures in the same sequence During shooting the shutter sound is off 5 Sh...

Страница 84: ...en The camera is zoomed in The camera is in Macro close up mode Shooting with the flash off when lighting is poor Note on BSS BSS may not produce good results with a moving subject or if the composition is changed while the shutter release button is pressed BSS A B Off default setting Turns BSS off A On Turns BSS on The flash is automatically set to B and settings for the focus exposure and white ...

Страница 85: ...sure compensation P 32 and Auto bracketing are set simultaneously shots will be bracketed on both sides of the chosen compensation value WB Bracketing WB bracketing cannot be selected if White balance P 46 is set to White bal preset Auto Bracketing C D Off default setting Turns bracketing off C Auto bracketing Takes three shots each time the shutter release button is fully pressed one shot with th...

Страница 86: ...ures Suitable for a wide variety of scenes from dark to bright I More contrast Processes the picture to emphasize the difference between light and dark areas enhancing contrast Useful when shooting under overcast skies or for low contrast subjects J Less contrast Processes the picture to decrease the difference between light and dark areas reducing contrast Recommended when lighting is very bright...

Страница 87: ...ases the vividness of colors Saturation Control P Q Maximum Gives vivid color effects Select when printing pictures as is with out further modification R Enhanced S Normal default setting Best choice for most situations U Moderate Select if retouching pictures on a computer V Minimum ...

Страница 88: ... shutter release button is pressed halfway This setting is useful when taking snapshots or you do not have time to check the focus m Manual You can select a focus point from 99 focus areas using the multi selector This option can be used instead of AF lock P 87 to focus on a relatively motionless subject that is not at the center of the frame When Manual is selected the focus area and selectable a...

Страница 89: ...below In this example AF area mode P 86 is set to Center 1 Focus Position the subject in the center of the frame and press the shutter release button halfway 2 Check focus indicator When the subject is in focus the focus indicator on the monitor lights up The focus area is outlined in green on the monitor Focus and exposure will remain locked while the shutter release button is pressed halfway 3 R...

Страница 90: ...KETING P 83 is set to Auto brack eting or WB bracketing Noise reduction P 88 has no effect even if set to On Fixed Aperture I J Off default setting Aperture changes with the zoom position I On Aperture is kept as close as possible to the f number selected by you or the camera To prevent the selected f number from exceed ing the exposure range at the new zoom position select an aper ture from f 5 t...

Страница 91: ...of a picture and save a copy P 92 w Print set Select pictures to print using a DPOF compatible device specify the number of copies and whether to include shooting information and the date P 72 z Slide show View pictures in an automatic slide show P 93 A Delete Delete all or selected pictures P 94 D Protect Protect pictures from accidental deletion P 94 E Transfer marking Select pictures to transfe...

Страница 92: ...mber of cop ies An icon corresponding to the function appears on the picture when the function is set on Repeat steps 1 and 2 to select additional pictures To cancel an option highlight the picture and press the multi selector down to remove the icon Exit picture selection screen For Print set the PRINT SET menu appears For Protect and Transfer marking no further operations are required For Delete...

Страница 93: ...ighlight date The screen shown above is displayed when Choose date is selected in Delete A thumbnail image of the first shot the recording date and the number of images for that date are displayed Set function on off or the number of copies An icon corresponding to the function appears on the picture when the function is set on Repeat steps 1 and 2 to select other dates To cancel an option highlig...

Страница 94: ...D Lighting are marked with the u icon in Playback mode List by Date L Highlight date A thumbnail image of the first shot the recording date and the number of images for that date are displayed Pressing T deletes all of the pictures on the same recording date Display SELECTED IMAGES screen To switch to Full screen playback mode press k v Press j t to return to the SELECTED IMAGES screen Press the m...

Страница 95: ...operations are per formed for another three minutes The camera will also turn off when Loop is set Movies are displayed as still images showing the first frame Slide Show z Highlight Start To repeat the slide show automatically high light Loop and press d before selecting Start A y is displayed in the check box Start slide show Pause Pauses the slide show and dis plays the menu Highlight Restart a...

Страница 96: ... letion Pictures marked with the D icon are protected and cannot be deleted The pictures can be protected from accidental dele tion Protected pictures are marked with the D icon in Playback mode Note on Protecting Pictures Protected pictures cannot be deleted However all pictures including protected files will be deleted when the internal memory or the memory card is formatted P 106 Delete A B Era...

Страница 97: ... the Auto transfer option is set to On P 107 All pictures are set to trans fer and marked with the E icon when displayed The E Transfer Marking Icon The selected pictures are marked with the E icon in Playback mode Transfer Marking E E All on Adds the E icon to all pictures in the internal memory or on the memory card F All off Removes the E icon from all pictures in the internal memory or on the ...

Страница 98: ...ollowing resize options are available Notes on Small Picture Copies are stored as JPEG files with Image quality set to BASIC compression ratio 1 16 Small pictures cannot be zoomed in on Small Pic H I 640 480 Suitable for displaying on a TV J 320 240 Suitable for displaying on web pages K 160 120 Suitable as an attachment to e mail ...

Страница 99: ...ource memory is 32 DSCN0032 JPG and the last number in the destination memory is 18 DSCN0018 JPG the copied pictures are assigned numbers starting from 33 DSCN0033 When copying using All images all folders in the internal memory or on the memory card are copied The newly copied folders are assigned new folder numbers one is added to the highest folder number in the destination memory If a new fold...

Страница 100: ...ording date time on pictures P 102 K Shot confirmation Set the Shot confirmation LED to light after each shot P 104 u AF assist Set the AF assist illuminator to light when focusing P 104 h Sound settings Set the button sound the volume of shutter and start up sounds P 105 i Auto off Set the time before the camera enters Standby mode automatically to save power P 105 M O Format memory card Format t...

Страница 101: ...en the camera is turned on Select an image Select a picture in the internal memory or on the memory card for the welcome screen 1 Highlight Select an image and press d to display SELECT IMAGE screen 2 Press multi selector left or right to high light picture 3 Press d to select picture for welcome screen When Select an image is Selected If you have already selected a welcome screen picture you can ...

Страница 102: ... see Basic Setup P 22 Time zone Select a time zone for Y new city time zone to dis play the date and time in that selected region P 124 Highlight home time zone or new city time zone To set the clock for the home time zone highlight X and press d To set the clock for the new city time zone highlight Y and press d To set daylight saving time on highlight DaylightSaving and press d A y is displayed ...

Страница 103: ...or when taking or viewing pic tures Auto info Displays the current settings or operation guide on the monitor for five seconds Hide info The operation guide or current settings are not displayed on the monitor Framing grid Displays the operation guide or current settings on the monitor In M Programmed auto or E Aperture priority auto mode a framing grid is displayed the current settings or operati...

Страница 104: ...ltra HS mode or when shooting movies Date imprint cannot be selected if the camera clock has not been set P 22 100 An imprinted date may be difficult to read when Image size P 43 is set to i 640 480 We recommend selecting h 1024 768 or larger image sizes when imprinting the date The date is imprinted in the order selected in Date P 22 100 Date Imprint b a Off default setting Time and date will not...

Страница 105: ...RED DATES Store up to three dates 1 Highlight option and press multi selec tor right to display STORED DATES screen 2 Set date P 22 and press d To select a date highlight an option and press d DISPLAY OPTIONS Highlight a display option and press d DATE COUNTER Number of days OK Press d to display STORED DATES screen Press d to dis play DISPLAY OPTIONS screen STORED DATES OK DISPLAY OPTIONS OK Numb...

Страница 106: ...SNOW O COPY P SPORTS L BACK LIGHT or F PANORAMA ASSIST mode The center focus area is selected in M CLOSE UP mode Shot Confirmation K Off default setting The shot confirmation LED will not light after shooting On The shot confirmation LED will light after shooting When Multi shot 16 or 5 shot buffer is selected for Continuous the lamp will light after all pictures in the series have been taken The ...

Страница 107: ...t setting five minutes 5m or thirty minutes 30m If no operations are performed in Standby mode for another three minutes the camera will turn off automatically Sound Settings h Button sound When On is selected a beep will sound once when operations are completed successfully three times when an error is detected Shutter sound Set the volume of the shutter sound to Loud Normal or Off Start up sound...

Страница 108: ...ithout regular formatting reduces the performance of memory cards We recommend formatting memory cards regularly to maintain their perfor mance Format is not available when the battery level is low You can select the language for menus and messages displayed on the mon itor Format Memory Card M O Quick format Formats only the areas with recorded data All pictures will be erased Format For memory c...

Страница 109: ...con will be transferred automatically by pressing d Interface USB Video Mode k USB Select Mass storage or PTP for connecting to a computer or printer P 64 Video mode Select NTSC or PAL to match the video standard used in the connected device P 61 Auto Transfer E F Off Pictures are not marked with the E icon after shooting E On default setting Marks all pictures with the E icon and sets them for tr...

Страница 110: ...umbering to 0001 To reset the file numbering to 0001 perform Reset all after deleting all pictures P 94 or format ting the internal memory or memory card P 106 Use this option to check the firmware version for the camera Reset All n Firmware Version B For more information see Default Settings P 119 COOLPIX P4 Ver 1 0 Back ...

Страница 111: ...dapter during formatting or while data is being written to or deleted from the card Failure to observe this precaution could result in loss of data or damage to the camera or card Do not disassemble or modify Do not drop bend or expose to water or strong physical shocks Do not touch the metal terminals with your fingers or metal objects Do not affix labels or stickers to the memory card Do not lea...

Страница 112: ... are being recorded or deleted Forcibly cutting power in these circum stances could result in loss of data or in damage to product memory or internal circuitry To prevent an accidental inter ruption of power avoid carrying the prod uct from one place to another while the AC adapter is connected Do not drop The product may malfunction if subjected to strong shocks or vibration Keep away from strong...

Страница 113: ...h water then dry thoroughly The camera may be damaged if foreign matter gets inside the camera body Nikon cannot accept liability for damage caused by dirt or sand Do not use alcohol thinner or other volatile chemicals Avoid Contact with Liquid Crystal Should the monitor break care should be taken to avoid injury due to broken glass and to prevent the liquid crystal from the monitor touching the s...

Страница 114: ...not use the battery at ambient temperatures below 0 C 32 F or above 40 C 104 F During charging the temperature should be in the vicinity of 5 35 C 41 95 F Note that the battery may become hot during use wait for the battery to cool before charging Failure to observe these precautions could damage the battery impair its performance or prevent it from charging nor mally On cold days the capacity of ...

Страница 115: ...TED O Write protect switch of memory card is in lock position Slide write protect switch to write position P 21 THIS CARD CANNOT BE USED x Error accessing memory card Use approved card Check that connectors are clean Turn camera off and confirm that memory card is correctly inserted P 109 P 20 WARNING THIS CARD CANNOT BE READ O CARD IS NOT FORMATTED O Format No Memory card has not been formatted f...

Страница 116: ...age is displayed although pictures are taken turn cam era off and then on again If error per sists contact your local retailer or Nikon representative P 24 Press i to return to shooting mode P 26 To show pictures in the internal mem ory remove memory card from cam era P 21 FILE CONTAINS NO IMAGE DATA r File created by com puter or different make of camera View file on computer or correct make of c...

Страница 117: ... then choose new USB setting in the cam era Set up menu and reconnect camera If error persists use Transfer button in PictureProject to transfer images P 62 P 64 P 66 NO IMAGES ARE MARKEDFORTRANSFER s No pictures selected for transfer when d Transfer g button pressed to transfer images to computer Disconnect camera and select at least one picture for transfer then begin transfer again Use Transfer...

Страница 118: ...emory card will not be affected Problem Possible cause Page Pictures are blurred When shooting a picture or movie a Vibration reduction option was set by pressing f Camera shook during shot Blurring caused by camera shake can be reduced by Using the flash Using the Best Shot Selector BSS Using the self timer with a tripod P 48 P 28 P 82 P 30 Monitor is blank Camera is off Battery is not correctly ...

Страница 119: ...spaced brightly colored pix els noise appear in image Shutter speed is too slow Noise can be reduced by Using flash Selecting D NIGHT PORTRAIT G NIGHT LANDSCAPE or J DUSK DAWN in b scene mode In these modes Noise reduction works automatically when shutter speed is slow Select an appropriate mode according to your shooting condition P 28 P 35 P 36 P 37 Bright specks in pic ture Flash is reflecting ...

Страница 120: ... cropped to sizes of 320 240 pixels or smaller P 53 PictureProject does not start when cam era is connected or memory card inserted in card reader or card slot Camera is off AC adapter is not properly connected or battery is exhausted USB cable is not correctly connected or card not properly inserted in card reader or card slot Camera is not properly recognized by computer USB in the INTERFACE men...

Страница 121: ...e AF Fixed aperture Off Noise reduction Off Movie menu Default Movie options TV movie 640 SET INTERVAL TIME of Time lapse movie 30s Auto focus mode Single AF Playback menu Default Slide show Loop Off Set up menu Default Menus Icons Welcome screen Animation Monitor set tings Photo info Show info Brightness 3 Date imprint Off Shot confirmation Off AF assist Auto Sound Set tings Button sound On Shutt...

Страница 122: ...ality Image Size Select from the following options according to your shooting intent All figures are approximate Print sizes assume a printer resolution of approximately 300dpi The size of images when printed depends on the printer resolution the higher the resolution the smaller the final print size Option Description Com pression FINE Fine image quality suitable for enlarged or high quality prin...

Страница 123: ...rated for 10 MB s Image mode Internal memory Approx 23 MB Memory card 256 MB Image size Image quality c 3264 2448 default setting FINE 6 60 NORMAL 12 120 BASIC 23 235 d 2592 1944 FINE 9 95 NORMAL 18 190 BASIC 36 370 e 2048 1536 FINE 15 150 NORMAL 29 295 BASIC 56 560 h 1024 768 FINE 56 560 NORMAL 104 1 015 BASIC 181 1 690 i 640 480 FINE 128 1 265 NORMAL 217 2 175 BASIC 331 3 045 j 3264 2176 FINE 6 ...

Страница 124: ... focus area is not selected in M CLOSE UP mode Date imprint is automatically canceled in F PANORAMA ASSIST P 36 mode Scene mode P 33 Flash P 28 Focus P 31 Self timer P 30 Exposure compensa tion P 32 AF Assist Illuminator P 26 A PORTRAIT FACE AF A AF Off 0 0 Auto B PORTRAIT A AF Off 0 0 Auto C PARTY INDOOR A z AF Off 0 0 Auto D NIGHT PORTRAIT A z AF Off 0 0 Auto E LANDSCAPE B w Off 0 0 Off F PANORA...

Страница 125: ...you take a picture when the current folder contains a picture numbered 9999 a new folder will be created and file numbering will begin again from 0001 If file number reaches 200 or picture number reaches 9999 when the internal mem ory or the memory card contains a folder numbered 999 no further pictures can be taken even if there is still memory capacity Replace the memory card or transfer all pic...

Страница 126: ... selection guide before adjusting these settings To change focus area press d again after making settings for each mode P 100 When daylight saving time is turned on GMT Location GMT 11 Midway Samoa GMT 10 Hawaii Tahiti GMT 9 Alaska Anchorage GMT 8 PST PDT Los Angeles Seat tle Vancouver GMT 7 MST MDT Denver Phoenix La Paz GMT 6 CST CDT Chicago Houston Mexico City GMT 5 EST EDT New York Toronto Lima...

Страница 127: ...0 is set as default When lighting is poor however camera automatically compensates by raising sensitivity to maximum of ISO 200 equivalent 50 Approximately equivalent to ISO 50 100 Approximately equivalent to ISO 100 200 Approximately equivalent to ISO 200 400 Approximately equivalent to ISO 400 e Auto default setting Automatically adjusts white balance to suit lighting conditions Best choice for ...

Страница 128: ...us set to Ultra HS or Intvl timer shooting cannot be edited Notes on Editing Images Editing images from another model of camera is not supported Images edited with this camera may not properly play back on another model of camera or transfer to a computer Edited images are separate images from the original Deleting one does not delete the other If there is not enough space in the destination memor...

Страница 129: ... 6 in W Focus area selection Auto 11 area automatic selection Manual 99 area manual selec tion Center center focus area selection AF assist illuminator CLASS 1 LED PRODUCT IEC 60825 1 Edition 1 2 2001 Maximum output 3 050 µW LCD Monitor 2 5 in 150 000 dot amorphous silicon TFT transflective LCD with five level brightness adjustment Frame coverage Shooting mode Approx 98 horizontal and 98 vertical ...

Страница 130: ...o auto gain setting from ISO 50 to 200 equivalent Self timer 10 or 3 second duration Built in Flash Range W Approx 0 4 4 0 m 1 ft 4 in 13 ft 1 in T Approx 0 4 2 0 m 1 ft 4 in 6 ft 7 in Sensitivity Auto Flash control Sensor flash system Interface USB Video output Can be selected from NTSC and PAL I O terminals DC in Digital I O audio video out and USB Supported language Czech Danish German English ...

Страница 131: ...L5 Charging time Approx 2 hrs when no charge remains Operating temperature 0 40 C 32 104 F Dimensions W H D Approx 67 26 67 mm 2 6 1 0 2 6 in Length of cable Approx 1 8 m 6 ft Weight Approx 65 g 2 3 oz excluding power cable Type Rechargeable lithium ion battery Rated capacity 3 7 V 1 100 mAh Dimensions W H D Approx 36 54 8 mm 1 4 2 1 0 3 in excluding projections Weight Approx 30 g 1 oz excluding t...

Страница 132: ...y to ensure compatibility among different makes of camera Digital Print Order Format DPOF DPOF is an industry wide standard that allows pictures to be printed from print orders stored on the memory card To print pictures using Print set check that printers or your local photo labs supports DPOF Exif Version 2 2 This camera supports Exif Exchangeable Image File Format for Digital Still Cameras vers...

Страница 133: ... cable 61 Audio video A V out connector 13 61 Auto bracketing 83 Auto off 25 105 125 Auto transfer 107 Autofocus 31 123 Auto focus mode 57 87 Full time AF 57 87 Single AF 57 87 B BACK LIGHT L 37 122 Backlit subject 92 Battery 16 19 112 charging 16 17 latch 13 18 Battery chamber Memory card slot cover 13 19 Battery charger 16 109 Battery level 24 BEACH SNOW H 36 122 Blur 35 37 48 see also Vibration...

Страница 134: ...14 26 Focus mode 31 infinity 31 Macro close up 31 Folder name 123 Format memory card 106 Format 21 106 internal memory 106 memory card 106 Quick format 106 FSCN 123 Full screen playback 49 H Histogram 32 42 51 I Identifier 123 Image adjustment 14 84 Image mode 44 Image quality 14 43 44 Image size 14 43 44 Image sharpening 14 84 Incandescent 125 Interface 107 connector cover 13 USB 64 107 Video mod...

Страница 135: ... 53 PORTRAIT FACE AF A 35 39 122 PORTRAIT B 35 122 Power connector cover 12 Power switch 12 Power on Lamp 12 24 PRINT MENU 70 DPOF printing 70 75 Paper size 69 70 Print all images 70 Print selection 70 Print set 72 Printer 67 Printing pictures 69 70 71 see also Date imprint DPOF Protect 94 Protected pictures 94 97 Q Quality see Image mode Quick format 106 Quick Playback Zoom 52 QuickTime see Movie...

Страница 136: ...UC E6 see USB cable USB 62 64 68 107 Mass storage 64 107 PTP 64 107 USB cable 62 68 USB connector 12 V Vibration reduction 48 Video mode 107 Video output 61 Voice memo 55 Voice memo icon 55 Volume 60 105 W WAV 55 123 Welcome screen 99 White balance 46 125 Auto 46 125 Cloudy 125 Direct sunlight 125 Flash 125 Fluorescent 125 Incandescent 125 Shade 125 White bal preset 47 Wide angle button see j t bu...

Страница 137: ...o 100 8331 Japan 6MA18411 01 No reproduction in any form of this manual in whole or in part except for brief quotation in critical articles or reviews may be made without written authoriza tion from NIKON CORPORATION The Nikon Guide to Digital Photography with the En DIGITAL CAMERA ...

Отзывы: