Off/Rec
:
Please press Off/Rec button to remove SD card. Please remove card within 30 seconds
of pressing the Off/Rec button to avoid loss of data.
Step 5. Set the Data and Time
:
This will allow the security video taken by NightWatcher NE400 to display the correct date and time
it was taken.
1.
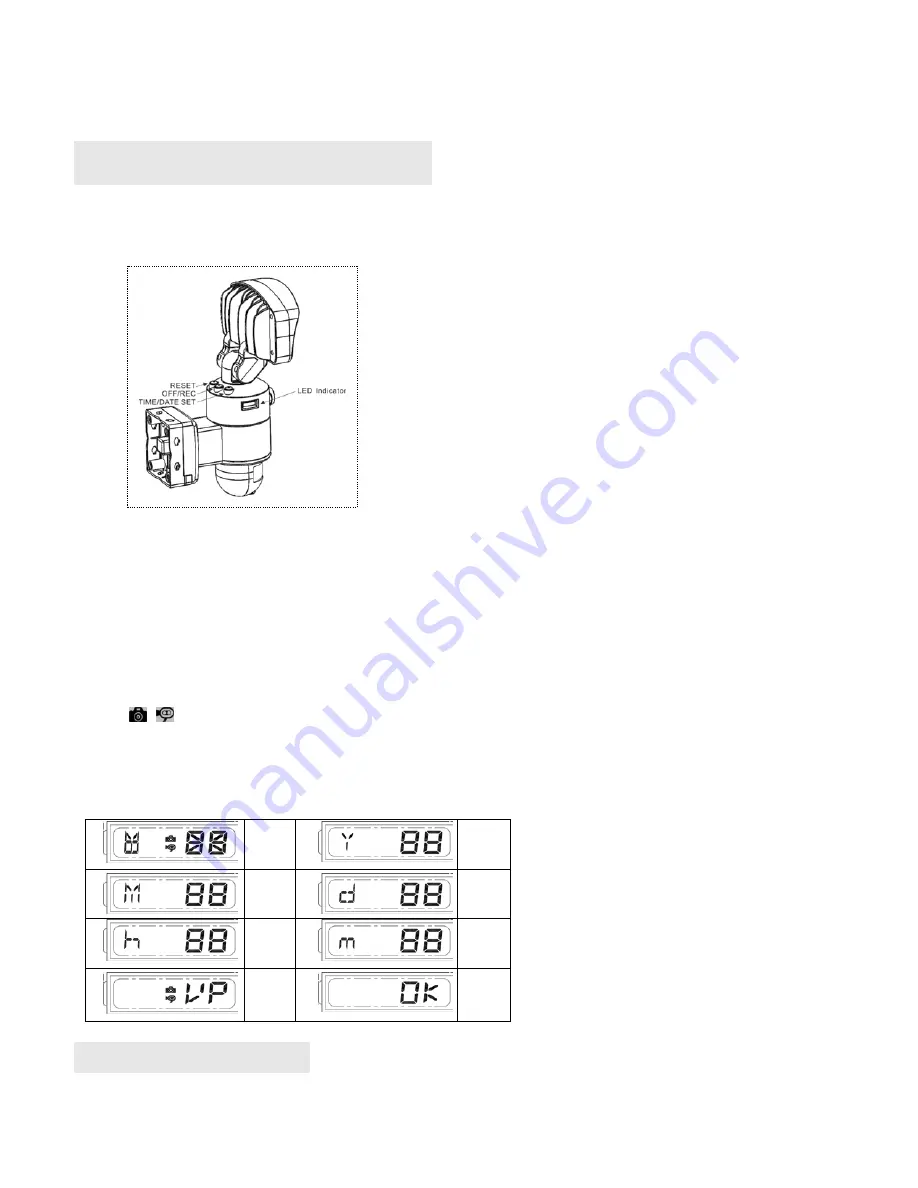
Push TIME/DATE SET button (see fig. 11) for 3 seconds, The LCD screen will then flash 3 times,
indicating you have entered Time/Date setting mode.
1.
“YEAR”setting
:
”Y” and “08” are displayed on the screen; push the button to set year from “08-
99”, push the button again and hold for 3 seconds to scroll through numbers quickly. If you have not
pressed the button for 3 seconds, it will automatically save the year and go on to allow you to set the
month.
2.
Repeat the same setting procedure for
MONTH/DATE/HOUR/MINUTE
.
3.
“VIDEO/PHOTO ”setting
:
when entering this mode, these two
icons and “V” appear on the screen
;
push the button to choose ”V”
(
Video
)
or ”P”
(
Photo
)
. If you have not pushed any buttons for 3 second, “OK” will appear on the screen, indicating it has
automatically saved the current settings. The LCD screen will shut off automatically 10 seconds later.
* On the ”P” (photo) setting, NightWatcher NE400 will take a series of digital photographs at a rate of 3
photos every second when the motion sensor is triggered.
①
Start
②
YEAR
Setting
③
MONTH
Setting
④
DATE
Setting
⑤
HOUR
Setting
⑥
MINUTE
Setting
⑦
VIDEO/
PHOTO
Setting
⑧
Finish
Step 6. Viewing video
1. Viewing image by computer through a card reader (see fig. 12)
Open the waterproofed cover on the NightWatcher NE400 Motion Light with Video Camera
Press OFF/REC button and remove SD cardfrom the slot.
Fig. 11


