NI 7935R Скачать руководство пользователя страница 6

Note


Do not install a device if it appears damaged in any way.
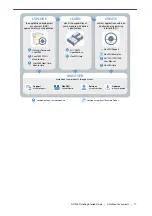
3.

Unpack any other items and documentation from the kit.

Store the device in the antistatic package when the device is not in use.

Preparing the Environment

Ensure that the environment you are using the NI-7935R in meets the following specifications.

Operating temperature (IEC 60068-2-1,
IEC 60068-2-2)

0 °C to 55 °C

Operating humidity (IEC 60068-2-56)

10% to 90% RH, noncondensing

Pollution Degree

2

Maximum altitude

2,000 m at 25 °C ambient temperature

Indoor use only.

Note


Refer to the 

NI-7935R Specifications

 at 

ni.com/manuals

 for complete

specifications.

Caution


Clean the hardware with a soft, nonmetallic brush. Make sure that the

hardware is completely dry and free from contaminants before returning it to
service.

Wiring Power to the NI-7935R

The NI-7935R requires a 9 V to 30 V external power supply that meets the specifications in
the 

NI-7935R Specifications

. The NI-7935R filters and regulates the supplied power and

provides power for the I/O modules.

Note


You can latch the power plug to the NI-7935R using two screws tightened to

0.20 to 0.25 N · m (1.8 to 2.2 lb · in.) of torque.

The maximum wire gage accepted by the power connector plug is 16 AWG. You must use a
stripped wire length of 10 mm (.394 in).

When the POWER LED on the front panel is lit green, the device is powered.

The NI-7935R has reverse-voltage protection.

Complete the following steps to connect a power supply to the NI-7935R.
1.

Ensure the power source is turned off.

2.

Connect a positive wire to the positive terminal of the power connector plug, and connect
a negative wire to the negative terminal of the power connector plug.

6

  | 

ni.com

  | 

NI-7935R Getting Started Guide

Содержание 7935R

Страница 1: ...bout the device specifications refer to the NI 7935R Specifications at ni com manuals Contents FlexRIO Documentation 2 Safety Guidelines 4 Electromagnetic Compatibility Guidelines 4 Verifying the System Requirements 4 What You Need to Get Started 5 Unpacking the Kit 5 Preparing the Environment 6 Wiring Power to the NI 7935R 6 Powering on the NI 7935R 7 STATUS LED 7 ...

Страница 2: ...n Locations and Descriptions Document Location Description Getting started guide for your controller for FlexRIO Available from the Start menu and at ni com manuals Contains installation instructions for your FlexRIO system Specifications document for your controller for FlexRIO Available from the Start menu and at ni com manuals Contains specifications for your controller for FlexRIO Getting star...

Страница 3: ...ions and adapter module component level IP CLIP FlexRIO Adapter Module Development Kit User Manual Available from the Start menu at Start All Programs National Instruments NI FlexRIO NI FlexRIO Adapter Module Development Kit Documentation Contains information about how to create custom adapter modules for use with FlexRIO FPGA modules LabVIEW Examples Available in NI Example Finder In LabVIEW clic...

Страница 4: ...nal Instruments could void your authority to operate it under your local regulatory rules Caution To ensure the specified EMC performance operate this product only with shielded cables and accessories The DC power input cables and optical SFP cables may be unshielded Caution To ensure the specified EMC performance you must use an isolated cable with the SFP ports Caution To ensure the specified EM...

Страница 5: ...IO adapter module or custom adapter module optional A number 2 Phillips screwdriver A number 1 Phillips screwdriver A small flat blade screwdriver Straight through shielded Ethernet cable if connecting to a network or crossover shielded Ethernet cable if connecting directly to a PC Unpacking the Kit Caution To prevent electrostatic discharge ESD from damaging the device ground yourself using a gro...

Страница 6: ...fore returning it to service Wiring Power to the NI 7935R The NI 7935R requires a 9 V to 30 V external power supply that meets the specifications in the NI 7935R Specifications The NI 7935R filters and regulates the supplied power and provides power for the I O modules Note You can latch the power plug to the NI 7935R using two screws tightened to 0 20 to 0 25 N m 1 8 to 2 2 lb in of torque The ma...

Страница 7: ... embedded stand alone LabVIEW Real Time application each time you boot the controller STATUS LED The STATUS LED is off during normal operation The NI 7935R indicates specific error conditions by flashing the STATUS LED a certain number of times every few seconds as shown in the following table LED State Indication 2 flashes every few seconds There is no software installed which is the out of box s...

Страница 8: ...ntact National Instruments Off Normal operation Connecting the NI 7935R to the Host Computer Complete the following steps to connect the NI 7935R to the host computer using the USB device port 1 Power on the host computer 2 Connect the NI 7935R to the host computer using the USB A to B cable Note Alternatively you can use the RJ 45 Ethernet port to connect the NI 7935R to the host computer The dev...

Страница 9: ... getting started guide for your adapter module for more information about your adapter module including programming information Configuring the System in Measurement Automation Explorer MAX After connecting the NI 7935R to the host computer complete the following steps to configure the system for the first time in MAX 1 Launch MAX on the host computer 2 Expand Remote Systems in the MAX configurati...

Страница 10: ...eld 3 Click the Security Configuration icon 4 Click Login 5 In the Login dialog box enter the username admin and leave the password field blank 6 Click OK 7 Click Change Password 8 Enter and re enter a new password 9 Click OK 10 Click Save 11 Click OK to confirm you are changing the password Caution NI cannot recover lost system passwords If you forget the password you must contact NI and reformat...

Страница 11: ... connected to the host select Existing target or device Select the NI 7935R under Real Time FlexRIO and click OK b If the hardware is not connected to the host select New target or device Select the NI 7935R under Real Time FlexRIO and click OK 4 Right click the target and select New FPGA Target The FPGA target appears in the project under the Real Time target Adding a FlexRIO Adapter Module to th...

Страница 12: ... Time Eclipse Edition tutorial Removing the Adapter Module Complete the following steps to remove an adapter module from the NI 7935R 1 Disconnect all cables to the adapter module 2 Power off the NI 7935R 2 3 Unscrew the adapter module 4 Remove the adapter module Troubleshooting the NI 7935R Related Information Connecting the NI 7935R to the Host Computer on page 8 Why Can t the NI 7935R Communica...

Страница 13: ...ng them off You may also need to add an exception for MAX In Windows 7 select Start Control Panel System and Security Windows Firewall Allow a program through Windows Firewall Click Allow another program select Measurement Automation click Add then click OK Ensure that UDP port 44525 is open to communication on the host computer If you are using an intelligent switch on the network ensure that it ...

Страница 14: ...FlexRIO adapter module connector 11 Port 0 Port 1 SFP connectors Related Information For more information about the NI 7935R front panel connectors buttons and LEDs refer to the FlexRIO Help LED Indicators The following figure shows the NI 7935R LEDs in more detail Figure 4 NI 7935R LEDs RT User LED Power LED Status LED FPGA User LED 14 ni com NI 7935R Getting Started Guide ...

Страница 15: ...ondary Side Bank 1 PCB Primary Side GND GPIO_CC_14_n GPIO_CC_14 GND GPIO_15_n GPIO_15 GND GPIO_16_n GPIO_16 GND GPIO_17_n GPIO_17 GND GPIO_18_n GPIO_18 GND GPIO_19_n GPIO_19 GND GPIO_20_n GPIO_20 GND GPIO_21_n GPIO_21 GND GPIO_22_n GPIO_22 GND GPIO_23_n GPIO_23 GND GPIO_58_n GPIO_58 GND GPIO_59_n GPIO_59 GND GPIO_CC_60_n GPIO_CC_60 GND GPIO_61_n GPIO_61 GND GPIO_62_n GPIO_62 GND GPIO_63_n GPIO_63 ...

Страница 16: ...rotection for electromagnetic compatibility EMC and product safety You can obtain the DoC for your product by visiting ni com certification If your product supports calibration you can obtain the calibration certificate for your product at ni com calibration National Instruments corporate headquarters is located at 11500 North Mopac Expressway Austin Texas 78759 3504 National Instruments also has ...

Страница 17: ... application development environment ADE appropriate for your application Services ni com services Updates ni com updates Support ni com support EXPLORE LEARN CREATE DISCOVER FlexRIO ni com flexrio Getting Started with LabVIEW LabVIEW FPGA Module Help FlexRIO Help NI 7935R Specifications LabVIEW Real Time Module Help FlexRIO Support FlexRIO Help FlexRIO Examples NI 7931 7932 7935 User Manual NI 79...

Страница 18: ...d party legal notices in the readme file for your NI product Refer to the Export Compliance Information at ni com legal export compliance for the NI global trade compliance policy and how to obtain relevant HTS codes ECCNs and other import export data NI MAKES NO EXPRESS OR IMPLIED WARRANTIES AS TO THE ACCURACY OF THE INFORMATION CONTAINED HEREIN AND SHALL NOT BE LIABLE FOR ANY ERRORS U S Governme...

Отзывы: