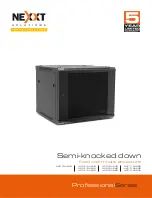
User manual
Warning:
the wall structure must be capable of supporting the total weight, which
includes the cabinet plus its maximum static load. Otherwise, the wall structure must be
reinforced.
Caution:
this product is heavy, at least two qualified people should perform the
assembly procedure. Personal injury and/or property damage can result from dropping
or mishandling the enclosure.
Do not exceed the recommended load capacity per rack, and the maximum weight
supported by the enclosure, as indicated by the manufacturer’s specifications. Failure
to comply will void the warranty of this product.
For safety, use proper equipment and tools during the assembly to prevent personal
injury and to avoid damaging its parts.
FALLING EQUIPMENT HAZARD:
ensure that the cabinet is properly anchored to the
wall prior to loading equipment inside the enclosure.
Carefully read and follow the safety
instructions included in this manual before
assembling and using the cabinet.
FAILURE TO FOLLOW THESE INSTRUCTIONS CAN LEAD TO
SERIOUS INJURY, DEATH, OR DAMAGE TO YOUR EQUIPMENT
IMPORTANT SAFETY INFORMATION
Nexxt solutions does not warrant against damage caused by the use of any Nexxt
Solutions enclosures for any purposes other than those for which it was designed or
damage caused by unauthorized attachments or modifications, and is not responsible
for any damages, claims, demands, suits, actions or causes of action of whatever kind
resulting from, arising out of or in any manner relating to any such use, attachments or
modifications.
1. Introduction
Thank you for purchasing the semi-knocked down (SKD) fixed wallmount enclosure from
Nexxt Solutions. Our wallmount unit is housed in a lockable heavy-gauge metal
enclosure, to keep network equipment and cables safe and properly organized. Each
cabinet includes a fan tray assembly to ensure optimum ventilation inside the unit.
Available with 6, 9, 12, 15 and 18 rack spaces, these enclosures are designed for
mounting multiple patch panels and other voice/data equipment where space is at a
premium. Easy to install and assemble, our wallmount cabinets offer a cost-effective
solution for applications requiring protection, accessibility and cable management
capabilities.
Main features
• 132lb (60kg) maximum static load capacity
• Frame construction reinforced with steel, specially made to support heavy equipment
• Lockable access to front glass door
• Convenient side panels are easy to remove for maintenance
• Standard square-punched mounting rails for faster equipment loading
• The front door can turn 270 degrees
• Two-way fan tray provides outstanding ventilation to avoid overheating
• Toolless, reversible glass door installation
• EIA-compliant mounting rail system can be easily adjusted for equipment varying
depths
• U-rack units are numbered front and back for easy equipment installation
• Finished surface to prevent damage caused by rust and other external factors
For support and to find out more about our complete line of products and solutions,
we invite you to visit us at
nexxtsolutions.com.
ELECTRICAL
SHOCK
HAZARD.
DANGER
All parts of the unit must be properly grounded to the frame
of the enclosure and connected to the Common Bonding
Network (CBN) of your facility.
Содержание NPC-F12U64B
Страница 9: ......


