ES
21
|
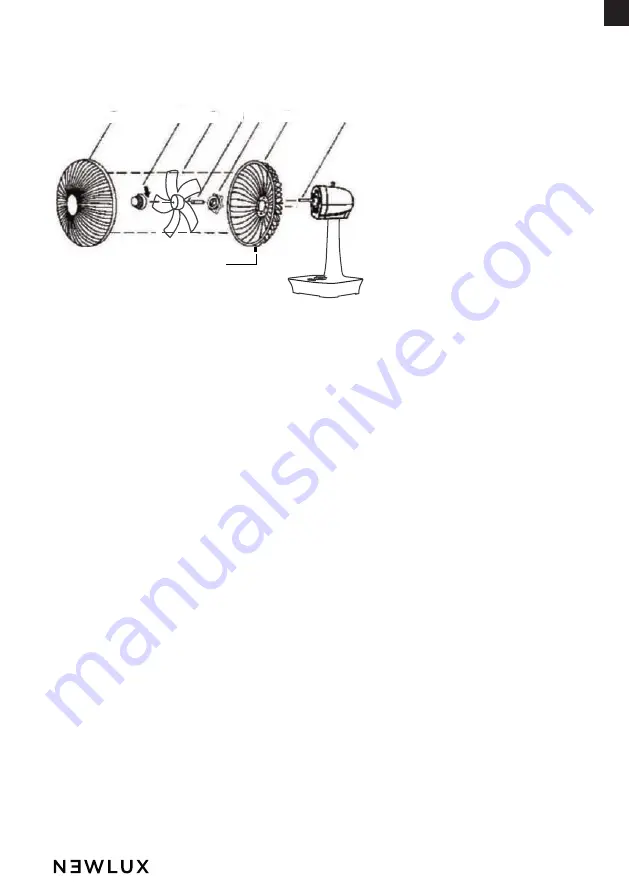
Breakdown of product parts
Blades and grille assembly
1. Unscrew the blade nut (6) clockwise and the grille nut (3)
counterclockwise, then remove both.
2. With the locking tab facing up, place the rear grille in the proper
position.
3. Screw the grille nut (3) tightly to secure the rear grille (2).
4. Remove the protective sleeve from the motor shaft (4).
5. Install the blades (5) on the motor shaft (1) until it reaches the
retaining pin.
6. Screw the blade nut (6) counterclockwise onto the motor shaft (1).
7. Unscrew the locking screw (8) from the rear grille (2). Then fi t the
front grille (7) into the rear grille (2). Secure them tightly using a
screwdriver to tighten the locking screw (8).
1. Motor shaft
2. Rear grille
3. Rear grille nut
4. Protective shaft sleeve
5. Blades
6. Nut for blades
7. Front grille
8. Locking screw
8
1
2
3
4
5
6
7
Содержание WindPure Mist W500 Smart
Страница 1: ...Ventilador de sobremesa Newlux WindPure Desk W500...
Страница 2: ......
Страница 4: ...Ventilador de sobremesa Newlux WindPure Desk W500 ESPA OL...
Страница 14: ......
Страница 16: ...16 Table fan Newlux WindPure Desk W500 ENGLISH...
Страница 25: ...FR 25 Ventilateur de table Newlux WindPure Desk W500 FRAN AIS...
Страница 34: ...34 Ventilatore da tavolo Newlux WindPure Desk W500 ITALIANO...
Страница 43: ...DE 43 Tischventilator Newlux WindPure Desk W500 DEUTSCH...
Страница 52: ...52 Ventilador de mesa Newlux WindPure Desk W500 PORTUGU S...
Страница 61: ...PT 61...
Страница 62: ......


