background image

10


  Make sure the electrical outlet is capable of providing power to the 

unit. 

  Check the back cover located at the back of the unit to make sure it is 

fully installed and snapped into place.  If the back cover is not fully 
installed, a safety switch will cause the unit to not power on.  

  Check to see if the proper fuse is installed and that it is serviceable. 

  Ensure that the fuse cap is completely seated and secured in its 

receptacle. 

  Be sure the cord is fully plugged into unit. 


2.  The fan is operating but the unit won't produce any ozone. What's wrong?  

  Check the air purifier plate(s) for serviceability. If they are cracked or 

broken, the plate(s) will require replacement.  

  Ensure maintenance procedures required for the New Comfort air 

purifier plate have been performed (i.e. washing the Ozone plates).  

  Aside from steps above, do not attempt to disassemble the unit due to 

the Limited Warranty of the product.  
 

3.  The unit has a burning smell, and/or appears to be arcing or sparking.  

  Remove and clean the ozone plates and reinstall.  If problems persist 

replace ozone plates. 


4.  What are the most typical application problems?  

Problem:

 Lack of air movement, improper placement of the unit. 

Warning Sign:

 Strong odors still remain in the environment after 

placement. 

Problem:

 Lack of ozone, improper placement of the unit. 

Warning Sign:

 A strong odor of ozone is in the environment. 

Problem:

 Too much ozone accumulation in the environment, as a 

result of improper purifier control setting and/or lack of air movement. 


5.  Unit does not operate:  

  Is the unit plugged in? 

  Is the power cord fully inserted into the back of the unit? 

  Are you sure the outlet is functioning normally? 

  Is the unit turned on? 

  Is the back grill installed properly to depress the safety switch 

forward? 
 

6.  Air flow is restricted or reduced:  

  Is the unit properly placed away from objects that may obstruct air 

flow? 

  Are the filters clean?  

Содержание BA3500

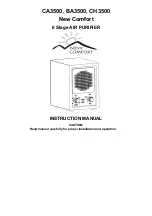
Страница 1: ...CA3500 BA3500 CH3500 New Comfort 6 Stage AIR PURIFIER INSTRUCTION MANUAL CAUTION Read manual carefully for proper installation and operation ...

Страница 2: ...ications 2 Features 3 Introduction 4 Applications 5 Installation 5 Back Cover Filter Removal 6 Placing the Unit 7 Settings and Adjustments 7 Maintenance 8 Replacing the Fuse 9 Troubleshooting 10 Warranty Information 11 ...

Страница 3: ...tivated Carbon Deodorization UVC Bulb Photo Catalytic Filter to kill virus and bacteria Washable HEPA Filter to eliminate small particles and dust Adjustable Fan Speed Control Washable Permanent Pre Filter Adjustable Ozone Control and Plate Configuration Adjustable Ion Control Ion Output 20 KV negative ion generator Filtration Type Washable HEPA Carbon and TI02 Filters Warranty 3 Year Factory Warr...

Страница 4: ... environment outdoors It is not designed to create clean fresh air like the outdoors with its 6 stages of purification Keeps your air clean and fresh with 6 stages of filtration Compact Portable No Duct Work Required No Chemicals Low Maintenance Low Electrical Usage Complete User Control No Residual Contamination APPLICATIONS Home Office Restaurant Hotel Smoking Areas Production Areas Basements Ca...

Страница 5: ...es and Filters Step 1 Make sure the unit is unplugged before installing or removing any filters or maintaining the unit in any way to prevent electric shock Step 2 Push two latches down on back cover Step 3 Remove HEPA filter and all other filters by pulling out the white ribbon on the top Step 4 Insert the 2 Ozone plates found in the small brown box For maximum performance Ozone plates may need t...

Страница 6: ...Suggested locations listed in order of preference Nearest to the source of the worst pollutant Near cold air return in an air circulation system In the area most frequently used location to achieve maximum benefit Notes For maximum control the unit should be placed where easy access to the control panel is possible The rear of the unit should always have at least six inches of open area to allow u...

Страница 7: ...uce the level of Ozone user may also remove one of the Ozone plates To reduce mold mildew and bacteria turn the unit on the highest setting for 3 4 hours Open doors and windows to allow air to circulate out of the room The POWER light turns to GREEN when the Fan switch is turned on The OZONE light turns to RED when the Ozone switch is turned on Only run the Ozone feature in unoccupied spaces After...

Страница 8: ...ter is visibly dirty remove the filter from the unit and wash it in cool water brush it gently with a toothbrush to remove particulate Dry completely prior to re installing All filters are washable except for the charcoal filter Fan Blade and Front Grill Cleaning Take off front reinstall grill method To remove for cleaning 1 As detail on the left shows hold bottom of front grill and pull out 2 Whe...

Страница 9: ...ING GUIDE Indicators of Operation Operation of the Ozone Power Indicator lamp Ozone switch to be operated when the room is unoccupied Open the door and window when you return to the room if Ozone operated for several hours Turn the unit on and check that the small red orange lamp is illuminated The lamp is located on the front panel one is silkscreen power and the other is silkscreen ozone Trouble...

Страница 10: ... disassemble the unit due to the Limited Warranty of the product 3 The unit has a burning smell and or appears to be arcing or sparking Remove and clean the ozone plates and reinstall If problems persist replace ozone plates 4 What are the most typical application problems Problem Lack of air movement improper placement of the unit Warning Sign Strong odors still remain in the environment after pl...

Страница 11: ...hey get dirty For warranty assistance contact the company you bought the air purifier from for authorized warranty service For warranty service the user is required to pay all shipping costs and the authorized New Comfort Warranty center shall be responsible for all parts and labor Customer Name _________________________________________________ Purchase Date________________________________________...

Отзывы: