


ENG-7
ENG-8
CD/MP3/USB Operation
You can play commercially available audio CDs including CD-R, CD-RW, MP3 files and USB files.
Note:
·
Even if this portable radio-CD player is able to read CD-R and CD-RW discs, in addition to conventional
compact discs, it is not possible to offer a 100% guarantee that all CD-R/RW discs can be read; playback
depends on the quality and condition of the blank discs that you use, among other things. A playback
failure does not necessarily indicate that the unit is malfunctioning.
·
You cannot play CDs encoded with copyright protection technologies.
Play a CD or MP3
1. Adjust the
Function Selector
to
CD/MP3/USB
.
2.Open the CD door by pressing the right bottom corner.
3. Insert a CD with the printed side facing up.
·
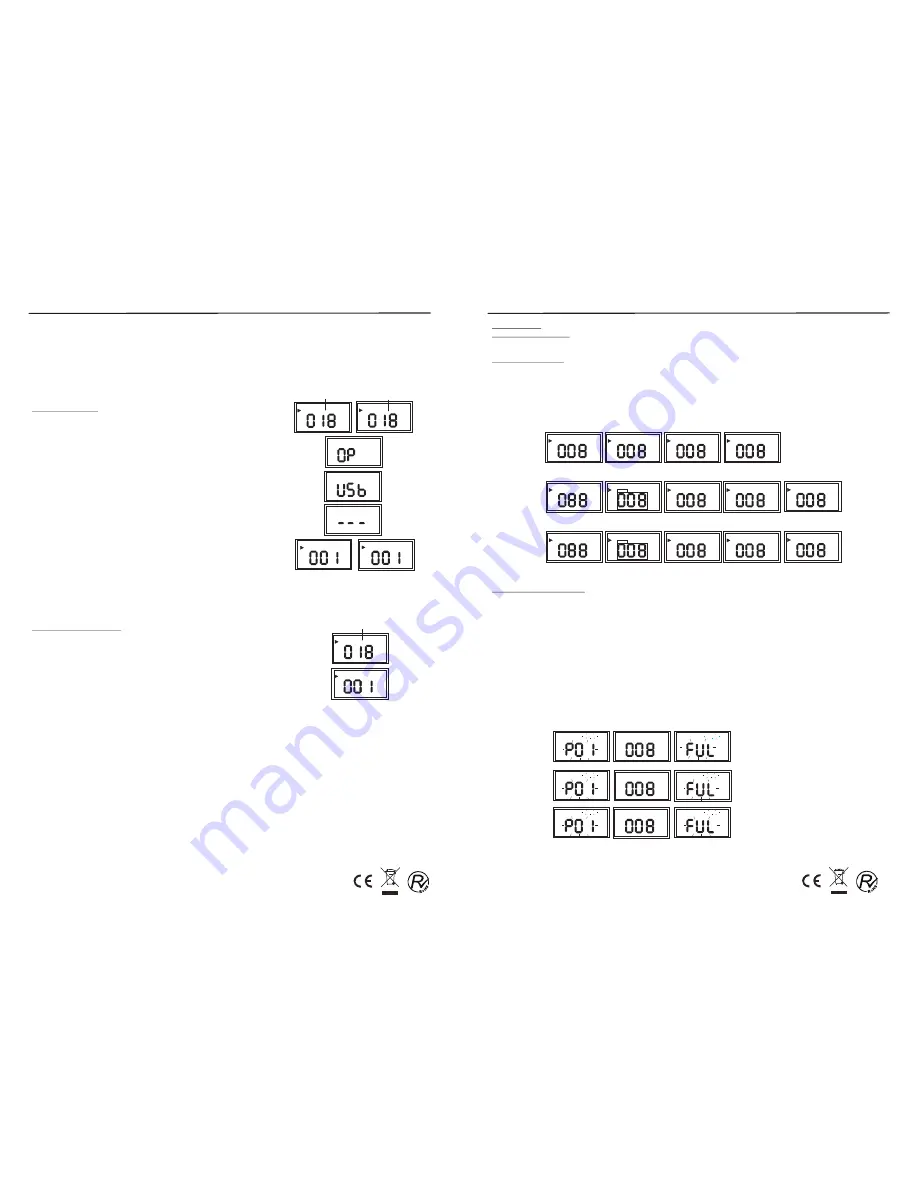
The total number of tracks in the disc will display. (for CD disc)
·
The total folder number first, then show the total number of
tracks in the disc will display (for MP3 disc)
·
If no disc, the display will show “USB”.
·
If CD door is not closed, the display will show “OP”.
·
If disc is loading, the display will show "- - -"
4. To start playback automatically.
5. To pause/resume play, press the
Play/Pause
button.
6. To stop play, press the
Stop
button.
7. To skip a track, press the
Skip-
or
Skip+
buttons.
·
press
Skip+
button to play the next track.
·
press
Skip-
button once to re-start playback of existed track.
·
press
Skip-
button twice to play the previous track.
8. To search within a track, press and hold the
Skip-
or
Skip+
buttons.
Release the button to resume normal play.
9. For MP3 discs, press the
Folder Up
or
Folder Down
buttons
repeatedly to select a folder, then press the
Skip-
or
Skip+
buttons to
select a file you want to play.
Note:
this function can only be activated
if the MP3 disc contains
at least 2 files.
Play from USB devices
Note:
Ensure that the USB device contains playable audio contents.
1. Adjust the
Function Selector
to
CD/MP3/USB
.
2. Insert the USB device to the USB jack.
·
The total number of folder in USB device will display first
then display the total number of tracks .
3. To start playback automatically.
4. To pause/resume play, press the
Play/Pause
button.
5. To stop play, press the
Stop
button.
6. To skip a track, press the
Skip-
or
Skip+
buttons.
·
press
Skip+
button to play the next track.
·
press
Skip-
button once to re-start playback of existed track.
·
press
Skip-
button twice to play the previous track.
7. Press the
Folder Up
or
Folder Down
buttons repeatedly to select a
folder, then press the
Skip-
or
Skip+
buttons to select a file you want
to play.
Note:
this function can only be activated if the USB device
contains at least 2 files.
8.
To quit the USB mode, press and hold the
Play/Pause
button in 2
Seconds to switch from USB mode to CD or MP3 mode.
CD/MP3/USB Operation
Play options
Adjust volume level
1. During play, turn
Volume Control
to increase/decrease the volume level.
Select play modes
1. Press the
Mode
button repeatedly to select a play mode:
·
repeat: repeat the single track.
·
repeat all: repeat the whole disc.
·
album: repeat the selected folder.
·
random: play tracks randomly.
2. To return to normal play, press the
Mode
button repeatedly until play mode icons are no longer
displayed.
Program play sequence
You may store up to 20 tracks (in CD mode) or 99 tracks (in MP3 or USB mode) in desired sequence. Be
sure to press the Stop button before use to ensure no prior program has been set.
1. In stop mode, press the
Memory
button to activate
programming.
·
“
MEMORY”
and “
P01
” indicator will flash on the display.
·
For MP3/USB tracks, press the
Memory
button repeatedly to select an album, then press the
Folder
Up
or
Folder Down
buttons to select a folder you want.
2. Press the
Skip-
or
Skip+
buttons to select your desired track number.
3. Press the
Memory
button to store the desired track number.
4. Repeat steps 2-3 to select additional tracks into program memory.
·
When the memory is full, “
MEMORY
” and “
FUL
” will flash on the display.
5. To play your program, press the
Play/Pause
button in stop mode.
·
The “
MEMORY
” indicator will flash.
6
.
To review the program, pres
s
the
Memory
button to
display your stored tracks in stop mode.
7. To erase a program, press the
Stop
button in stop mode or by
opening the CD door.
·
The “
MEMORY
” indicator will disappear.
CD MODE
MP3 MODE
USB MODE
MEMORY
USB
MEMORY
USB
USB
MP3
MP3
MP3
MEMORY
MP3
MEMORY
MP3
MP3
MEMORY
CD
MEMORY
CD
CD
Total track
Total track
MP3
CD
USB
MP3
CD
Total track
USB
MP3
USB
MP3
REPEAT 1
à
ALBUM
REPEAT ALL
à
à
RANDOM
à
NORMAL PLAYBACK
REPEAT 1
à
ALBUM
REPEAT ALL
à
à
RANDOM
à
NORMAL PLAYBACK
REPEAT 1
à
REPEAT ALL
à
RANDOM
à
NORMAL PLAYBACK
CD MODE
MP3 MODE
USB MODE
REP.
CD
MP3
USB MP3
REP.
USB
REP.
USB
ALBUM
REP.
USB
ALL
RND.
USB
REP.
MP3
REP.
MP3
ALBUM
REP.
MP3
ALL
RND.
MP3
MP3
MP3
MP3
MP3
CD
REP.
CD
ALL
RND.
CD
ENG-4


