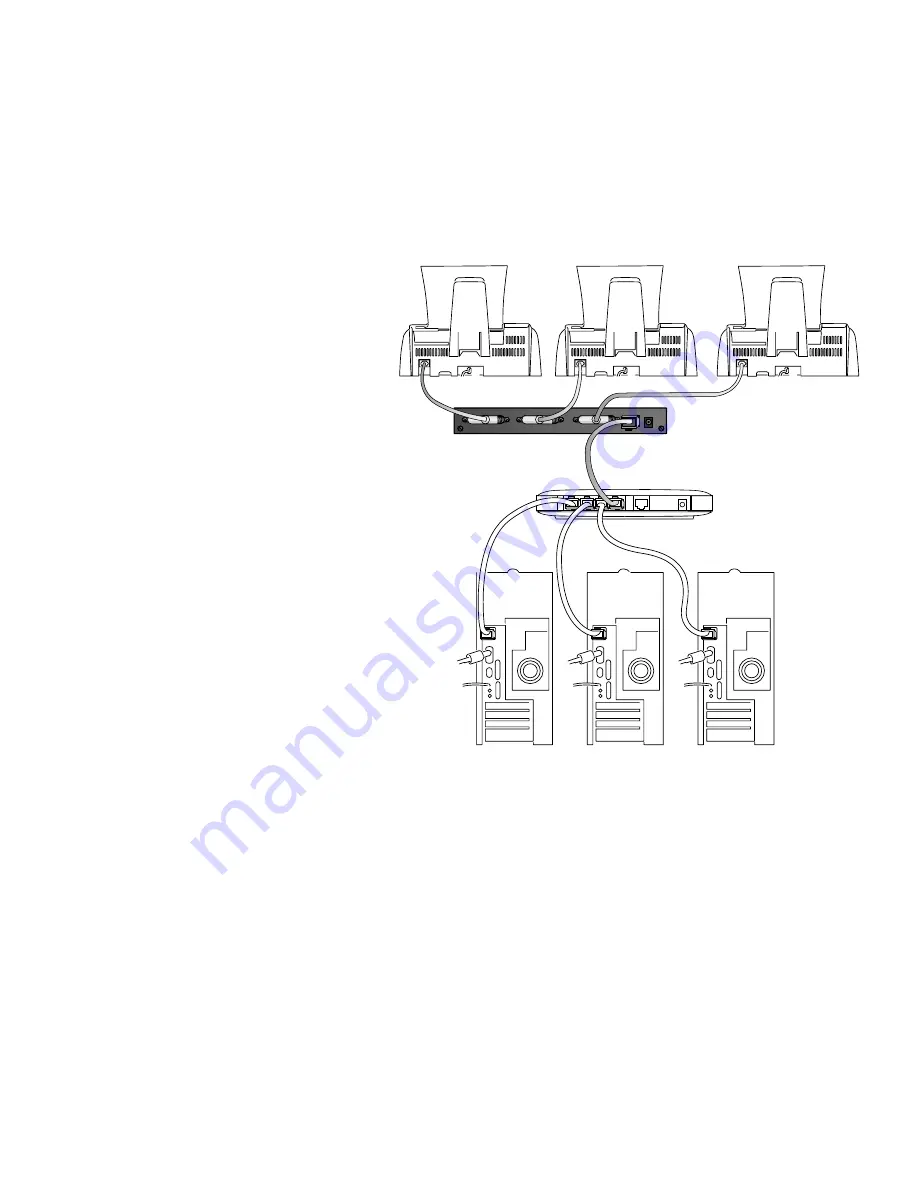
Connect the Print Server
The PS110 or PS113 Print Server connects to the parallel port on your printers. You
may connect two printers to the PS110 or as many as three printers to the PS113.
After connecting the print server to your printer, you then connect it to a network device (like
a hub, router, or switch).
Before you share the printer with
the NETGEAR PS110 or PS113
Print Server, you should have at
least one computer connected to
an Ethernet network and have one
unused port on an Ethernet hub,
switch, or router.
Note:
The procedures
described in this guide are
for a TCP/IP-based network
environment. For NetBEUI
protocol printing, please see
the Reference Manual.
1.
Place the print server on a
flat surface.
Note:
You can mount the
print server to the side of a
printer using Velcro
®
strips to
conserve space. NETGEAR
recommends that you
configure and test the print server before mounting the print server in a different
configuration.
2.
Insert one end of an Ethernet patch (or straight-through) cable into an open Ethernet
port in the network device (hub, switch, or router) and insert the other end into the
Network
port on the print server.
Note:
You may use a Category 3 (or higher) Ethernet cable.
3
2
2
PS113 10/100
Mbps Print Server
12VDC 1.2A
PRINTER 3
PRINTER 2
PRINTER 1
NETWORK
Printer
Printer
Printer
Netgear Router
or Switch
Содержание PS110 - Print Server - Parallel
Страница 1: ...Installation Guide PS110 and PS113 10 100 Mbps Print Servers...
Страница 19: ......


