background image

Advanced Settings

95

 N600 Wireless Dual Band Router WNDR3400v2

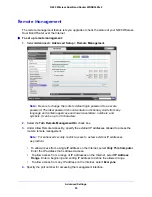
Remote Management

The remote management feature lets you upgrade or check the status of your N600 Wireless 
Dual Band Router over the Internet.

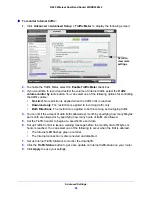
To set up remote management:

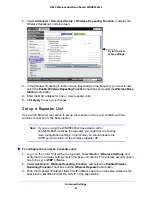
1. 

Select 

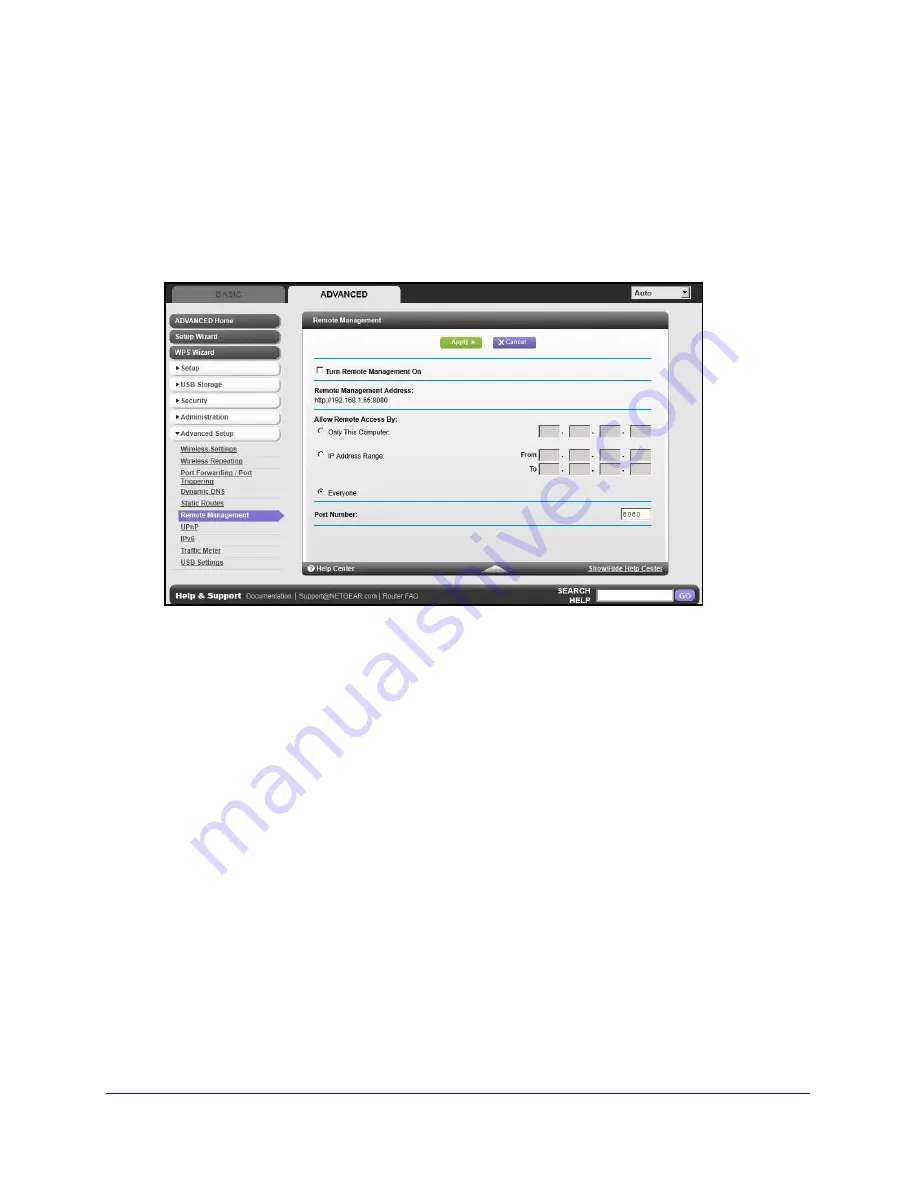
Advanced > Advanced Setup > Remote Management

Note: 

Be sure to change the router’s default login password to a secure 

password. The ideal password should contain no dictionary words from any 
language and contain uppercase and lowercase letters, numbers, and 
symbols. It can be up to 30 characters.

2. 

Select the 

Turn Remote Management On 

check box.

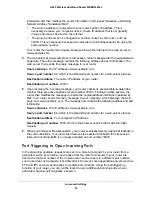
3. 

Under Allow Remote Access By, specify the external IP addresses allowed to access the 

router’s remote management.

Note: 

For enhanced security, restrict access to as few external IP addresses 

as practical.

•     

To allow access from a single IP address on the Internet, select 

Only This Computer

Enter the IP address that is allowed access. 

•     

To allow access from a range of IP addresses on the Internet, select 

IP Address 

Range

. Enter a beginning and ending IP address to define the allowed range. 

•     

To allow access from any IP address on the Internet, select 

Everyone

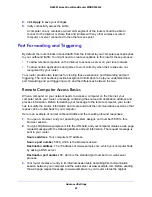
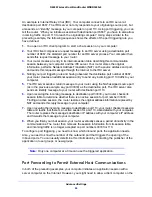
4. 

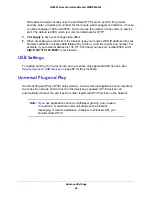
Specify the port number for accessing the management interface.

Содержание N600 WNDR3400v2

Страница 1: ...350 East Plumeria Drive San Jose CA 95134 USA January 2013 202 10828 04 N600 Wireless Dual Band Router WNDR3400v2 User Manual ...

Страница 2: ...gistering your product through the NETGEAR website For product updates and web support visit http support netgear com Phone US Canada only 1 888 NETGEAR Phone Other Countries Check the list of phone numbers at http support netgear com general contact default aspx Trademarks NETGEAR the NETGEAR logo and Connect with Innovation are trademarks and or registered trademarks of NETGEAR Inc and or its su...

Страница 3: ...gs 17 Types of Logins and Access 17 NETGEAR genie Setup 18 Use NETGEAR genie after Installation 19 Upgrade Router Firmware 19 Router Dashboard Basic Home Screen 20 Add Wireless Devices or Computers to Your Network 21 Manual Method 21 Wi Fi Protected Setup WPS Method 21 Chapter 3 genie Basic Settings Internet Setup 23 Internet Setup Screen Fields 23 Attached Devices 25 Parental Controls 26 ReadySHA...

Страница 4: ...y Remove a USB Drive 56 Specify Approved USB Devices 56 Connect to the USB Drive from a Remote Computer 57 Access the Router s USB Drive Remotely Using FTP 57 Chapter 6 Security Keyword Blocking of HTTP Traffic 60 Block Services Port Filtering 61 Schedule Blocking 62 Security Event Email Notifications 63 Chapter 7 Administration Upgrade the Router Firmware 66 View Router Status 67 Router Informati...

Страница 5: ...USB Settings 96 Universal Plug and Play 96 IPv6 98 Traffic Meter 98 Chapter 9 Troubleshooting Quick Tips 101 Sequence to Restart Your Network 101 Check Ethernet Cable Connections 101 Wireless Settings 101 Network Settings 101 Troubleshooting with the LEDs 102 Power Test LED Is Off or Blinking 102 Power Test LED Stays Amber 102 LEDs Never Turn Off 102 Internet or Ethernet Port LEDs Are Off 103 Wire...

Страница 6: ...s Dual Band Router WNDR3400v2 Test the Path from Your Computer to a Remote Device 109 Appendix A Supplemental Information Factory Settings 110 Technical Specifications 112 Appendix B Notification of Compliance Index ...

Страница 7: ...rotects the devices PCs gaming consoles and so on that you connect to your home network Note For more information about the topics covered in this manual visit the support website at http support netgear com If you have not already set up your new router using the installation guide that comes in the box this chapter walks you through the hardware setup Chapter 3 genie Basic Settings explains how ...

Страница 8: ...irtually anywhere within the operating range of your wireless network However the operating distance or range of your wireless connection can vary significantly depending on the physical placement of your router For example the thickness and number of walls the wireless signal passes through can limit the range For best results place your router Near the center of the area where your computers and...

Страница 9: ...use multiple access points ensure that adjacent access points use different radio frequency channels The recommended channel spacing between adjacent access points is 5 channels for example use Channels 1 and 6 or 6 and 11 Prepare the Router To ensure proper heat dissipation and for router stability it is important that you connect the stand and place your router in an upright position To prepare ...

Страница 10: ...ireless Dual Band Router by inserting the tabs of the stand supplied with your router into the slots on the bottom of your router as shown 3 Place your router in an area suitable for installation near an AC power outlet and accessible to the Ethernet cables for your wired computers ...

Страница 11: ... on the front panel Front Panel The router front panel has the status LEDs and icons shown in the following figure USB LED WPS button LAN Ports 1 4 LEDs 5 GHz LED 2 4 GHz LED Internet LED Power Test LED Table 1 Front panel LED descriptions LED Description USB Solid green The local Ethernet ports have detected wired links with PCs Blinking green Data is being transmitted or received Off No link is ...

Страница 12: ...ing sent or received over the wireless network Off The wireless radio is off Internet Solid amber The IP address has not been acquired Solid green An IP address was received ready to transmit data Blinking green Data is being sent to or received from the Internet Off No Ethernet cable is connected between the router and the modem Power Test Solid amber The unit is starting up after being powered o...

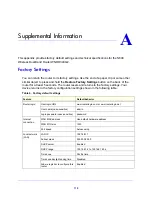
Страница 13: ... reset the router to its factory default settings WiFi On Off button Four local area network LAN 10 100 Mbps Ethernet ports for connecting the router to your local computers Internet Wide Area Network WAN Ethernet port for connecting the router to a cable or DSL modem AC power adapter outlet for connecting the power adapter Power On Off button See Factory Settings on page 110 for information about...

Страница 14: ...ess Dual Band Router WNDR3400v2 Label The label on the bottom of the router shows the WPS PIN login information MAC address and serial number MAC addresses Serial number Preset WiFi Password Default access information Preset SSID ...

Страница 15: ...he On Off button on the back The Power Test LED is green when the router is turned on The LAN ports are green for each Windows computer cabled to the router by an Ethernet cable 2 4GHz 5GHz The Wireless LEDs are on The Internet LED is lit If it is not make sure that the Ethernet cable is securely attached to the router Internet port and the modem and that the modem is powered on Verify that the LA...

Страница 16: ...te cabling as described in the installation guide and in the previous chapter in this book This chapter contains the following sections Router Setup Preparation Types of Logins and Access NETGEAR genie Setup Use NETGEAR genie after Installation Upgrade Router Firmware Router Dashboard Basic Home Screen Add Wireless Devices or Computers to Your Network ...

Страница 17: ...nnection is working you no longer need to launch the ISP login program on your computer to access the Internet When you start an Internet application your router automatically logs you in The ISP configuration information for your DSL account ISP login name and password Fixed or static IP address settings special deployment by ISP this is rare Wireless Devices and Security Settings Make sure that ...

Страница 18: ...GEAR genie type http www routerlogin net in the address field for your browser to display the NETGEAR genie screen See Use NETGEAR genie after Installation on page 19 4 Follow the onscreen instructions to complete NETGEAR genie setup NETGEAR genie guides you through connecting the router to the Internet If the browser cannot display the web page Make sure that the computer is connected to one of t...

Страница 19: ...Note The router user name and password are different from the user name and password for logging in to your Internet connection See Types of Logins and Access on page 17 for more information Upgrade Router Firmware When you set up your router and are connected to the Internet the router automatically checks for you to see if newer firmware is available If it is a message is displayed on the top of...

Страница 20: ...router Internet Set update and check the ISP settings of your router Wireless View or change the wireless settings for your router Attached Devices View the devices connected to your network Parental Controls Download and set up parental controls to prevent objectionable content from reaching your computers ReadySHARE If you connected a USB storage device to the router then it is displayed here Gu...

Страница 21: ...m of the router 3 Enter the router password and click Connect The default router passphrase is on the product label on the bottom of the router 4 Repeat steps 1 3 to add other wireless devices Wi Fi Protected Setup WPS Method Wi Fi Protected Setup WPS is a standard for easily adding computers and other devices to a home network while maintaining security To use WPS make sure that all wireless devi...

Страница 22: ... This chapter explains the features available from the genie Basic Home screen shown in the following figure This chapter contains the following sections Internet Setup Attached Devices Parental Controls ReadySHARE USB Storage Basic Wireless Settings Guest Networks ...

Страница 23: ...ddress and DNS server The default settings usually work fine If you have problems with your connection check the ISP settings 3 Click Apply to save your settings 4 Click Test to test your Internet connection If the NETGEAR website does not display within 1 minute see Chapter 9 Troubleshooting Internet Setup Screen Fields The following descriptions explain all of the possible fields in the Internet...

Страница 24: ...me Server DNS Address The DNS server is used to look up site addresses based on their names Get Automatically from ISP Your ISP uses DHCP to assign your DNS servers Your ISP automatically assigns this address Use These DNS Servers If you know that your ISP does not automatically transmit DNS addresses to the router during login select this option and enter the IP address of your ISP s primary DNS ...

Страница 25: ...net cables Wireless devices have joined the wireless network number The order in which the device joined the network IP Address The IP address that the router assigned to this device when it joined the network This number can change if a device is disconnected and rejoins the network MAC Address The unique MAC address for each device does not change The MAC address is typically shown on the produc...

Страница 26: ...utomatically directed to the Internet where you can learn more about Live Parental Controls or download the application The following screen displays ReadySHARE USB Storage You can view information about a USB storage device that is connected to the router s USB port here From the Basic Home screen select ReadySHARE to display the USB Storage Basic Settings screen ...

Страница 27: ...he current utilization of the storage device Edit Click the Edit button to edit the Available Network Folders settings Safely Remove a USB Device Click to safely remove the USB device attached to your router You can click Refresh to update this screen For more information about USB storage see Chapter 5 USB Storage Basic Wireless Settings The Wireless Setup screen lets you view or configure the wi...

Страница 28: ...d procedures are explained in the following sections 2 Make any changes that are needed and click Apply to save your settings 3 Set up and test your wireless devices and computers to make sure that they can connect wirelessly If they do not check the following Is your wireless device or computer connected to your network or another wireless network in your area Some wireless devices automatically ...

Страница 29: ...n If this check box is selected then wireless clients computers or wireless devices that join the network can use the Internet but cannot access each other or access Ethernet devices on the network Name SSID The SSID is also known as the wireless network name Enter a 32 character maximum name in this field This field is case sensitive The default SSID is randomly generated and NETGEAR strongly rec...

Страница 30: ...ssphrase but if you want to change these settings this section explains how Do not disable security Change WPA Security Option and Passphrase Note These settings apply separately to the 2 4 GHz b g n and 5 GHz a n bands 1 Under Security Options select the WPA option you want 2 In the Passphrase field that displays when you select a WPA security option enter the network key passphrase that you want...

Страница 31: ...he Internet without providing them with your wireless security key You can add a guest network to each wireless network 2 4 GHz b g n and 5 0 GHz a n To set up a guest network 1 Select Basic Guest Network to display the following screen Scroll to view more settings Scroll to view more settings 2 Select any of the following wireless settings ...

Страница 32: ...ID 4 Select a security option from the list The security options are described in Guest Network Wireless Security Options on page 32 5 Click Apply to save your selections Guest Network Wireless Security Options A security option is the type of security protocol applied to your wireless network The security protocol in force encrypts data transmissions and ensures that only trusted devices receive ...

Страница 33: ...while WPA PSK is implemented through software WPA2 PSK uses a passphrase to authenticate and generate the initial data encryption keys Then it dynamically varies the encryption key WPS PSK WPA2 PSK Mixed Mode can provide broader support for all wireless clients WPA2 PSK clients get higher speed and security and WPA PSK clients get decent speed and security The product documentation for your wirele...

Страница 34: ...rough the Administration menu This chapter contains the following sections Setup Wizard WPS Wizard Setup Menu WAN Setup LAN Setup Quality of Service QoS Setup Some selections on the Advanced Home screen are described in separate chapters USB Storage See Chapter 5 USB Storage Security See Chapter 6 Security Administration See Chapter 7 Administration Advanced Setup See Chapter 8 Advanced Settings ...

Страница 35: ...Setup Wizard from the Advanced tab of the genie 1 Select Setup Wizard to display the following screen 2 Select either Yes or No I want to configure the router myself If you select No you are taken to the Internet Setup screen see Internet Setup on page 23 3 If you selected Yes click Next The following screen displays The Setup Wizard searches your Internet connection for servers and protocols to d...

Страница 36: ...following screen lets you select the method for adding the WPS client a wireless device or computer You can use either the push button or PIN method 3 Select either Push Button or PIN Number To use the push button method either click the WPS button on this screen or press the WPS button on the top of the router Within two minutes go to the wireless client and press its WPS button to join the netwo...

Страница 37: ...u The following selections are available Internet Setup This is a shortcut to the same Internet Setup screen that you can access from the dashboard on the Basic Home screen See Internet Setup on page 23 Wireless Setup This is a shortcut to the same Wireless Setup screen that you can access from the dashboard on the Basic Home screen See Basic Wireless Settings on page 27 Guest Network This is a sh...

Страница 38: ...et select this check box Use this only as a diagnostic tool because it allows your router to be discovered Do not select this check box unless you have a specific reason Disable IGMP Proxying IGMP proxying allows a computer on the local area network LAN to receive the multicast traffic it is interested in from the Internet If you do not need this feature you can select this check box to disable it...

Страница 39: ...ering screen Instead of discarding this traffic you can forward it to one computer on your network This computer is called the default DMZ server To set up a default DMZ server 1 On the WAN Setup screen select the Default DMZ Server check box 2 Type the IP address 3 Click Apply Change the MTU Size The Maximum Transmission Unit MTU is the largest data packet a network device transmits When one netw...

Страница 40: ...he problem goes away The following table describes common MTU sizes and applications Table 2 Common MTU sizes MTU Application 1500 The largest Ethernet packet size and the default value This is the typical setting for non PPPoE non VPN connections and is the default value for NETGEAR routers adapters and switches 1492 Used in PPPoE environments 1472 Maximum size to use for pinging Larger packets a...

Страница 41: ...nated private address range for use in private networks and should be suitable for most applications If your network has a requirement to use a different IP addressing scheme you can make those changes in the LAN Setup screen To change the LAN settings Note If you change the LAN IP address of the router while connected through the browser you will be disconnected You have to open a new connection ...

Страница 42: ...oth RIP 2B and RIP 2M send the routing data in RIP 2 format RIP 2B uses subnet broadcasting RIP 2M uses multicasting Use Router as a DHCP Server This check box is usually selected so that the router functions as a Dynamic Host Configuration Protocol DHCP server Starting IP Address Specify the start of the range for the pool of IP addresses in the same subnet as the router Ending IP Address Specify...

Страница 43: ...is service is not enabled and no other DHCP server is available on your network you need to set your computers IP addresses manually or they will not be able to access the router Address Reservation When you specify a reserved IP address for a computer on the LAN that computer always receives the same IP address each time it accesses the router s DHCP server Reserved IP addresses should be assigne...

Страница 44: ...WMM QoS provides prioritization of wireless data packets from different applications based on four access categories voice video best effort and background For an application to receive the benefits of WMM QoS both the application and the client running that application must have WMM enabled Legacy applications that do not support WMM and applications that do not require QoS are assigned to the be...

Страница 45: ...To create a QoS policy for applications and online games 1 In the QoS Setup screen select the Turn Internet Access QoS On checkbox 2 Click the Setup QoS rule button to see the existing priority rules On this screen you can edit or delete a rule by selecting its radio button and clicking either the Edit or Delete button To delete all of the rules click the Delete All button 3 To add a priority rule...

Страница 46: ...tion Type list select either TCP UDP or both TCP UDP and specify the port number or range of port numbers used by the application or game 7 From the Priority list select the priority that this traffic should receive relative to other applications and traffic when accessing the Internet The options are Low Normal High and Highest 8 Click Apply to save this rule to the QoS Policy list and return to ...

Страница 47: ... other applications and traffic when accessing the Internet The options are Low Normal High and Highest 7 Click Apply to save this rule to the QoS Policy list and return to the QoS Setup screen 8 In the QoS Setup screen click Apply QoS for a MAC Address To create a QoS policy for traffic from a specific MAC address 1 Select Advanced Setup QoS Setup and click the Setup QoS Rule button The QoS Setup...

Страница 48: ...essing the Internet The options are Low Normal High and Highest Click Add to add this rule to MAC Device List 6 Click Apply to save this rule to the QoS Policy list and return to the QoS Setup screen 7 In the QoS Setup screen select the Turn Internet Access QoS On check box 8 Click Apply Editing or Deleting an Existing QoS Policy To edit or delete a QoS policy 1 Select Advanced QoS Setup to displa...

Страница 49: ...connect USB storage devices like flash drives or hard drives Do not connect computers USB modems printers CD drives or DVD drives to the router USB port This chapter contains the following sections USB Drive Requirements ReadySHARE Access File Sharing Scenarios Basic Settings USB Storage Advanced Settings Safely Remove a USB Drive Specify Approved USB Devices Connect to the USB Drive from a Remote...

Страница 50: ...TFS and Linux file systems EXT2 and EXT3 Note Some USB external hard drives and flash drives require drivers to be loaded in to the Windows computer before the Windows computer can access the USB device Such USB devices do not work with the router ReadySHARE Access Once you have set up your router you can connect any USB storage device and share the contents with other users on your network You ca...

Страница 51: ...o sharing site To share files with your friends and family 1 Insert your USB drive into the USB port on the router either directly or with a USB cable Computers on your local area network LAN can automatically access this USB drive using a web browser or Microsoft Networking 2 If you want to specify read only access or to allow access from the Internet see USB Storage Advanced Settings on page 54 ...

Страница 52: ...word The guest user account has no password On the FTP site the person receiving the files should use the guest user account and enter any password FTP requires that you type something in the password field Be sure to select the FTP via Internet check box in the USB Storage Advanced Settings screen This option supports both downloading and uploading of files Note You can enable the HTTP via Intern...

Страница 53: ... in your computer s network folders list 2 For SMB readyshare click Connect Note If you logged in to the router before you connected your USB device you might not see your USB device in the router screens until you log out and then log back in again Add or Edit a Network Folder 1 You can access this feature by selecting Basic ReadyShare Edit or Advanced USB Storage Advanced Settings 2 Specify the ...

Страница 54: ...ssword to admin The user name account name for All no password is guest The password for admin is the same one that is used to log in to the router By default it is password 4 Click Apply for your changes to take effect USB Storage Advanced Settings You can set up the device name workgroups and network folders for your USB device On the Advanced tab select USB Storage Advanced Settings to display ...

Страница 55: ...isabled by default If you enable this setting remote users can type http public IP address shares for example http 1 1 10 102 shares or a URL domain name to access the USB drive over the Internet This setting supports file uploading only FTP Disabled by default FTP via Internet Disabled by default If you enable this setting remote users can access the USB drive through FTP over the Internet This s...

Страница 56: ...e either USB drive or HDD Total Free Space Shows the current utilization of the storage device Safely Remove a USB Drive To safely remove a USB disk drive so that no users can access it select USB Storage Basic Settings and click the Safely Remove USB Device button This takes the drive offline Specify Approved USB Devices For more security you can set up the router to share approved USB devices on...

Страница 57: ...evice Connect the other USB device and repeat this process Connect to the USB Drive from a Remote Computer To connect to the USB drive from remote computers with a web browser you have to use the router s Internet port IP address If you are using Dynamic DNS you can type the DNS name rather than the IP address You can view the router s Internet IP address from the dashboard on the Basic Home scree...

Страница 58: ...nd password that has access rights to the USB drive The user name account name for All no password is guest 3 The directories of the USB drive that your account has access to are displayed for example share partition1 directory1 You can now read and copy files from the USB directory ...

Страница 59: ... basic firewall features of the router to prevent objectionable content from reaching the PCs and other devices connected to your network This chapter includes the following sections Keyword Blocking of HTTP Traffic Block Services Port Filtering Schedule Blocking Security Event Email Notifications ...

Страница 60: ... the Keyword field enter a keyword or domain click Add Keyword and click Apply The Keyword list supports up to 32 entries Here are some sample entries Specify XXX to block http www badstuff com xxx html Specify com if you want to allow only sites with domain suffixes such as edu or gov Enter a period to block all Internet browsing access To delete a keyword or domain 1 Select the keyword you want ...

Страница 61: ...ublished in RFC1700 Assigned Numbers Service numbers for other applications are typically chosen from the range 1024 to 65535 by the authors of the application Although the router already holds a list of many service port numbers you are not limited to these choices You can often determine port number information by contacting the publisher of the application by asking user groups or newsgroups or...

Страница 62: ...lication uses either TCP or UDP select the appropriate protocol If you are not sure select Both 6 Enter the starting and ending port numbers If the application uses a single port number enter that number in both fields 7 Select the radio button for the IP address configuration you want to block and enter the IP addresses You can block the specified service for a single computer a range of computer...

Страница 63: ...t Every Day to select the check boxes for all days Time of Day to Block Select a start and end time in 24 hour format or select All Day for 24 hour blocking 3 Select your time zone from the list If you use daylight savings time select the Automatically adjust for daylight savings time check box 4 Click Apply to save your settings Security Event Email Notifications To receive logs and alerts by ema...

Страница 64: ...ddress is also used for the From address If you leave this field blank log and alert messages are not sent by email 5 If your outgoing email server requires authentication select the My Mail Server requires authentication check box Fill in the User Name and Password fields for the outgoing email server 6 You can have email alerts sent immediately when someone attempts to visit a blocked site and y...

Страница 65: ...tion about upgrading or checking the status of your router over the Internet See Traffic Meter on page 98 for information about monitoring the volume of Internet traffic passing through your router s Internet port This chapter includes the following sections Upgrade the Router Firmware View Router Status View Logs of Web Access or Attempted Web Access Manage the Configuration File Set Password ...

Страница 66: ...irmware and update your router 1 Select Advanced Administration Router Update to display the following screen Click Check 2 Click Check The router finds new firmware if available 3 Click Yes to update and locate the firmware you downloaded the file ends in img WARNING When uploading firmware to the router do not interrupt the web browser by closing the window clicking a link or loading a new page ...

Страница 67: ...AN Port MAC Address The Media Access Control address is the unique physical address used by the Ethernet LAN port of the router IP Address The IP address used by the Ethernet LAN port of the router The default is 192 168 1 1 DHCP Server Identifies whether the router s built in DHCP server is active for the LAN attached devices Internet Provider WAN Setup MAC Address The Media Access Control addres...

Страница 68: ...Up Time The time elapsed since the router was last restarted Port The statistics for the WAN Internet and LAN Ethernet ports For each port the screen displays Status The link status of the port TxPkts The number of packets transmitted on this port since reset or manual clear RxPkts The number of packets received on this port since reset or manual clear Collisions The number of collisions on this p...

Страница 69: ...tus screen IP Address The IP address assigned to the router Subnet Mask The subnet mask assigned to the router Default Gateway The IP address for the default gateway that the router communicates with DHCP Server The IP address for the Dynamic Host Configuration Protocol server that provides the TCP IP configuration for all the computers that are connected to the router DNS Server The IP address of...

Страница 70: ...to When Auto is selected the router finds the best operating channel available If you notice interference from nearby devices you can select a different channel Channels 1 6 and 11 donot interfere with each other Mode Indicates the wireless communication mode Up to 54 Mbps Up to 130 Mbps default and Up to 300 Mbps Wireless AP Indicates whether the radio feature of the router is enabled If this fea...

Страница 71: ...me Indicates whether the router is broadcasting its SSID Wireless Isolation Select this check box only if you want to prevent wireless connections to the router Allow guest to access My Local Network If selected any user who connects to this SSID can access local networks associated with the router View Logs of Web Access or Attempted Web Access g The log is a detailed record of the websites you a...

Страница 72: ...ess of the website or news group visited or to which access was attempted Action Whether the access was blocked or allowed To refresh the log screen click the Refresh button To clear the log entries click the Clear Log button To email the log immediately click the Send Log button Manage the Configuration File The configuration settings of the N600 Wireless Dual Band Router are stored within the ro...

Страница 73: ...utton to find the file 2 When you have located the cfg file click the Restore button to upload the file to the router Upon completion the router reboots WARNING Do not interrupt the reboot process Erase Under some circumstances for example if you move the router to a different network or if you have forgotten the password you might want to erase the configuration and restore the factory default se...

Страница 74: ...n 2 Type the old password and type the new password twice in the fields on this screen 3 If you want to be able to recover the password select the Enable Password Recovery check box 4 Click Apply so that your changes take effect Password Recovery NETGEAR recommends that you enable password recovery if you change the password for the router s user name of admin Then you have an easy way to recover ...

Страница 75: ...400v2 When you use your browser to access the router the login window displays If password recovery is enabled when you click Cancel the password recovery process starts You can then enter the saved answers to the security questions to recover the password ...

Страница 76: ...he router up for unique situations such as when remote access from the Internet by IP or domain name is needed This chapter includes the following sections Advanced Wireless Settings Wireless Repeating Function WDS Port Forwarding and Triggering Set up Port Forwarding to Local Servers Set up Port Triggering Dynamic DNS Static Routes Remote Management USB Settings Universal Plug and Play IPv6 Traff...

Страница 77: ...ters to the router with an Ethernet cable Note The Fragmentation Length CTS RTS Threshold and Preamble Mode options are reserved for wireless testing and advanced configuration only Do not change these settings Turn off wireless signal by schedule You can use this feature to turn off the wireless signal from your router at times when you do not need a wireless connection For example you could turn...

Страница 78: ...etwork to be expanded through multiple access points instead of using a wired backbone to link them The following figure shows a wireless repeating scenario Repeater Base station access point access point Figure 4 Wireless repeating scenario Note If you use the wireless repeating function you need to select either WEP or None as a security option in the Wireless Setup screen The WEP option display...

Страница 79: ...d and use the other radio band as a wireless router or wireless base station dual band concurrent mode is not affected For you to set up a wireless network with WDS the following conditions have to be met for both access points Both access points have to use the same SSID wireless channel and encryption mode Both access points have to be on the same LAN IP subnet That is all the access point LAN I...

Страница 80: ... cleared Base Station MAC Address If your router is the repeater enter the MAC address for the access point that is the base station Wireless Base Station If your router is the base station select this check box Disable Wireless Client Association If your router is the base station selecting this check box means that wireless clients cannot associate with it Only LAN client associations are allowe...

Страница 81: ...connection to the base station Note If you are using the WNDR3400v2 base station with a non NETGEAR router as the repeater you might need to change more configuration settings In particular you should disable the DHCP server function on the wireless repeater AP To configure the router as a repeater unit 1 Log in to the router that will be the repeater Select Basic Wireless Settings and verify that...

Страница 82: ...r network needs to access a computer on the Internet your computer sends your router a message containing the source and destination address and process information Before forwarding your message to the remote computer your router has to modify the source information and create and track the communication session so that replies can be routed back to your computer Here is an example of normal outb...

Страница 83: ...mber 33333 Finding an active session the router then modifies the message to restore the original address information replaced by NAT Your router sends this reply message to your computer which displays the web page from www example com The message now contains the following address and port information Source address The IP address of www example com Source port number 80 which is the standard po...

Страница 84: ... using the NAT assigned source port as in the previous example say port 33333 as the destination port The IRC server also sends an identify message to your router with destination port 113 6 Upon receiving the incoming message to destination port 33333 your router checks its session table to determine whether there is an active session for port number 33333 Finding an active session the router res...

Страница 85: ...ss The remote computer then sends this request message through the Internet to your router 2 Your router receives the request message and looks in its rules table for any rules covering the disposition of incoming port 80 traffic Your port forwarding rule specifies that incoming port 80 traffic should be forwarded to local IP address 192 168 1 123 Therefore your router modifies the destination inf...

Страница 86: ...affic to reach servers on your local network For example you might want to make a local web server FTP server or game server visible and available to the Internet Use the Port Forwarding screen to configure the router to forward specific incoming protocols to computers on your local network In addition to servers for specific applications you can also specify a default DMZ server to which all othe...

Страница 87: ...ss field enter the last digit of the IP address of your local computer that provides this service 4 Click Add The service appears in the list in the screen Add a Custom Service To define a service game or application that does not appear in the Service Name list you have to first determine which port number or range of numbers is used by the application You can usually determine this information b...

Страница 88: ...address of your local computer that provides this service 8 Click Apply The service appears in the list in the Port Forwarding Port Triggering screen Editing or Deleting a Port Forwarding Entry To edit or delete a port forwarding entry 1 In the table select the radio button next to the service name 2 Click Edit Service or Delete Service Application Example Making a Local Web Server Public If you h...

Страница 89: ...cified outbound trigger port When the router detects outbound traffic on that port it remembers the IP address of the local computer that sent the data The router then temporarily opens the specified incoming port or ports and forwards incoming traffic on the triggered ports to the triggering computer While port forwarding creates a static mapping of a port number or range to a single local comput...

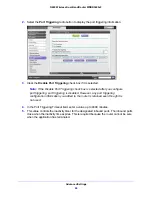
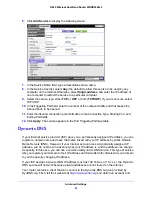
Страница 90: ...after you configure port triggering port triggering is disabled However any port triggering configuration information you added to the router is retained even though it is not used 4 In the Port Triggering Timeout field enter a value up to 9999 minutes 5 This value controls the inactivity timer for the designated inbound ports The inbound ports close when the inactivity time expires This is requir...

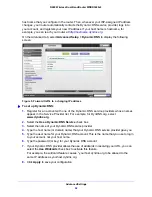
Страница 91: ...ppears in the Port Triggering Portmap table Dynamic DNS If your Internet service provider ISP gave you a permanently assigned IP address you can register a domain name and have that name linked with your IP address by public Domain Name Servers DNS However if your Internet account uses a dynamically assigned IP address you do not know in advance what your IP address is and the address can change f...

Страница 92: ...service providers whose names appear in the Service Provider list For example for DynDNS org select www dyndns org 2 Select the Use a Dynamic DNS Service check box 3 Select the name of your Dynamic DNS service provider 4 Type the host name or domain name that your Dynamic DNS service provider gave you 5 Type the user name for your Dynamic DNS account This is the name that you use to log in to your...

Страница 93: ... router two implicit static routes were created A default route was created with your ISP as the gateway and a second static route was created to your local network for all 192 168 1 x addresses With this configuration if you attempt to access a device on the 134 177 0 0 network your router forwards your request to the ISP The ISP forwards your request to the company where you are employed and the...

Страница 94: ...eported in RIP 4 Select the Active check box to make this route effective 5 Type the IP address of the final destination 6 Type the IP subnet mask for this destination If the destination is a single host type 255 255 255 255 7 Type the gateway IP address which has to be a router on the same LAN segment as the N600 Wireless Dual Band Router 8 Type a number between 1 and 15 as the metric value This ...

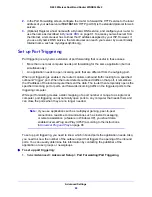
Страница 95: ...ols It can be up to 30 characters 2 Select the Turn Remote Management On check box 3 Under Allow Remote Access By specify the external IP addresses allowed to access the router s remote management Note For enhanced security restrict access to as few external IP addresses as practical To allow access from a single IP address on the Internet select Only This Computer Enter the IP address that is all...

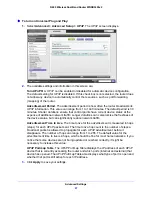
Страница 96: ...om port number For example if your external address is 134 177 0 123 and you use port number 8080 enter http 134 177 0 123 8080 in your browser USB Settings For added security the router can be set up to share only approved USB devices See Specify Approved USB Devices on page 56 for the procedure Universal Plug and Play Universal Plug and Play UPnP helps devices such as Internet appliances and com...

Страница 97: ...affic Longer durations can compromise the freshness of the device status but can significantly reduce network traffic Advertisement Time to Live The time to live for the advertisement is measured in hops steps for each UPnP packet sent The time to live hop count is the number of steps a broadcast packet is allowed to propagate for each UPnP advertisement before it disappears The number of hops can...

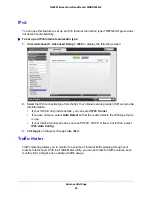
Страница 98: ...an provide this information If your ISP did not provide details you can select IPv6 Tunnel If you are not sure select Auto Detect so that the router detects the IPv6 type that is in use If your Internet connection does not use PPPoE DHCP or fixed but is IPv6 select IPv6 Auto Config 3 Click Apply so that your changes take effect Traffic Meter Traffic metering allows you to monitor the volume of Int...

Страница 99: ... traffic only Both Directions The restriction is applied to both incoming and outgoing traffic 4 You can limit the amount of data traffic allowed per month by specifying how many Mbytes per month are allowed or by specifying how many hours of traffic are allowed 5 Set the Traffic Counter to begin at a specific time and date 6 Set up Traffic Control to issue a warning message before the monthly lim...

Страница 100: ...NETGEAR support site at http support netgear com for product and contact information This chapter contains the following sections Quick Tips Troubleshooting with the LEDs Cannot Log in to the Router Cannot Access the Internet Changes Not Saved Incorrect Date or Time Wireless Connectivity Restore the Factory Settings and Password Troubleshoot Your Network Using the Ping Utility ...

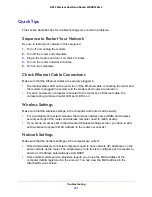
Страница 101: ...e the corresponding numbered router LAN port LED is on Wireless Settings Make sure that the wireless settings in the computer and router match exactly For a wirelessly connected computer the wireless network name SSID and wireless security settings of the router and wireless computer need to match exactly If you set up an access list in the Advanced Wireless Settings screen you have to add each wi...

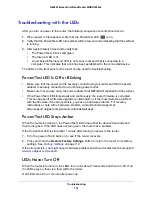
Страница 102: ... Test LED blinks slowly and continuously the router firmware is corrupted This can happen if a firmware upgrade is interrupted or if the router detects a problem with the firmware If the error persists you have a hardware problem For recovery instructions or help with a hardware problem contact technical support at http support netgear com general contact default aspx Power Test LED Stays Amber Wh...

Страница 103: ...net crossover cable Wireless LEDs Are Off If the Wireless LEDs stay off check to see if the Wireless On Off button on the router has been pressed This button turns the wireless radios in the router on and off The Wireless LEDs are lit when the wireless radio is turned on The Push N Connect WPS Button Blinks Amber If after using the WPS function the button blinks amber check the following Make sure...

Страница 104: ... NETGEAR router as an additional router behind an existing router in your network consider replacing the existing router instead NETGEAR does not support such a configuration If you are attempting to set up your NETGEAR router as a replacement for an ADSL gateway in your network the router cannot perform many gateway services for example converting ADSL or cable data into Ethernet networking infor...

Страница 105: ...ically your ISP provides the addresses of one or two DNS servers for your use If you entered a DNS address during the router s configuration reboot your computer and verify the DNS address You can configure your computer manually with DNS addresses as explained in your operating system documentation Your computer might not have the router configured as its TCP IP gateway If your computer obtains i...

Страница 106: ... your computer Your computer might not have the router configured as its default gateway Reboot the computer and verify that the router address www routerlogin net is listed by your computer as the default gateway address You might be running login software that is no longer needed If your ISP provided a program to log you in to the Internet such as WinPoET you no longer need to run that software ...

Страница 107: ... wirelessly to the router try to isolate the problem Does the wireless device or computer that you are using find your wireless network If not check the Wireless LEDs on the front of the router They should be lit If they are not you can press the WiFi On Off button on the back of the router to turn the router s wireless radio back on If you disabled the router s SSID broadcast then your wireless n...

Страница 108: ...y that sends an echo request packet to the designated device The device then responds with an echo reply You can troubleshoot a network by using the ping utility on your computer or workstation Test the LAN Path to Your Router You can ping the router from your computer to verify that the LAN path to your router is set up correctly To ping the router from a running Windows computer 1 From the Windo...

Страница 109: ...ng correctly replies like those shown in the previous section are displayed If you do not receive replies Check that your computer has the IP address of your router listed as the default gateway If the IP configuration of your computer is assigned by DHCP this information is not visible in your computer s Network Control Panel Verify that the IP address of the router is listed as the default gatew...

Страница 110: ...ttings Your device returns to the factory configuration settings shown in the following table Table 4 Factory default settings Feature Default behavior Router login User login URL www routerlogin com or www routerlogin net User name case sensitive admin Login password case sensitive password Internet connection WAN MAC address Use default hardware address WAN MTU size 1500 Port speed Autosensing L...

Страница 111: ...SSID name See router label Security Enabled Broadcast SSID Enabled Transmission speed Auto Country region United States in the US otherwise varies by region RF channel 6 until region selected Operating mode Up to 300 Mbps Data rate Best Output power Full Firewall Inbound communications coming in from the Internet Disabled bars all unsolicited requests Outbound communications going out to the Inter...

Страница 112: ...emperature 0 to 40 C 32º to 104ºF Operating humidity 90 maximum relative humidity noncondensing Electromagnetic emissions FCC Part 15 Class B VCCI Class B EN 55 022 CISPR 22 Class B C Tick N10947 LAN 10BASE T or 100BASE TX RJ 45 WAN 10BASE T or 100BASE TX RJ 45 Wireless Maximum wireless signal rate complies with the IEEE 802 11 standard See the footnote for the previous table Radio data rates Auto...

Страница 113: ...Europe ETSI 5 GHz 5 18 5 24 5 745 5 825 GHz US 5 18 5 24 GHz Europe ETSI FCC 5 25 5 35 GHz DFS band 5 47 5 725 GHz DFS band 5600 5650 MHz is disabled and unavailable for use CE Europe ETSI 5 25 5 35 GHz DFS band 5 47 5 725 GHz DFS band 802 11 security WPA PSK WPA2 PSK and WPA WPA2 Enterprise Table 5 WNDR3400v2 Router specifications continued Feature Description ...

Страница 114: ...tates and Switzerland This device may not be used for setting up outdoor radio links in France and in some areas the RF output power may be limited to 10 mW EIRP in the frequency range of 2454 2483 5 MHz For detailed information the end user should contact the national spectrum authority in France FCC Requirements for Operation in the United States FCC Information to User This product does not con...

Страница 115: ...rated Selection of other channels is not possible This device and its antenna s must not be co located or operation in conjunction with any other antenna or transmitter Canadian Department of Communications Radio Interference Regulations This digital apparatus Product Name Model does not exceed the Class B limits for radio noise emissions from digital apparatus as set out in the Radio Interference...

Страница 116: ...tilisant les mêmes canaux Les utilisateurs de radars de haute puissance sont désignés utilisateurs principaux c à d qu ils ont la priorité pour les bandes 5250 5350 MHz et 5650 5850 MHz et que ces radars pourraient causer du brouillage et ou des dommages aux dispositifs LAN EL Interference Reduction Table The following table shows the recommended minimum distance between NETGEAR equipment and hous...

Страница 117: ...outer 106 compliance 114 configuration file 72 73 configuring DMZ server 39 Dynamic DNS 92 NAT 38 port forwarding 86 port triggering 89 QoS 44 repeater unit 81 user defined services 61 connecting wirelessly 8 country setting 35 crossover cable 103 CTS RTS Threshold 77 custom service port forwarding 87 D dashboard 20 data packets fragmented 39 date and time 107 daylight savings time 107 default DMZ...

Страница 118: ...t information 17 Internet Setup screen fields 23 Internet services blocking access 61 interval poll 68 IP addresses current 67 DHCP 17 dynamic 91 reserved 43 IP subnet mask 68 K keywords 60 L label product 14 LAN port QoS for 46 settings 67 LAN setup 41 language setting 35 large files sharing 52 lease DHCP 69 LEDs troubleshooting 102 verifying cabling 15 local servers port forwarding to 86 logging...

Страница 119: ...81 reserved IP adresses 43 restarting network 101 restoring configuration file 73 default factory settings 13 108 router interface described 20 router status viewing 67 S scheduling keyword and service blocking 63 secondary DNS 24 security 27 firewall settings 59 see also security options security options 32 security PIN 14 36 sending logs by email 63 serial number product label 14 services blocki...

Страница 120: ...8 troubleshooting 107 wireless devices adding to the network 21 Wireless Distribution System WDS 78 79 Wireless LEDs troubleshooting 103 104 wireless mode 29 wireless network name SSID broadcasting 29 described 29 product label 14 wireless network settings 29 wireless radio 77 wireless repeating 78 79 base station 80 repeater unit 81 wireless security options 32 Wireless Settings screen 27 71 chec...

Отзывы: