


www.netcomm.com.au
Rev. 1 - YML667
Page 4
NP5000 Wireless Multi-Port Print Server User Guide
Section 2 - Connecting your Wireless Print Server
This section describes how to install the Wireless Print Server in your Local Area Network.
1. Preparation
■
Ensure the power is OFF. Do not connect the Wireless Print Server while power is On.
■
Find the Default Server Name for your Print Server. The Default Server Name is shown
on a sticker on the base of the device. It consists of 8 letters and/or digits. Record this
name; it may be needed during configuration.
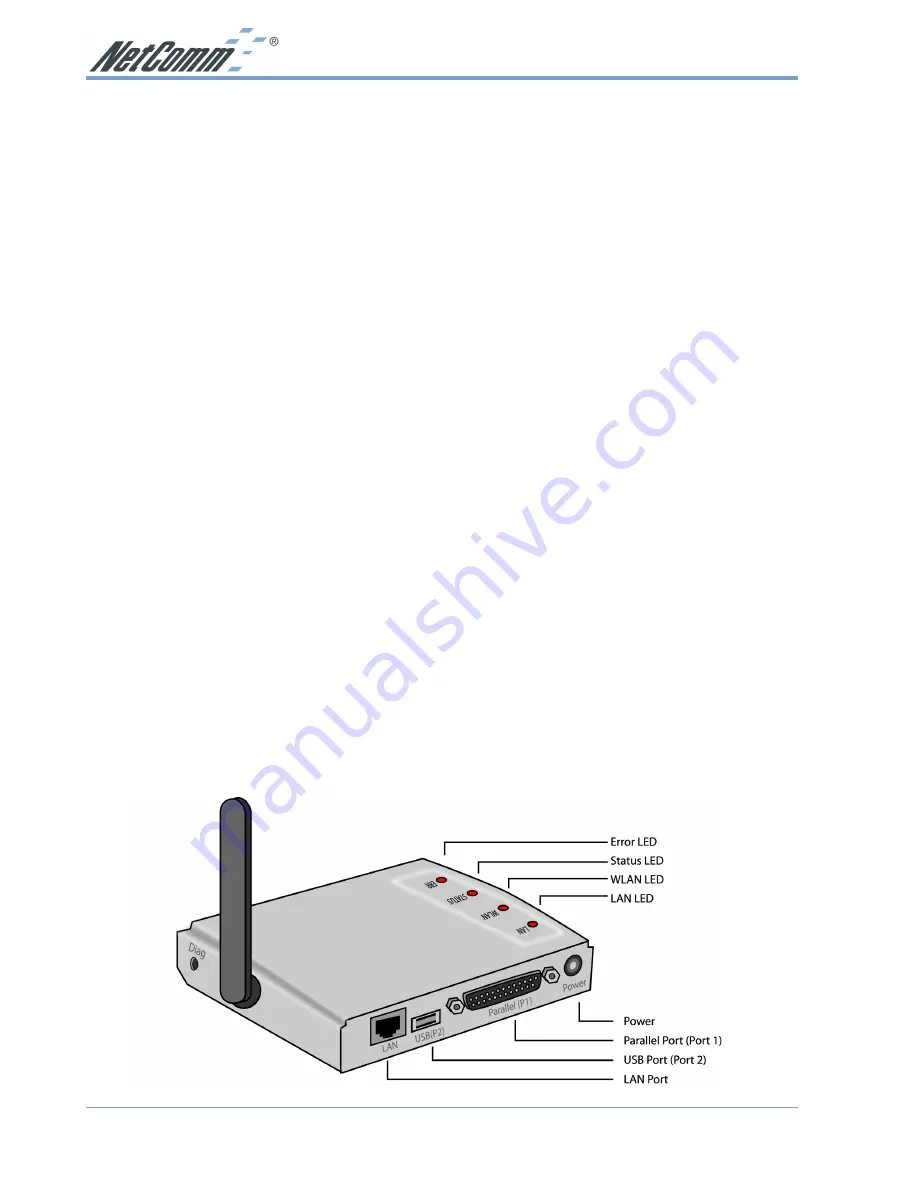
2. Connect the Printer
Connect the parallel printer and USB printer cables to the appropriate ports on the Wireless
Print Server unit. Parallel port cables should be less than 3 meters long.
3. Connect the Network Cable
■
Connect the network cable to the proper connector on the Wireless Print Server. The
Wireless Print Server will automatically recognize whichever connector is used.
Note: This will disable the Wireless interface, because the default "Infrastructure
mode" wireless setting can NOT be used with the LAN interface. To use both
the LAN and Wireless interfaces, the Wireless mode must be set to "Ad-
hoc".After configuration, the LAN interface can be disconnected if not
required.For LAN application, the LAN cable need to be inserted before
power ON.
4. Power Up
Plug in the power adapter cable and power up. Start-up will take only a few seconds.
5. Check the LEDs
■
The Red Error LED should flash, then turn Off. When the Red LED goes off and the
Green LED remains lit or flashes, the Wireless Print Server is ready. The Red Error LED
will remain flashing if the Wireless Print Server can't connect to the printer.


