background image

7

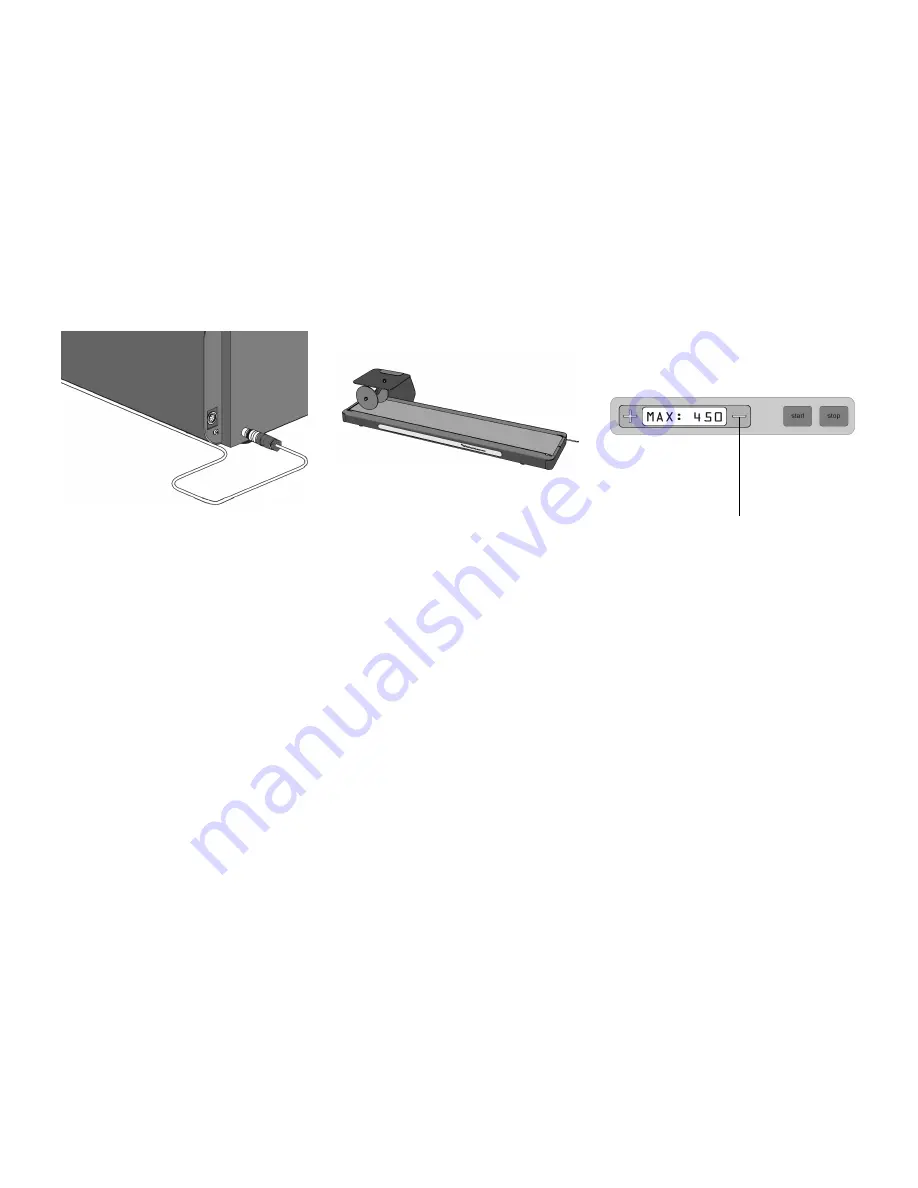
6.2 Conveyor belt

Instead of a receiving tray, a conveyor belt can be

connected (as shown in fig. 15). The mail can then be

processed by two or more persons. The conveyor

belt is connected to the socket at the back of the letter

opener as shown in figure 14.

After pressing “START” the conveyor belt will start

moving. The opened envelopes will be fed one after

another onto the belt. A sensor is located at the end

of the conveyor belt. This sensor will stop the machine

when the envelopes are not taken of the belt and

have reached the end of the belt. The moment the

documents are taken off the belt, the machine will

start processing again.

6.3 Two conveyor belts

It is possible to use two conveyor belts. This is

convenient when two or more persons are processing

the opened mail.

After pressing “START” the conveyor belts will start

moving. The opened envelopes will be fed one after

another onto the first belt. The sensor located at the

end of the last conveyor belt will stop the machine

when the envelopes are not taken of the belt and

have reached the end of the belt. The moment the

documents are taken of the belt, the machine will start

processing again.

When either a receiving tray with sensor or a conveyor

belt is used, an applicable job has to be selected first.

Fig. 14

Fig. 15

Fig. 16

6.4 Preset counter

The LO-1 can be equipped with a preset counter. The

machine stops when the preset number of envelopes to

be opened is reached.

The preset counter can only be altered when the machine

is in stop mode. After pressing the “-” key A for four

seconds the display will show “MAX: xxxx” as shown in

fig. 16. The number displayed is the last used value for

the preset  counter. Then the preset counter can be

changed per digit. Select the digit by pressing the “start”

key. The respective digit will flash and can be altered by

pressing the “+” or the “-” key. By pressing the “stop”

key any changes are saved and the machines switches

back into “stop” mode.

If the preset counter is set to 0 (zero), the preset counter

is not used.

A

Содержание IM 30

Страница 1: ... MANUAL 1 FUNCTION The IM 30 is used to open envelopes The envelope is opened along three sides after which it is presented to the operator on a receiving tray at the front The Letter Opener can process envelopes of a wide variety Fig 1 ...

Страница 2: ...SYMBOLS In this manual the following symbols are used Warning this symbol indicates a wrong action which can cause a hazard to health or damage the machine Warning this symbol indicates a hazard to life because of high voltage NOTE Additional information 2 GENERAL Before using this machine thoroughly read the operating instructions In the European Union an operator manual printed in the national l...

Страница 3: ...ainst the mail 3 3 Choosing the opening of the mail The envelopes can be opened on maximal three sides as shown in figure 5 The cutting of a particular side can be thrown out of operation by turning the levers A B or C clockwise towards By turning the levers counter clockwise towards the cutting is put into operation again Be sure that the levers A B or C are completely turned counter clockwise wh...

Страница 4: ...ng the or key quickly two times a graphical display of the speed is shown as shown in fig 9 Now the speed can be changed by pressing the faster or slower key several times depending on the desired speed Each time the or key is pressed a change of 100 envelopes per hour is initiated The speed can vary from 900 to 2400 envelopes per hour When the or key is not pressed for longer than two seconds the...

Страница 5: ...he top cover Then remove the envelope from the position which is indicated in the display When needed lift the cutting knives by turning the levers A B and C fig 10 clockwise towards It is possible that scraps of paper from the envelope remain behind These can easily be removed with the supplied cleaning tool or brush To remove scraps of paper open the cover Lift the cutting knives by rotating lev...

Страница 6: ...for example A and B in figure 12 The sensors might get dusty after intensive use When this happens the display will alternately show the counter and the message CLEAN DUST Although the machine will still operate it is best to clean the sensors as soon as possible If the cleaning is delayed the display will show the message after every 10th envelope The machine will stop entirely after processing a...

Страница 7: ...t belt The sensor located at the end of the last conveyor belt will stop the machine when the envelopes are not taken of the belt and have reached the end of the belt The moment the documents are taken of the belt the machine will start processing again When either a receiving tray with sensor or a conveyor belt is used an applicable job has to be selected first Fig 14 Fig 15 Fig 16 6 4 Preset cou...

Страница 8: ...ervice personnel only For service please contact your authorized distributor 7 2 General cleaning The machine must be kept in proper condition by regularly removing dust paper remains etc The following guidelines can be used clean the feeding roller of the envelope hopper every day or after every 1000 envelopes with a slightly wetted cloth clean the sensors with the supplied brush every week or af...

Страница 9: ... depending on mode of operation Operating temperature 10 40 C 50 122 F Humidity 10 90 Power consumption 100 120 V AC 50 60 Hz 2 3 3 0 Amps 220 240 V AC 50 Hz 1 2 1 5 Amps Approvals conforms to IEC 950 and derivatives UL listed ITE File E153801 BS EN60950 File SM11322 Envelope specifications minimum maximum width 140 mm 5 5 inch 260 mm 10 2 inch length 85 mm 3 3 inch 175 mm 6 9 inch thickness 4 mm ...

Страница 10: ...10 ...

Отзывы: