background image

en

17

Washing dishes

Reduce costs!

If only a small number of
dishes have been loaded into
the dishwasher, selecting a
programme that operates at
the next lowest temperature
will usually suffice.

Programme data

The stated programme data are based on
standard operating conditions.  The values
can vary considerably according to:

different amounts of dishes
temperature of mains water supply
pressure of mains water supply
ambient temperature
fluctuations in mains voltage
machine-related factors (e.g.
temperature, water volume, ...).

Energy and water consumption is reduced
by up to 1/4 when dishes are washed in
the upper basket only.
Water consumption values are based on a
water hardness setting of 2.

Switching ON the appliance

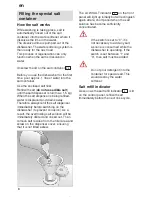
Open water tap fully.
Switch ON main switch 

1

.

The selection of the most recently
selected programme light up.
This programme will be performed
unless another programme button 

6

is pressed.
Close the door. 
The programme starts automatically.

End of programme

The programme has come to an end when
the PROGRAMME END indicator 

3

 and

the indicator for the selected programme
are both lit up.
Apart from this, the end of the programme
is indicated by a buzzer. This function can
be changed as follows:–

Hold down the function button 

C

 and

switch on the main switch 

1

.

 Function button 

C

 flashes.

Each depression of function button 

C

changes the buzzer in 4 stages (from
off to loud).
Switch off the main switch 

1

.

 The setting is stored.

Switching the dishwasher OFF

Several minutes after the programme has
ended:

Open the door when the programme
has ended.
Set main switch 

1

 to OFF.

Turn the water tap off.
(Does not apply when Aqua-Stop unit
has been fitted)
Remove dishes, etc. when they have
cooled down.

Содержание S5443X2GB

Страница 1: ...en Instructions for Use 5600 0 47 208 8205 ...

Страница 2: ...the special salt container 8 Filling the rinse aid container 9 Unsuitable dishes 10 Arranging crockery glasses etc in the dishwasher 11 Detergents 14 Programme overview 16 Washing dishes 17 Maintenance and care 18 Fault finding 20 Customer Service 23 Important information 23 Installation 24 ...

Страница 3: ...ductor system of the domestic electricity supply has been installed correctly Electrical connection conditions must correspond with the specifications on the rating plate of the dishwasher Built under and built in appliances should always be installed under a continuous work surface which is attached to the adjacent cupboards in order to ensure that the appliance is entirely stable After the appli...

Страница 4: ...of the dishwasher There could still be some detergent left inside If a fault occurs Repairs or other work on the dishwasher should only be carried out by a qualified specialist The dishwasher must be disconnected from the electricity supply before any repairs or other work are started Pull the mains plug out of the wall socket or switch off at the fuse box Grasp the plug to remove it from the sock...

Страница 5: ...nce interior 20 Upper basket with 2 tiered cup rack 21 Additional cutlery basket for the top basket 22 Upper spray arm 23 Lower spray arm 24 Container for special salt with level indicator 25 Filters 26 Cutlery basket 27 Lower basket 28 Locking mechanism 29 Container for rinse aid with level indicator 30 Detergent compartment 31 Nameplate not on all models You will need to purchase the following b...

Страница 6: ... programme button B and switch on the main switch 1 then release the buttons The display 4 flashes and buttons A and B illuminate Hardness value 2 was set at the factory To change the setting Press programme button B Each depression of the button increases the set value by one 0 3 If buttons A B and C illuminate the maximum hardness value has been reached If the hardness value is now increased aga...

Страница 7: ...and drains away Therefore always refill the salt dispenser immediately before switching on the dishwasher to prevent corrosion As a result the overflowing salt solution will be immediately diluted and rinsed out Then remove salt residue from the filler area and screw on the dispenser cover ensuring that it is not fitted askew The LOW SALT indicator 4 on the front panel will light up initially but ...

Страница 8: ... only rinse aid for domestic dishwashers Spilt rinse aid may result in excessive foam formation in the next rinse cycle Therefore remove any spilt rinse aid with a cloth Adjusting the amount of rinse aid The amount of rinse aid added to the water can be varied by adjusting the stepless control The rinse aid control has been set to 4 in the factory Do not alter the setting of the rinse aid control ...

Страница 9: ...rials such as sponges and cloths must not be cleaned in the dishwasher either Recommendation In future buy only dishes which are identified as dishwasher safe Note Dishes which are soiled with ash wax lubricating grease or ink must not be cleaned in the dishwasher Damage to glassware and other dishes Possible causes type of glass or manufacturing process chemical composition of detergent water tem...

Страница 10: ...shwasher as they could easily fall out of the baskets Removing the dishes To prevent water dripping from the top basket onto the dishes in the lower basket we recommend that you empty the lower basket first and then the top basket Cups and glasses Upper basket 20 on applicable models Pots and pans Lower basket 27 Cutlery Cutlery should always be inserted in random order with the handles pointing d...

Страница 11: ...tall glasses and those with long stems against the shelf not against other items to be washed Long items serving cutlery salad servers or knives should be placed on the shelf so that they do not obstruct the rotation of the spray arms The shelf can be folded back when not required for use Adjusting position of basket not on all models 86cm 81cm Ø max 30 25cm Ø max 20 25cm Ø max 34 29cm Ø max 20 25...

Страница 12: ...o levers on the left and right sides of the basket Always take hold of the side of the basket on the upper edge otherwise the basket will not drop smoothly and may damage the utensils To raise the basket take hold of the basket on the upper edge and pull upwards Before you re insert the basket ensure that it is at the same height on both sides Otherwise the appliance door cannot be closed and the ...

Страница 13: ...erature programme or increasing the amount of detergent or using a detergent that contains chlorine Check the label on the detergent packaging to determine whether a particular product is suitable for use with silverware If you have any further questions we recommend that you contact the customer advice departments of the various detergent manufacturers Detergent compartment with measuring marks T...

Страница 14: ...ng when using combined cleaning products which eliminate the need for a rinsing agent or salt for example Some products with a built in rinsing agent are only used to their full effect in certain programmes This type of product does not generally produce the desired effect with automatic programmes Products which eliminate the need for regeneration salt can only be used within a certain water hard...

Страница 15: ...tle very little stuck on hard looselyattached Normal 65 Intesive 70 Eco 50 Quick 35 Pre rinse Drying Rinse aid 70 Second rinse First rinse Wash 65 Pre rinse Main rinse Rinse aid 55 Wash 35 Rinse off if the dishes have been stacked for several days in the dishwasher prior to washing Pre rinse Rinse aid 70 Drying Drying Main rinse Rinse aid 65 Wash 50 Pre rinse Third rinse Pre rinse 50 Wash 70 First...

Страница 16: ... main switch 1 The selection of the most recently selected programme light up This programme will be performed unless another programme button 6 is pressed Close the door The programme starts automatically End of programme The programme has come to an end when the PROGRAMME END indicator 3 and the indicator for the selected programme are both lit up Apart from this the end of the programme is indi...

Страница 17: ...that you have not yet closed the door If it is necessary to change the programme after this the programme cycle that has already begun e g washing will still carry on to the end Maintenance and care You can help prevent faults by checking and maintaining your appliance regularly This will save time and reduce problems Therefore you should occasionally examine the inside of your dishwasher Overall ...

Страница 18: ...ay arms 22 and 23 and the arm mountings Inspect the nozzles in the spray arms for blocked holes due to remnants of food If necessary pull the lower arm 23 upwards and lift it off Unscrew the upper spray arm 22 Clean both spray arms under running water Refit the spray arms Ensure that the lower arm has locked into place and the upper one is screwed tight 0 1 2 3 Spray arms ...

Страница 19: ...nor problems yourself Experience has shown that you can resolve most problems that arise during normal daily usage yourself without having to call out a service engineer Not only does this save costs but it also means that the appliance is available for use again that much sooner The following list of common occurrences and their remedies should help you identify the causes of most problems Proble...

Страница 20: ... has ended Blockage or kink in drainage hose Pump is jammed Filters are blocked The programme is still running Wait for the programme to end programme end display will illuminate Perform Reset function during washing Unusual amount of foam is created Normal washing up liquid has been poured into the rinse aid container Remove any spilled rinse aid with a cloth as it could otherwise lead to excessi...

Страница 21: ...gh water is quite hard no salt has been put in appliance Water softener was set too low Lid on salt container is not screwed tight If you used a phosphate free detergent try a detergent containing phosphates and compare results Dishes cutlery etc have not been dried Selected programme did not include drying function Amount of rinse aid was set too low Items were removed from dishwasher too soon Gl...

Страница 22: ...ocked inside and are not exposed to the risk of suffocation Your new appliance was protected by suitable packaging while it was on its way to you All materials used for this purpose are environment friendly and can be recycled Please make a contribution to protecting the environment by disposing of the packaging appropriately Do not allow children to play with any parts of the packaging There is a...

Страница 23: ... the drainage spigot of the siphon Ensure that the drainage hose is not kinked crushed or twisted ensure that there is no sealing cover which prevents the waster water from flowing away Fresh water connection Using the enclosed parts connect the fresh water connection to the tap according to the installation instructions Ensure that the fresh water connection is not kinked crushed or twisted When ...

Страница 24: ...n If the appliance is not kept upright during transport any water left inside may seep into the control module and cause subsequent errors with programme functions The appliance must be drained in the following sequence Turn on the tap Set main switch to ON Select the A programme Wait for approximately 4 minutes Terminate the programme by pressing A and C simultaneously Wait a further minute and t...

Страница 25: ......

Страница 26: ......

Страница 27: ... damage in the case of private consumers 2 This liability warranty is valid for the service life of the appliance 3 The warranty claim is subject to correct installation and connection of the appliance in accordance with our instructions This also includes correct installation of the Aqua Safe extension original accessory Our warranty does not cover defective supply lines or fittings up to the Aqu...

Отзывы: