background image

FlexPAK DX

• FlexPAK DX is regularly inspected for damage or

malfunction. If FlexPAK DX is damaged, it is to be

shut down and any explosive atmosphere removed.

• There is to be no explosive atmosphere when servi-

cing or inspecting FlexPAK DX.

• Only Nederman original spare parts are to be used.
• FlexPAK DX is not be covered with thick dust layers

(>5 mm). This is prevented by setting up routines

for regular cleaning and including these in the ex-

plosion protection document.

6.2 Checks one month after installation

and every year

WARNING! Risk of electric shock

Always disconnect the supply voltage with

the maintenance switch before any service,

whether mechanical or electrical. Always lock

the maintenance switch in the off position. Do

not use the emergency stop button as a substi-

tute.

WARNING! Risk of personal injury

• Ensure that there is no vacuum present in the

system during service.

• Always disconnect the compressed air supply

before any service.

Check all power conductors and protective con-

ductors one month after installation and tight-

en, if required, to ensure good contact. Service

to the electrical equipment may only be carried

out by a qualified electrician.

One month after installation, and then every year,

perform the following checks:
• Check all power and protective conductors and

ground wire connections. Tighten, if required, to en-

sure good contact.

• Inspect the integrity of the dust separator.
• Ensure that the inside of the unit and the connec-

tion ducts are free from deposits. A build-up of de-

posits inside the duct system may cause the dis-

charge of static electricity.

• Clean the area around the unit and all areas where

the collected material is stored to ensure that there

are no dust deposits.

• Ensure that there is not any combustible material in

the risk area.

• Check that all signs/markings regarding safe opera-

tion are in place and that the personnel knows about

them.

• Verify the function of all emergency stop buttons,

alarms and signalling devices.

• Inspect the explosion venting panel and verify that

it is intact.

6.3 Empty the collector bin

WARNING! Risk of personal injury

• Ensure that there is no vacuum in the dust

separator before removing the collector bin.

• Crush hazard. Be careful when lowering and

refitting the collector bin. Use proper pro-

tective equipment.

• Wear goggles, a dust mask and gloves when

emptying the collector bin.

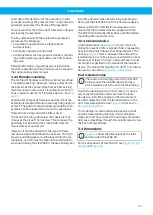
The plastic bag is to be replaced when filled up

to 2/3, see 

Figure 11

.

Do the following to replace the plastic bag:
1 Check that the risk area is clear.
2 Ensure that there is no vacuum in the dust separ-

ator.

3 Remove the collector bin.
4 Seal and remove the plastic bag. Use a cable tie or

equivalent, see 

Figure 12

.

5 Fit a new antistatic plastic bag in the collector bin,

see 

Figure 13

.

6 Refit the collector bin onto the dust separator.
7 Check that the pressure equalizer hose is attached

to the collector bin, see 

Figure 14

.

8 Check that the collector bin seals properly once

the vacuum is re-applied to the dust separator.

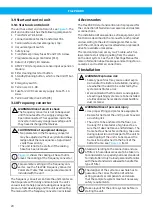
6.4 Replace the main filter

WARNING! Risk of personal injury

If a flameless venting device is used, FlexPAK

DX is heavy so lower the unit carefully. It can

fall on the individual replacing the filter or get

damaged.

Fitting the steel ring correctly is important to

maintain the tightness and durability of the

unit. Do not forget to ground it. See 

Figure 17

.

Filter replacement is to be noted in the service pro-

tocol of the unit. Replacing individual filter bags is

possible, but it is recommended that the whole filter

package is replaced since it is quicker and causes less

spreading of dust. The work is easy if the unit is placed

so it can be tilted, see 

Figure 15

. Also, the filter may be

lifted straight up, see 

Figure 16

, with a crane or other

lifting device.
If the filter bags are replaced separately, the plastic

holders will also have to be replaced.

Figure 17

, items A–C, shows how the rubber sealing

rings are to be fitted. When a used sealing ring is to

be re-used, the form when open may differ from the

original form as shown in item A. Use a screwdriver to

bring the edge of the module between the rubber lips

to obtain the result shown in item C.

25

Содержание FlexPAK DX

Страница 1: ...Installation and service manual Compact dust collectors FlexPAK DX DX Models Original installation and service manual EN INSTALLATION AND SERVICE MANUAL 2021 07 07 144885 07 ...

Страница 2: ...FlexPAK DX Trace back information Workspace Main version a2 Checked in 2021 07 07 Skribenta version 5 4 024 ...

Страница 3: ...ries 20 5 Installation 20 5 1 Delivery check 21 5 2 Installation requirements 21 5 2 1 Bolts 21 5 3 Duct dimensions and installation 21 5 3 1 Requirements 21 5 3 2 Recommendations 21 5 4 Installing the unit 22 5 4 1 Indoor installation 22 5 4 2 Outdoor installation 22 5 4 3 Moving the unit 22 5 5 Electrical installation 22 5 6 Suppression system installation 23 5 7 General requirements 23 5 8 Auto...

Страница 4: ...Loading new software 26 6 9 1 Frequency converter control panel 26 6 9 2 Firmware and software labelling 26 6 9 3 Upgrading the system 27 6 10 Spare Parts 27 6 10 1 Ordering spare parts 27 6 11 Recycling 27 6 11 1 Environmental information 27 7 Troubleshooting 28 7 1 Tools 28 7 2 Remove the lid of the start and control unit 28 8 Acronyms and abbreviations 30 9 Appendix A Installation protocol 32 1...

Страница 5: ...s AB Ph Nederman Co SWEDEN Type Art no V Ser no Hz kW 50 A kW V A 60 Hz Year of manufacture hp 1 2116mm 83 3 772 mm 30 4 1670mm 65 8 1019 mm 40 1 58 mm 2 3 45 98 mm 90 88 90 98 98 98 98 98 220 320 540 640 O 14 18x 2A 5 ...

Страница 6: ...FlexPAK DX 2116mm 83 3 1750mm 69 1650mm 65 0 120mm 4 8 80mm 3 25 1010mm 40 2B 2116mm 83 3 1114mm 43 9 1469mm 57 8 1670mm 65 7 508mm 20 0 2C 6 ...

Страница 7: ...FlexPAK DX A E E A B C D G F 3A J I H 45 3B 7 ...

Страница 8: ...FlexPAK DX 13 12 10 9 7 8 2 1 3 4 6 5 11 4A 11 7 8 9 12 13 15 14 17 16 10 18 4B 8 ...

Страница 9: ...FlexPAK DX 20 21 19 Ø 151 mm Ø 195 mm 7 68 in Ø 220 mm 8 66 in 10 mm 39 in 8x Ø 5 94 in 22 5 4 5 7 x 5 mm 20 in 4C 1 2 3 6 7 8 9 16 15 14 13 11 10 12 4 5 5 9 ...

Страница 10: ...FlexPAK DX 6 A B 7 10 ...

Страница 11: ...FlexPAK DX EMERGENCY STOP SIEMENS LOGO 12 24RC XXXXXXX XXXXX XXXX ESC OK Stop Set Param Set Prg Name 6 1 5 4 2 3 8 11 ...

Страница 12: ...FlexPAK DX 4 1 6 7 8 10 9 11 5 2 3 9 1643 1mm 65 662 1mm 26 2 1771 4 1mm 70 Ø13mm 1 1643 1mm 65 662 1mm 26 2 1771 4 1mm 70 Ø13mm 10 12 ...

Страница 13: ...FlexPAK DX 11 12 13 14 13 ...

Страница 14: ...FlexPAK DX A A A A C Min 2 1m 83 15 1 0 m 39 4 16 A B C 17 14 ...

Страница 15: ...r personnel 3 Description 3 1 Function FlexPAK DX is a complete vacuum unit with a dir ect driven side channel fan fitted as one unit on a steel frame and a start and control unit with an integ rated 24 V transformer The unit is controlled by a fre quency converter has automatic start stop and auto matic filter cleaning 3 1 1 Filtration in two stages FlexPAK DX filters particles in two stages In t...

Страница 16: ...ystem see Figure 2B Flameless venting see Figure 2C 3 3 1 Explosion venting The risk area may extend beyond the values given below The final risk area is to be evalu ated with regards to affecting factors found in Standard EN 14491 For assistance and information contact Neder man The harmful effects of an explosion are minimized by venting the pressure and flame of the explosion through an explosi...

Страница 17: ...ased into the sur roundings and this must be taken into consideration when positioning the FlexPAK DX Please consult your local fire authority when determining suitable posi tioning of the FlexPAK DX with the flameless device Please refer to the installation and service or user manual for the flameless device supplied with the FlexPAK DX to find other limitations and information regarding safe use...

Страница 18: ...mm 7 87 6 29 150 160 mm 7 87 6 29 Sound level 70 dB A 70 dB A Ambient temperature range 0 40 C 32 104 F 0 40 C 32 104 F Process air temperature 0 60 C 32 140 F 0 60 C 32 140 F Relative humidity Max 85 Max 85 Compressed air 6 7 bar 87 102 psi 6 7 bar 87 102 psi Material recycling 93 6 per weight 93 6 per weight Control filter area 1x12 m 1x129 sqft 1x12 m 1x129 sqft Control filter material Polyeste...

Страница 19: ... filter see Fig ure 4A and Figure 4B 12 Cooling valve see Figure 4A and Figure 4B 13 High pressure side channel fan with pump char acteristic see Figure 4A and Figure 4B 14 PT100 sensor see Figure 4B 15 Outlet silencer after fan see Figure 4B 16 Control Filter and filter cartridge see Figure 4B 17 Pressure sensor see Figure 4B 18 Acoustic enclosure see Figure 4B 19 Cooling air hose from the freque...

Страница 20: ...xPAK DX start and control unit is prepared for the connection of Nederman accessories and custom er connections The installation of accessories extra equipment and functions is described in the manual for each product and according to the electrical diagrams that came with the unit Consult your local Nederman represent ative for available accessories The most common accessory is a PS cable which a...

Страница 21: ...e such as PVC is not to be used Almost all types of dust pick up stat ic electricity when sucked through a plastic pipe which significantly increases the risk for an explosion if the dust is combustible Do not collect material that may cause igni tion or blocking It is strictly prohibited to col lect material that may undergo dangerous chemical or thermal reactions and or self ig nite Some types o...

Страница 22: ...ed to a heat exchanger but there are not to be any dampers that may obstruct the air flow 5 4 2 Outdoor installation If installed outdoors consider the following The area needs to be protected from the weather Cover the top of the unit to protect it from snow rain or falling debris Install a lightning conductor see Section 5 7 General requirements Environmental and ambient conditions See Sec tion ...

Страница 23: ...h a protection device 5 8 Automatic bin emptying function See the PLC Settings Manual 5 9 Machining chips and swarf extrac tion See the PLC Settings Manual 5 10 Pneumatic filter cleaning valve See the PLC Settings Manual 5 11 ATEX Duct Isolation Valve See the PLC settings Manual 5 12 Ground check measurement All metal parts of the unit are to be grounded The system is to have two independent groun...

Страница 24: ...tively in a com mon protective hose Air pressure hoses are to be anchored mechanically 6 Maintenance Read Chapter 3 Description before carrying out any maintenance work Maintenance work means that the equipment will have to be opened and possibly dis mantled This may constitute a risk and the mainten ance personnel need to know about the risks that may occur when acting incorrectly WARNING Explosi...

Страница 25: ...ces Inspect the explosion venting panel and verify that it is intact 6 3 Empty the collector bin WARNING Risk of personal injury Ensure that there is no vacuum in the dust separator before removing the collector bin Crush hazard Be careful when lowering and refitting the collector bin Use proper pro tective equipment Wear goggles a dust mask and gloves when emptying the collector bin The plastic b...

Страница 26: ...lean the motor compartment regularly The motor has 2 ball bearings The bearings are to be replaced after approximately 15 000 hours of opera tion If the ambient temperature often reaches 35 C 95 F the time between replacements is to be re duced In any case the bearings are to be replaced every fifth year The bearings are a standard type Contact Nederman or an authorized Nederman distributor for re...

Страница 27: ...rts See also w w w n e d e r m a n c o m 6 10 1 Ordering spare parts When ordering spare parts always state the following The part number and control number see the product identification plate Detail number and name of the spare part see w w w n e d e r m a n c o m e n s e r v i c e s p a r e p a r t s e a r c h Quantity of the parts required 6 11 Recycling The product has been designed for compo...

Страница 28: ...circuited If the PS cable is damaged press the Standby Running but ton to put the unit into Off mode and investigate the fault If necessary loosen the PS cable from the control unit see the electrical diagrams and use an ohmmeter across the leads in turn to locate the fault Defect PT100 tem perature sensor Check whether the PT100 sensor is defective as follows 1 Disconnect the PT100 sensor wire fr...

Страница 29: ...l have to replace the pressure sensor Deposits or blockage in ducts on the way to the unit Clean the ducts Check the transport velocity The duct system is not properly dimensioned Re dimension the duct system or add an extra suction source Valves in the duct system are not working Check the duct system valves Low vacuum or air flow The filter cleaning does not work or is insufficient Check the fun...

Страница 30: ...act your nearest authorized distributor or Nederman for technical advice Filter cleaning does not work The cleaning interval is too short Extend the cleaning interval Compressed air Pr t is 1 bar See Section 3 5 Technical data Too low compressed air pressure can result in premature filter clogging If the pres sure is lacking or too low the piston cannot open the FCV and lid properly This results i...

Страница 31: ...ressure Sensor Filter Cleaning MFDPS Wr Main Filter Differential Pressure Sensor Warning MI Maintenance interval OT Operating total PE Protective earth PLC Programmable logic controller PS Pilot signal PSIFC Pilot signal interlock filter cleaning PTC Positive temperature coefficient PES Potential equalization system PVC Polyvinyl chloride RPS Relief Panel Sensor SLV Solenoid lower valve SSR Start ...

Страница 32: ...ckets Unit No Date Performed by Control items Result Application requirements limits Material chemical thermal reaction risk Radiation heat from surroundings Delivery checks Missing components Transport damage Before installation Foundation Total weight product accessories and collected material Anchor bolts Access for maintenance filter replacement 1 m above the unit Mounting check availability M...

Страница 33: ...air valve Compressed air connected to the unit Ground check measurement Check Incoming duct Incoming mains ground GND1 External mains ground Accessories if applicable Signs and warnings Intended use marked or indicated Safe bag replacement described or indicated Initial start up function test Maintenance switch Motor the direction of rotation Automatic filter cleaning Manual filter cleaning Cover ...

Страница 34: ...sult Result Result Manual Nut VV Previous service record Inspect clean outside the unit Remove dust deposits clean work area Remove corrosion by grinding apply primer and touch up paint Vacuum measure negative pressure Cooling valve Motor bearings Fan Cooling fan motor Bearing motor fan Safety switch Box housing Main switch Cable harness Electrical connection points Ground earth connection Indicat...

Страница 35: ...ng valve check Filter bags visual check Filter bags check pressure drop perform ance The main filter replace Clean and dry air check Ground measurement check GND1 Fan Incoming duct Incoming mains ground GND1 External mains ground Gaskets check for leakage and replace if necessary Plastic bag replace Bearings motor replace Bearings fan replace Check that the ventilation of the room is clear if plac...

Страница 36: ...www nederman com ...

Отзывы: