background image


 4-56   Adding Options

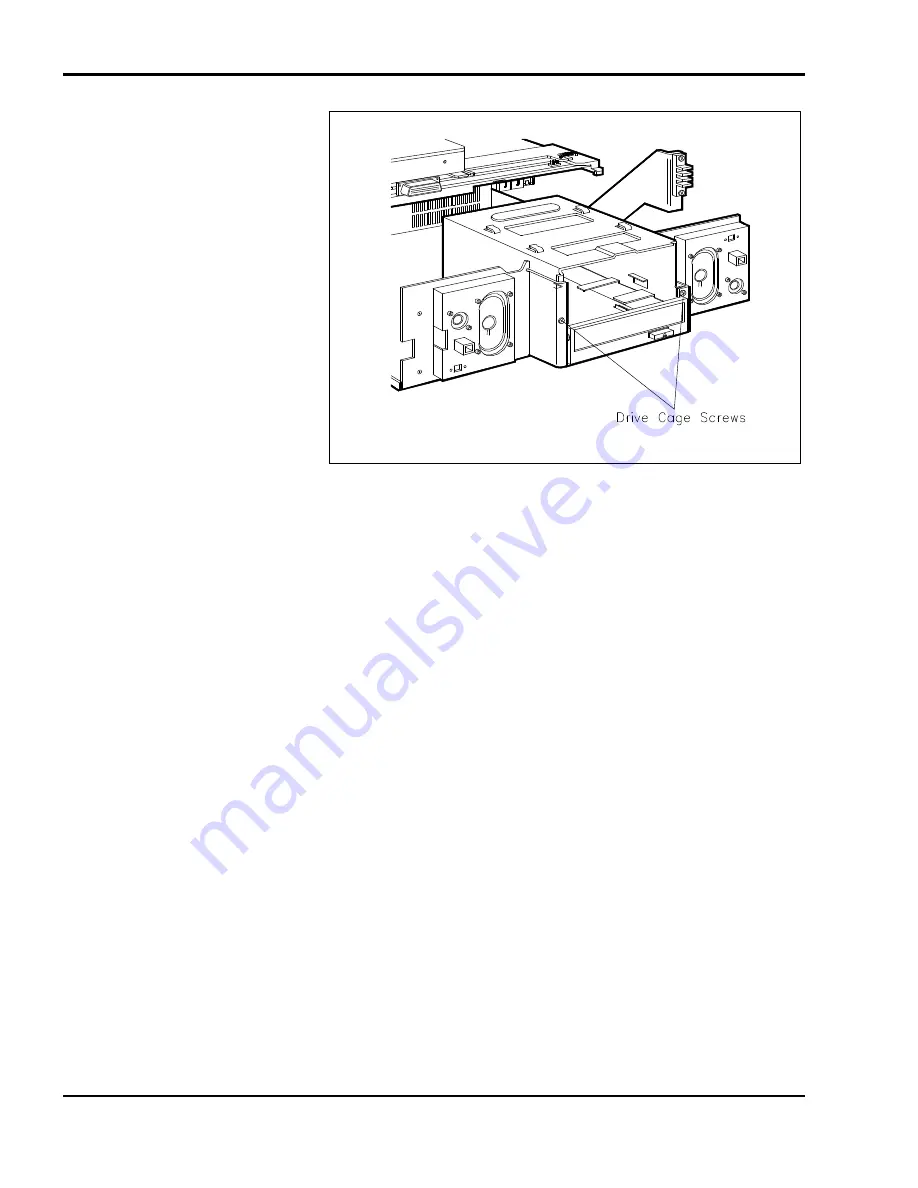
 Replacing the Drive Cage Screws

5. 

If you installed a drive that requires external access, remove the drive
slot cover from the docking station cover as follows:

n


Locate the drive slot cover tabs inside the docking station cover.

n


Gently push the tabs out until you can release the cover.

n


Remove the slot cover and store it in a safe place for possible future
use.


Содержание VERSA DOCKING STATION 6000

Страница 1: ...arranted in accordance with the terms of the Warranty Statement accompanying each product However actual performance of each such product is dependent upon factors such as system configuration customer data and operator control Since implementation by customers of each product may vary the suitability of specific product configurations and applications must be determined by the customer and is not...

Страница 2: ...ng an NEC Versa on the docking station n Chapter 3 explains setting up the software to use your docking station and NEC Versa together n Chapter 4 details how to add options to the docking station These options include expansion boards and various types of drives n Chapter 5 directs you through connecting peripheral devices like an external keyboard mouse monitor printer and audio options n Append...

Страница 3: ...being discussed n Names of keys are printed as they appear on the keyboard for example Ctrl Alt or Enter n Text that you must type or keys that you must press are presented in bold type For example type dir and press Enter RELATED DOCUMENTS See the following documents for information related to the NEC Versa Se ries Docking Station 6000 and NEC Versa operation n Your NEC Versa user s guide n The M...

Страница 4: ... Environment 1 11 Storage Environment 1 11 Docking Station 6000 Care 1 11 Precautions 1 11 Routine Care 1 12 Battery Charging 1 13 2 Docking Undocking the NEC Versa Hardware Setup 2 1 Connecting the Power Cable 2 1 Preparing the NEC Versa for Docking 2 4 Docking the NEC Versa 2 6 Undocking the NEC Versa 2 10 Normal Undocking 2 10 Emergency Undocking 2 12 3 Setting Up and Using the Software Plug an...

Страница 5: ...the Drive Cage 4 13 Attaching the Drive to the Drive Cage 4 15 Attaching the Cables 4 17 Finishing Up 4 30 Hard Disk Drives 4 32 Preparing the Hard Disk Drive 4 33 Specifying Master and Slave Drives 4 33 Installing the Drive 4 34 Attaching IDE Drive Cables 4 36 Attaching SCSI Drive Cables 4 41 VersaBay II Adapter Installation 4 45 Removing the Drive Cage 4 45 Securing the NEC VersaBay II Adapter 4...

Страница 6: ... 9 Gaming Devices 5 10 Parallel Devices 5 10 Serial Devices 5 12 External SCSI Devices 5 13 A Specifications B Pin Assignments Keyboard and Mouse Ports B 1 COM Port B 2 Printer Port B 3 Monitor Port B 4 AT Interface Connectors B 5 Expansion Port B 8 C Solving Problems Problem Checklist C 1 Troubleshooting C 1 If You Need Help C 2 ...

Страница 7: ...vi Contents ...

Страница 8: ...y the docking station supports the newest Plug and Play boards as well as older non Plug and Play legacy boards The sleek ergonomic docking station design makes it pleasant to look at and easy to use Its innovative docking mechanism insures secure and easy docking and undocking This chapter describes the features and capabilities of the docking station WHAT S IN THE BOX Carefully unpack the shippi...

Страница 9: ... described in greater detail in the sections that follow n Support for full Windows 95 configuration and Plug and Play options n Support for Windows for Workgroups and MS DOS 6 22 n Support and on board connectors for both SCSI and IDE interfaces n An electronic docking mechanism that makes docking and undocking easier than ever n A CRT base that lets you put an external monitor on top of the dock...

Страница 10: ...osition lock to ensure that your NEC Versa is not undocked or your docking station used without authorization n Stereo speakers for outstanding quality sound n Ports on the back of the unit for connecting external peripherals like a PS 2 style keyboard PS 2 style mouse printer monitor and much more n LEDs on the front of the docking station to track docking station and NEC Versa status n Three dri...

Страница 11: ...s These allow air circulation to keep the docking station and its components from over heating n LEDs Five LEDs on the front of the docking station let you monitor docking status hard disk drive access diskette drive access NEC Versa battery and Keylock status LED functions and lighting sequences are described in the next section under LEDs n Volume Control Knob This conveniently located knob lets...

Страница 12: ...se and the Locked setting to secure your system to the docking station Normal this default position allows you to dock or undock the NEC Versa through software for Windows 95 Plug and Play systems or the Eject button Set the key lock to this position for normal use To prevent electrical damage manual undocking is not allowed when the lock is in this state Locked secures your NEC Versa to the docki...

Страница 13: ...g status LED lights steady green indicating that it is ready for docking Blinking Green If docking or undocking is unsuccessful due to an error or jam the LED blinks Steady Yellow Once the NEC Versa docking process completes successfully the LED lights a steady yellow n Hard Disk Drive Access lights green when a hard disk drive in either the NEC Versa or the docking station is being accessed n Dis...

Страница 14: ...Manual or Locked and a software eject command was issued or the Eject button was pressed Back Features Features on the back of the docking station are shown in the following figure Descriptions follow the figure Features on the back of the docking station n Thumbscrews secure the cover to the docking station When un screwed allow cover removal n Keyboard Connector allows the connection of an exter...

Страница 15: ...rd to the docking station and AC power n Voltage Selection Switch lets you select the correct voltage to use in your area n Docking Station Power Switch lets you turn on power to the docking station n Fan Assembly Provides proper cooling for the power supply that regu lates power in the docking station n SCSI II Port lets you connect an external SCSI 2 device like an exter nal CD ROM scanner or ha...

Страница 16: ...r another audio system Connect this port to a Line In port on another audio system to play or record Audio ports Internal Features Internal NEC Docking Station 6000 features are shown next The following figure shows the docking station with its cover removed Descriptions of in ternal features follow the figure ...

Страница 17: ...ccess Bay allows the installation of up to two 5 1 4 inch half height drives n Hard Disk Drive Bay lets you install one 3 1 2 inch internal hard disk drive n I O Connectors One each of the following Diskette Drive Connector IDE Disk Connector SCSI Disk Connector n LED Bracket supports docking station status LEDs and volume control knob n Speakers provide exceptional sound for the integrated dockin...

Страница 18: ...torage Environment Store the docking station in a location that meets the following conditions n Temperature 4 F to 122 F 20 C to 50 C n Humidity 15 to 85 noncondensing DOCKING STATION 6000 CARE With protective measures and proper care you can keep your docking sta tion in top operating condition Follow the measures given next to maintain your docking station Precautions Follow these precautions w...

Страница 19: ...external monitor Do not place other heavy ob jects on the CRT base Routine Care Maintain the condition of your docking station by periodically following the general procedures listed next WARNING For safety power off and unplug the docking station and NEC Versa before cleaning n Clean the outside of the docking station with a soft clean cloth n Remove stubborn stains with a cloth slightly dampened...

Страница 20: ...GING The docking station charges the battery installed in your NEC Versa as long as the computer is docked the docking station is plugged into AC power and main docking station power switch is on Battery charging occurs whether or not you are using your system ...

Страница 21: ...e first time you use the NEC Docking Station 6000 you must set system parameters on the NEC Versa hard disk You must set docking station parameters on every hard disk drive that you plan to use with the docking station These procedures are de scribed in Chapter 3 This chapter also describes how to undock the NEC Versa from the docking station when you want to use the notebook by itself Connecting ...

Страница 22: ... flat surface close to an AC outlet 2 Verify that the voltage selection switch is set correctly for your country Insert a pointed object like the tip of a ball point pen to move the switch to the correct setting The switch is set at the factory for 115 voltage Locating the voltage selection switch 3 Attach one end of the cable to the AC power port on the docking station 4 Attach the other end to a...

Страница 23: ...r switch on the back of the docking station Press ON to turn on docking station power Docking station power must be turned on for the electronic docking mechanism to work Pressing the main power button on the back of the unit provides the necessary power Powering on the docking station ...

Страница 24: ...Versa power for your system as follows n If you have a Plug and Play NEC Versa you can either put your sys tem into Suspend mode or leave power on for docking For example the NEC Versa 6000 with Windows 95 running is a Plug and Play system n If you have a non Plug and Play system turn off system power before docking Systems running Windows for Workgroups do not support plug and play Make sure your...

Страница 25: ...on See Connecting the Power Cable for details The Docking LED should be a steady green which indicates that it is ready for docking Docking LED 4 On the back of the NEC Versa open the expansion port cover and slide it underneath the expansion port Check that all other NEC Versa port covers are closed Opening the NEC Versa expansion port cover ...

Страница 26: ...ower on and the system in Suspend mode This procedure can be used with NEC Versa 6000 systems with the Windows 95 operating system n Hot Docking with NEC Versa power on This procedure can be used with NEC Versa 6000 systems with the Windows 95 operating system Use the following steps to dock your NEC Versa 1 Locate the expansion connector on the docking station Locating the expansion connector 2 S...

Страница 27: ...e computer is pushed at an angle it does not dock properly To prevent connector damage the docking mechanism will not start to dock if the expansion connectors are not aligned properly If this occurs adjust the NEC Versa position by lifting the front of the com puter or shifting it left or right The sensor inside the docking connector detects the NEC Versa and initiates the mechanical docking sequ...

Страница 28: ...rmal use and the Locked setting to secure your system to the docking station The keylock LED lights a steady green when set to Manual Normal allows you to dock or undock the NEC Versa through software for Windows 95 Plug and Play systems or the Eject button Set the key lock to this position for normal use To prevent electrical damage manual undocking is allowed This is the default lock setting The...

Страница 29: ...s if someone tries to undock the NEC Versa while the key is in the locked position Locking the NEC Versa 5 If using the NEC Versa without an external monitor open the LCD panel 6 To turn on NEC Versa power locate the power button on the front of the docking station push it in momentarily and release it Powering on ...

Страница 30: ...andard undocking procedures follow the instructions in Normal Undocking n If power to the docking station is interrupted unexpectedly follow the in structions in Emergency Undocking You may need this procedure in case of a power failure or motor jam Normal Undocking Undock your NEC Versa as follows 1 Check the status of your NEC Versa power n If you are running Windows 95 you can either put your s...

Страница 31: ...of the docking station To use Windows 95 software to undock the NEC Versa locate the Eject icon on the screen and click The software puts your NEC Versa into Suspend mode and initiates the undocking sequence If the NEC Versa does not eject properly using the front panel Eject button go to the next section Emergency Undocking 5 Once the connection is broken pull the NEC Versa forward and remove it ...

Страница 32: ...procedure to undock the NEC Versa 1 If possible turn off NEC Versa power or put the system into Suspend mode a half moon is displayed on the LCD panel If the NEC Versa cannot be powered off or put into Suspend mode turn off the main power switch on the back of the docking station before continuing 2 Turn the docking station key to the Manual position 3 Close the NEC Versa LCD panel 4 Pull the NEC ...

Страница 33: ...ON Make sure the key is in the Manual position before MANUALLY removing the NEC Versa To prevent mechanical damage do not try to remove the NEC Versa manually with the key in any other position 5 Always turn the key back to the Normal position ...

Страница 34: ...rograms and the NEC Versa family of computers the Quick Start section at the end of this chapter may be all you need PLUG AND PLAY SYSTEMS Plug and Play systems like the NEC Versa 6000 with the Windows 95 operating system and Plug and Play BIOS require no special software installation To install the online version of the docking station user s guide on your NEC Versa simply follow the instructions...

Страница 35: ...d drive RUNNING THE SETUP UTILITY The first time you use the Docking Station 6000 you must set up the soft ware in the NEC Versa to recognize the Docking Station 6000 and make full use of its features Setting up the software as described here creates a configuration called Docking Station 6000 that your NEC Versa can use when it is connected to the Docking Station 6000 When the NEC Versa is not do...

Страница 36: ...n from the File pull down menu in Program Manager 2 Enter the CD drive letter a colon backslash and setup Press OK or Enter to start Setup For example enter one of the following d setup or e setup A Welcome screen appears 3 Respond to the utility prompts as follows Press the Next button to accept the default loading directories To change a directory press Browse and specify the new location The ut...

Страница 37: ...rts automatically 1 Select Run from the Start menu 2 Enter the CD drive letter a colon backslash and setup Press OK or Enter to start Setup For example enter one of the following d setup or e setup A Welcome screen appears 3 Respond to the utility prompts to load docking station software and EZ SCSI drivers n Press the Next button to accept the default loading directories To change a directory pre...

Страница 38: ...would normally A menu similar to the following is displayed 1 Mobile Configuration 2 Docking Station Configuration 2 Enter the appropriate number for the configuration you want to use as follows n Mobile Configuration Select this configuration to use the NEC Versa by itself n Docking Station Configuration Use this configuration when you dock your NEC Versa on the Docking Station 6000 Option Config...

Страница 39: ...ect parameters Some systems automatically detect the new device and its parameters Check that the settings reflect the options installed in the docking station Drivers Windows 95 supports multiple configurations for your NEC Versa Ver sions of MS DOS above revision 6 0 also support multiple configurations After running the NEC Docking Station 6000 Setup utility simply reboot your system when docke...

Страница 40: ...systems select Run from the Start menu Type d setup where d is the CD drive letter and press Enter or click OK Respond to the utility as prompted If you register your EZ SCSI software choose Host Adapter AIC 7870 When Setup is complete reboot your system at the prompt 6 From the Windows Program Manager access the File pull down menu and select Run Type d setup where d is the CD drive letter and pr...

Страница 41: ... for a full size or half size ISA board One combination PCI ISA card slot for a full or half size PCI or ISA board Installing these options require that you remove the docking station cover Once the options are installed you must replace the cover before using the docking station This chapter provides the information you need to remove and replace the docking station cover install expansion boards...

Страница 42: ...nnected and cables are de tached from the docking station before beginning installation proce dures 1 Turn the Docking Lock to the Manual position for easier cover removal and replacement 2 Remove the CRT Base from the docking station 3 Locate and remove the two screws next to the expansion connector Locating two screws 4 Locate and unscrew the thumbscrews on the back of the docking station ...

Страница 43: ...mbscrew locations 5 Pull the cover forward to clear the expansion connector Clearing the expansion connector CAUTION When disassembling the docking station be careful not to drop anything into it Doing so can damage the unit ...

Страница 44: ... your options are installed replace the docking station cover as follows 1 Align and lower the cover over the front of the docking station Make sure the cover clears the expansion connector CAUTION Be careful not to catch any wires or cables when replacing the cover Move cables aside if they look like they may be pinched or squeezed when you replace the cover ...

Страница 45: ...ush the cover towards the back of the docking station Make sure the expansion connector and the volume control knob protrude through the openings in the cover Replacing the cover 4 Slide the cover all the way onto the docking station 5 Replace the two screw on the front of the docking station ...

Страница 46: ...Replace the two screws next to the docking connector EXPANSION BOARDS You can install three full size or half size PCI bus or AT style expansion boards in the NEC Docking Station 6000 Before beginning the installation check the documentation that came with the board If you have any switches to set on the board do so before starting this procedure ...

Страница 47: ... electricity by touching a grounded metal object n Always hold a board by its edges Avoid touching the components on the board Slot Locations Slot locations for expansion boards are shown in the following figure Expansion slot locations These slots accommodate the following expansion board types n One slot accepts any industry standard PCI bus board n One slot accepts any industry standard 8 or 16...

Страница 48: ...g station n Turn off and unplug the docking station n Disconnect any peripheral devices connected to the docking station n Remove the docking station cover See Cover Removal earlier in this section for information on removing the cover n Position the docking station so you have access to the side where the expansion slots are located CAUTION Be careful not to drop anything into the docking station...

Страница 49: ...tion Removing the slot cover screw 3 Remove the slot cover 4 Locate the expansion slot connectors inside the docking station 5 Hold the board by its edges component side up and insert it into the slot If installing a full size board fit the board into the guide at the front of the docking station ...

Страница 50: ...crew to attach the board to the support bracket Securing the board 8 Repeat steps 2 through 7 to install a second or third expansion board 9 Once you install the boards continue as follows n To add drives continue to the next section Data Storage Devices n If you have no more options to install replace the docking station cover as described in Cover Replacement earlier in this chapter ...

Страница 51: ...nect any peripheral devices connected to the docking station n Remove the docking station cover See Cover Removal earlier in this section for information on removing the cover n Position the docking station so you have access to the side where the expansion slots are located CAUTION Be careful not to drop anything into the docking station Doing so can damage the unit 2 Remove the screw that attach...

Страница 52: ... external access to storage devices installed in it This bay accepts two standard 5 1 4 inch storage devices including disk ette hard disk tape and CD ROM drives n An internal bay provides space for one 3 1 2 inch hard disk drive NEC Versa series systems and the docking station support only two diskette drives Therefore if you have more than two disk ette drives installed in the NEC Versa and dock...

Страница 53: ...aring the Hard Disk Drive later in this chapter for hard disk drive preparation instructions Drive installation involves three basic procedures n Removing the drive cage n Attaching the drive s to the drive cage n Attaching power and signal cables to the drive n Finishing up reinstalling the drive cage with the drive in the docking station These procedures are described next Removing the Drive Cag...

Страница 54: ...s on the drive cage Removing drive cage screws 3 Slide the drive cage towards the back of the unit Make sure the holes on the bottom of the cage clear the tabs on the bottom of the docking station chassis 4 Lift the drive cage up and out of the system ...

Страница 55: ... the drive to the drive cage as follows Before attaching the drive to the cage make sure that any switches on the drive are set properly See the guide that came with the drive for switch setting information 1 Align the front of the drive with the front of one of the bays in the drive cage ...

Страница 56: ...eated on the guides within the cage Sliding the drive into the cage 3 Locate the screw holes on the side of the drive cage and align them with the screw holes on the side of the drive 4 Using the screws that came with the drive secure the drive to the drive cage Securing the drive ...

Страница 57: ... the figures Taking care not to bend any pins press the cable connector firmly onto the pins 1 Place the drive cage close to the docking station for easy access to the connectors on the docking station interface board 2 Look in the package of cables that came with the docking station and lo cate drive power cable Drive power cable 3 Connect the power cable to the docking station interface board ...

Страница 58: ...type as follows When installing SCSI drives you must purchase an optional SCSI cable If you are installing Plug and Play SCSI devices pur chase a cable that comes with a terminated connector n For diskette drives Look in the package of cables and find the diskette drive signal cable ...

Страница 59: ...signal cable to the docking station in terface board as shown in the following figure Position the red edge as shown Connecting the diskette drive signal cable Position the red edge of the signal cable as shown in the following figure and connect the cable to the drive ...

Страница 60: ...con nector size depends on the drive you are installing Power con nectors are keyed to fit only one way Connecting the diskette drive signal cable n For IDE drives Locate the IDE cable in the bag of cables that came with the docking station The cable looks similar to the following ...

Страница 61: ...cking station board The connector has a projection that acts as a key on one side Align the cable connector and the key with the connector on the board and press firmly to attach them Position the red edge of the cable as shown Connecting the cable to the docking station board ...

Страница 62: ...tor can cause your system to malfunction and damage the cable On the IDE cable pick a connector to attach to your IDE device Note the location of the blocked hole in the connector Blocked pin hole On the IDE device locate the gap in the cable port It looks like a space with a missing pin Missing pin on IDE device connector ...

Страница 63: ...e On some IDE drives the connector is reversed The gap is in the top row of pins instead of the bottom row In this case turn the cable over so that the red edge is on the opposite side of the one pictured If you are installing an IDE device with audio features like a CD ROM reader connect the audio cable as follows Locate the audio cable in the bag of cables that came with the docking station ...

Страница 64: ...4 24 Adding Options Audio Cable Attach the audio cable to the docking station interface board as shown in the following figure ...

Страница 65: ...ct a large or small power cable connector to the drive con nector size depends on the drive you are installing Power con nectors are keyed to fit only one way The audio cable comes with two connectors Pick the one that is appropriate for your drive type ...

Страница 66: ...ives To install SCSI devices you must purchase an optional SCSI cable If you are installing Plug and Play SCSI devices purchase a cable that comes with a terminated connector Locate your optional SCSI cable It should look similar to the one shown in the following figure ...

Страница 67: ...SCSI signal cable Locate the SCSI cable connector on the docking station interface board Connect the SCSI signal cable to the interface board Connectors are keyed to fit only one way Connecting the SCSI cable to the interface board ...

Страница 68: ...installing a SCSI device with audio features like a CD ROM reader connect the audio cable as follows Locate the audio cable that came with the docking station Audio cable Attach the audio cable to the docking station interface board ...

Страница 69: ...e to next connector on the ca ble Do not skip connectors when attaching more than one SCSI device Connect the cables to the back of the drive See the documenta tion that came with the drive exact connector locations Locations vary depending on model The audio cable comes with two connectors Pick the one that is appropriate for your drive type ...

Страница 70: ...n as follows 1 Locate the tabs on the bottom of the docking station chassis 2 Position the drive cage a little behind the tabs and lower it into the unit 3 Slide the drive cage forward until the tabs slide into the matching holes on the bottom of the drive cage 4 Replace the two screws that secure the drive cage in the docking station ...

Страница 71: ... external access remove the drive slot cover from the docking station cover as follows n Locate the drive slot cover tabs inside the docking station cover n Gently push the tabs out until you can release the cover n Remove the slot cover and store it in a safe place for possible future use ...

Страница 72: ...reparing the hard disk drive n Setting your hard disk drive to slave or master as appropriate n Installing the drive n Connecting cables n Finishing up This section describes how to install a hard disk drive in the internal hard disk drive bay in the docking station WARNING Make sure docking station power is off the NEC Versa is not docked peripheral devices are disconnected and cables are de tach...

Страница 73: ...sable the built in IDE This is done through the Setup utility that comes with your NEC Versa system See your NEC Versa series user s guide for more information n If you are installing a SCSI drive you must purchase an optional SCSI cable If you are installing a Plug and Play SCSI device for use with a Plug and Play system make sure the SCSI cable comes with a terminated connector n Follow any pre ...

Страница 74: ... WARNING Make sure docking station power is off the NEC Versa is not docked all peripheral devices are disconnected and all power ca bles are detached from the docking station before starting this pro cedure 1 Remove the docking station cover as described in Cover Removal 2 Locate the internal hard disk drive bay Locating the internal drive bay ...

Страница 75: ...ctors face the front of the docking station Make sure the screw holes on the hard disk drive face the drive bracket in the docking station 4 Insert the drive into the drive bay Aligning and installing the drive 5 Align the screw holes on the drive with those on the bracket ...

Страница 76: ...section n See Attaching IDE Drive Cables for IDE drive installations n See Attaching SCSI Drive Cables for SCSI drive installations Attaching IDE Drive Cables Attach IDE drive cables as follows The connectors are keyed to fit only one way 1 Locate the IDE cable in the bag of cables that came with the docking station The cable looks similar to the following ...

Страница 77: ...or to attach to the docking station board The connector has a projection that acts as a key on one side 3 Align the cable connector and the key with the connector on the board and press firmly to attach them Connecting the cable to the docking station board ...

Страница 78: ...the cable 4 On the IDE cable pick a connector to attach to your IDE device Note the location of the blocked hole in the connector Blocked pin hole 5 On the IDE device locate the gap in the cable port It looks like a space with a missing pin Missing pin on IDE device connector 6 Align the gap on the device port with the blocked pin hole on the cable connector and connect them ...

Страница 79: ... The gap is in the top row of pins instead of the bottom row In this case turn the cable over so that the red edge is on the opposite side of the one pictured 8 Locate the power cable that came in the cable accessories bag The power cable 9 Connect the cable to the interface board Power connectors are keyed to fit in only the correct position ...

Страница 80: ...4 40 Adding Options Connecting the power cable to the interface board 10 Connect the cables to the drive Connecting the cables to the drive ...

Страница 81: ...he new drive n If you do not have a Plug and Play system run Setup to set your new configuration Attaching SCSI Drive Cables Attach SCSI drive cables as follows To install a SCSI drive you must purchase an optional SCSI cable If you are installing Plug and Play SCSI drive purchase a ca ble that comes with a terminated connector 1 Locate the SCSI cable connector on the docking station interface boa...

Страница 82: ...4 42 Adding Options Optional SCSI cable 2 Attach the connector on the SCSI cable to the connector on the board The connectors are keyed to fit in only one position Attaching the SCSI cable ...

Страница 83: ... that came with the docking station It looks similar to the one shown in the following figure Power cable 4 Attach the power cable to the docking station interface board as shown in the next figure Attaching the power cable to the docking station board ...

Страница 84: ...vice to next connector on the ca ble Do not skip connectors when attaching more than one SCSI device 6 Taking care not to bend any pins press the cable connector firmly onto the pins The connectors are keyed to fit in only the correct position 7 Attach the appropriate power cable connector to the power connector on the hard disk Power connectors are keyed to fit only in the correct position Attach...

Страница 85: ...BAY II ADAPTER INSTALLATION Installing the VersaBay II Adapter in the Docking Station 6000 involves the following procedures n Removing the docking station cover See Cover Removal earlier in this chapter n Removing the drive cage n Connecting the adapter to the drive cage n Attaching the cables n Finishing up which involves removing the slot cover and replacing the docking station cover These proc...

Страница 86: ...g station Securing the NEC VersaBay II Adapter Next use the following steps to secure the adapter to the docking station drive cage 1 Locate the last row of screw holes on the bottom of the drive cage 2 Align the bottom set of screw holes on the side of the adapter with the screw holes on the bottom of the drive cage The adapter does not sit on the rails inside the drive cage In stead lift the ada...

Страница 87: ...Adding Options 4 47 Sliding the adapter into the cage 3 Using the four screws that came with the adapter secure the adapter to the drive cage Securing the adapter ...

Страница 88: ...ly the audio ca ble that ships with the NEC Versa Docking Station 6000 Attach the cables to the interface board as follows 1 Look in the package of cables that came with the docking station and lo cate the 5 connector power cable Locating the power cable If an optional diskette drive or hard drive is already installed the power cable is already attached to these options ...

Страница 89: ...ame with your docking station If an optional hard disk drive or CD ROM drive is already installed the IDE signal cable is already attached to the option Depending on what other IDE devices are installed in the docking station the IDE cable might not be long enough If not purchase the appropriate size cable at a local computer store The cable looks similar to the following ...

Страница 90: ...or to attach to the docking station board The connector has a projection that acts as a key on one side 5 Align the cable connector and the key with the connector on the board and press firmly to attach them Connecting the cable to the docking station board ...

Страница 91: ...the cable 6 On the IDE cable pick a connector to attach to your IDE device Note the location of the blocked hole in the connector Blocked pin hole 7 On the IDE device locate the gap in the cable port It looks like a space with a missing pin Missing pin on IDE device connector 8 Align the gap on the device port with the blocked pin hole on the cable connector and connect them ...

Страница 92: ... turn the cable over so that the red edge is on the opposite side of the one pictured 10 If you plan to play audio CDs using your NEC CD ROM pack you will need to connect the audio cable as follows n An audio cable is supplied with your NEC Versa Docking Station 6000 Locate the audio cable that came with the docking station n If an audio option is already installed the audio cable is already at ta...

Страница 93: ...Adding Options 4 53 Audio cable Attach the audio cable to the connector on the docking station in terface board ...

Страница 94: ...ions Connecting the audio cable 11 Connect a large power cable connector to connector J4 on the adapter Connecting IDE and power cables 12 Connect the smaller 3 pin audio cable connector to connector J1 on the adapter ...

Страница 95: ...t section Finishing Up Finishing Up Finish up drive installation as follows 1 Locate the tabs on the bottom of the docking station chassis 2 Position the drive cage a little behind the tabs and lower it into the unit 3 Slide the drive cage forward until the tabs slide into the matching holes on the bottom of the drive cage 4 Replace the two screws that secure the drive cage in the docking station ...

Страница 96: ...es external access remove the drive slot cover from the docking station cover as follows n Locate the drive slot cover tabs inside the docking station cover n Gently push the tabs out until you can release the cover n Remove the slot cover and store it in a safe place for possible future use ...

Страница 97: ...Adding Options 4 57 Removing the drive slot cover 6 Being careful to move cables out of the way to prevent crushing them replace the docking station cover as described in Cover Replacement ...

Страница 98: ...tility also called the ACU Parameters and configuration files are discussed in Chapter 3 Setting Up and Using the Software External options that you can connect include the following n External monitor n External keyboard and mouse n External audio peripherals including Headphone and external speakers Microphone External sound sources connected to the Line In or Line Out port n A standard phone ca...

Страница 99: ...ly on the docking station or NEC Versa without the CRT base Doing so can damage the unit The CRT base weight limit is 60 lb 27 2 kg equivalent to a 17 inch NEC monitor Do not exceed the weight limit Doing so can damage the unit Use the following steps to connect an external monitor to the docking sta tion If you choose not to use the CRT base skip steps 2 and 3 1 Check the following before connect...

Страница 100: ...l monitor on the CRT base or place it on the desk WARNING Be sure to center the monitor on the CRT base and docking station see the following figure Putting the monitor too close to the edge can cause the monitor to fall causing possible harm or damage 4 Attach the 15 pin connector on the signal cable to the monitor port on the docking station ...

Страница 101: ... of the power cable into the appropriate port on the back of the monitor 7 Plug the other end of the power cable into a properly grounded wall outlet 8 Power on the external monitor 9 Power on the docking station Always power on the monitor before powering on the NEC Versa Otherwise the system may not recognize the monitor type ...

Страница 102: ...S 2 style keyboard to the docking station 1 Make sure NEC Versa power and docking station power are off CAUTION Be sure power is off Connecting an external keyboard while the power is on can damage the keyboard controller in the computer 2 Locate the keyboard port on the back of the docking station 3 Insert the keyboard cable connector in the port Connecting an external keyboard 4 Turn on power to...

Страница 103: ...power is off Connecting an external mouse while the power is on can damage the computer 2 Locate the mouse port on the back of the docking station 3 Insert the mouse cable connector in the port Connecting an external mouse 4 Turn on power to the NEC Versa and docking station EXTERNAL AUDIO OPTIONS The docking station provides various audio ports on the back of the unit for connecting audio devices...

Страница 104: ...ollowing figure identifies the audio ports on the back of the docking station Docking station audio ports Microphone For the best results NEC recommends that you use an omnidirectional monaural microphone that has an electric condenser See Appendix A Specifications for recommended microphone specifications To connect a microphone to the docking station insert the microphone jack into the microphon...

Страница 105: ...y to your ears When you connect headphones the internal docking station speakers are dis abled To connect headphones insert the headphone jack into the head phones port Speakers When you connect external speakers the internal docking station speakers are disabled Connect external speakers as follows 1 Set up your speakers according to the directions that came with them 2 Locate the headphone port ...

Страница 106: ...s you use the docking station as an input source for an other audio system like your home stereo To play or record from the docking station use a cable to connect to the Line In port on the other audio system to the docking station Line Out port Telephone Cable Connect a standard telephone cable jack to the RJ11 port on the back of the docking station This gives you access to the internal modem th...

Страница 107: ...5 pin connector for the docking station and for most parallel printers a Centronics compatible 36 pin connector Use the following procedure to connect a parallel printer to the docking sta tion Before connecting the printer make sure that you set up the printer correctly Follow the setup instructions that come with the printer 1 Attach the printer cable to the back of the printer 2 Attach the 25 p...

Страница 108: ...ck the connector to the printer with the connector clips n Secure the cable to the docking station with the screws provided Connecting a parallel device 4 Connect the power cable to the printer 5 If you are having trouble communicating with the parallel device reboot your system ...

Страница 109: ...e connecting an RS 232C device to your docking sta tion make sure the device is set up correctly Follow the setup in structions that come with the option 1 Turn off and unplug the docking station and any external options con nected to it 2 Make sure that any power to the RS 232C device is off and the power cable is unplugged 3 Connect the RS 232C cable to the serial communication port on the docki...

Страница 110: ... verify switch and jumper settings 2 Turn off and unplug the docking station and any external devices con nected to it 3 Locate the external SCSI connector on the back of the docking station 4 Squeeze the tabs on the side of the SCSI cable connector and attach the SCSI cable to the back of the docking station 5 Connect the other end of the cable to the device 6 Reconnect any options that you disco...

Страница 111: ...kers with 2 3 W per channel output capability stereo left and right channels Input Output Facilities n Docking connector n Serial RS 232C 9 pin connector n Parallel EPP 25 pin connector n SCSI 2 Connector for external SCSI devices n MIDI Game I F port with 15 pin connector n RJ11 Telephone jack for standard telephone jack n VGA CRT 15 pin port n PS 2 style mouse port n PS 2 style keyboard port n A...

Страница 112: ...y for one 3 5 x 1 hard disk drive n Board Expansion Slots 3 slots 1 slot for full size PCI card 1 slot for full size ISA card 1 slot for either a PCI or ISA card Indicator LEDs n Docking status n Hard Disk Drive Access status n Diskette Drive Access status n Versa Battery Charging status n Keylock status Power Supply n Input voltage 115 to 230 V manual switching Frequency 50 60 Hz n Output Voltage...

Страница 113: ...Humidity 20 to 80 noncondensing Storage Requirements n Temperature 4 F to 122 F 20 C to 50 C n Humidity 10 to 85 noncondensing Provided Software n NEC Docking Station 6000 Setup Utility n EX SCSI Drivers n Intel Plug n Play kit Windows for Workgroup systems only n Docking Station drivers n BIOS Update Diskette ...

Страница 114: ...ini DIN female ports The keyboard and mouse connectors are male connectors Keyboard and mouse ports KEYBOARD MOUSE PORT PIN ASSIGNMENTS Pin Signal I O Function 1 KBDATA MOUSEDATA I O Keyboard data Mouse data 2 NC Not connected 3 GND Ground 4 5V Power 5 KBCLK MOUSECLK I O Keyboard clock Mouse clock 6 NC Not connected B ...

Страница 115: ...ort pin assignments are as follows COM port COM PORT PIN ASSIGNMENTS Pin Function 1 Carrier Detect 2 Receive Data 3 Transmit Data 4 Data Terminal Ready 5 Signal Ground 6 Data Set Ready 7 Request to Send 8 Clear to Send 9 Ring Indicator ...

Страница 116: ...ows Printer port PRINTER PORT PIN ASSIGNMENTS Pin Function 1 Strobe 2 Data Bit 0 3 Data Bit 1 4 Data Bit 2 5 Data Bit 3 6 Data Bit 4 7 Data Bit 5 8 Data Bit 6 9 Data Bit 7 10 Acknowledge 11 Busy 12 PE 13 Select 14 Auto Feed XT 15 Error 16 Initialize 17 Select In 18 25 Ground ...

Страница 117: ...lows Monitor port MONITOR PORT PIN ASSIGNMENTS Pin Function 1 Red 2 Green 3 Blue 4 VESA option 1 5 Ground 6 Red return ground 7 Green return ground 8 Blue return ground 9 5V 10 Sync return ground 11 VESA Option 2 12 VESA Data 13 Horizontal sync 14 Vertical sync 15 VESA CLK ...

Страница 118: ... O A3 SD6 I O A4 SD5 I O A5 SD4 I O A6 SD3 I O A7 SD2 I O A8 SD1 I O A9 SD0 I O A10 I O CH RDY I A11 AEN O A12 SA19 I O A13 SA18 I O A14 SA17 I O A15 SA16 I O A16 SA15 I O A17 SA14 I O A18 SA13 I O A19 SA12 I O A20 SA11 I O A21 SA10 I O A22 SA9 I O A23 SA8 I O A24 SA7 I O A25 SA6 I O A26 SA5 I O A27 SA4 I O A28 SA3 I O A29 SA2 I O A30 SA1 I O A31 SA0 I O ...

Страница 119: ...5 5 Vdc Power B6 DRQ2 I B7 12 Vdc Power B8 OWS I B9 12 Vdc Power B10 GND Ground B11 SMEMW O B12 SMEMR O B13 IOW I O B14 IOR I O B15 DACK3 O B16 DRQ3 I B17 DACK1 O B18 DRQ1 I B19 REFRESH I O B20 CLK O B21 IRQ7 I B22 IRQ6 I B23 IRQ5 I B24 IRQ4 I B25 IRQ3 I B26 DACK2 O B27 TC O B28 BALE O B29 5 Vdc Power B30 OSC O B31 GND Ground ...

Страница 120: ...C8 LA17 I O C9 MEMR I O C10 MEMW I O C11 SD08 I O C12 SD09 I O C13 SD10 I O C14 SD11 I O C15 SD12 I O C16 SD13 I O C17 SD14 I O C18 SD15 I O D1 MEM CS16 I D2 I O CS16 I D3 IRQ10 I D4 IRQ11 I D5 IRQ12 I D6 IRQ15 I D7 IRQ14 I D8 DACK0 O D9 DRQ0 I D10 DACK5 O D11 DRQ5 I D12 DACK6 O D13 DRQ6 I D14 DACK7 O D15 DRQ7 I D16 5 Vdc Power D17 MASTER I D18 GND Ground ...

Страница 121: ...ystem Clock 13 GNT0 Std PCI Bus Grants 14 to 15 GND Digital GND 16 AD31 PCI Address and Data Bus 31 17 AD30 PCI Address and Data Bus 30 18 AD28 PCI Address and Data Bus 28 19 AD27 PCI Address and Data Bus 27 20 AD25 PCI Address and Data Bus 25 21 AD24 PCI Address and Data Bus 24 22 AD23 PCI Address and Data Bus 23 23 AD22 PCI Address and Data Bus 22 24 AD20 PCI Address and Data Bus 20 25 AD19 PCI ...

Страница 122: ...I Address and Data Bus 10 41 AD9 PCI Address and Data Bus 9 42 C BE0 PCI Bus Command and Byte Enable 0 43 AD7 PCI Address and Data Bus 7 44 AD5 PCI Address and Data Bus 5 45 AD4 PCI Address and Data Bus 4 46 AD2 PCI Address and Data Bus 2 47 AD1 PCI Address and Data Bus 1 48 MDGNDN Barrack Board DAA 49 SYSACT Not Used 50 MDNEG Barrack Board DAA 51 OHRC Barrack Board DAA 52 MDPOS Barrack Board DAA ...

Страница 123: ... REQA PC PCI Bus Requests 71 IRQ15 ISA IRQ 15 72 CLKRUN Clock Run 73 IRQ14 ISA IRQ 14 74 REQ0 Std PCI Bus Requests 75 IRQ12 ISA IRQ 12 76 GND Digital GND 77 IRQ11 ISA IRQ 11 78 AD29 PCI Address and Data Bus 29 79 IRQ10 ISA IRQ 10 80 AD26 PCI Address and Data Bus 26 81 IRQ9 ISA IRQ 9 82 C BE3 PCI Bus Command and Byte Enable 3 83 IRQ7 ISA IRQ 7 84 AD21 PCI Address and Data Bus 21 85 IRQ6 ISA IRQ 6 8...

Страница 124: ...E Bus Type ID H ISA L PCI 100 AD11 PCI Address and Data Bus 11 101 DCDCIN DC Power In 102 AD8 PCI Address and Data Bus 8 103 DCDCIN DC Power In 104 AD6 PCI Address and Data Bus 6 105 ADADIN DC Power In 106 AD3 PCI Address and Data Bus 3 107 DCDCIN DC Power In 108 AD0 PCI Address and Data Bus 0 109 DCDCIN DC Power In 110 to 111 GND Digital GND 112 PIDET Barrack Board DAA 113 to 114 GND Digital GND ...

Страница 125: ...ption 1 128 to 129 GND Digital GND 130 RTS Request to Send 131 GND Digital GND 132 CTS Clear to Send 133 DTR Data Terminal Ready 134 RI Ring Indicator 135 RXD Receive Data 136 DSTRK0 FDD Track 0 137 STEP FDD Step 138 HDSEL FDD Head Select 139 DSWRPRO FDD Write Protect 140 FDIR FDD Direction 141 DSDSKC FDD Disk Change 142 DENSY FDD Density 143 DSREDA FDD Read Data 144 WRENB FDD Write Enable 145 DSI...

Страница 126: ... Good 160 DCKINTR Dock Interrupt 161 EXMSDAT External Mouse Data 162 FDS FD Select 163 EXMSCLK External Mouse Clock 164 DSDET Barrack Board Detect 165 EXKBDAT External Keyboard Data 166 QBUFEN Q Buffer Enable 167 EXKBCLK External Keyboard Clock 168 SUSSW Suspend Button 169 GND Digital GND 170 SUSTAT NB Status 171 to 173 GND Digital GND 174 AGNDS Analog GND forSound 175 MIDIOUT MIDI Out 176 JRC2 Jo...

Страница 127: ...GND 193 PCTYPE1 PC Type ID 1 194 DCD Device Carrier Detect 195 PCTYPE2 PC Type ID 2 196 TXT Transmit Data 197 PCTYPE3 PC Type ID 3 198 DSR Data Set Ready 199 HDDIC HDD LED 200 DVSEL0 Drive Select 0 201 FDDIC FDD LED 202 MOT0 FDD Motor 0 203 CHRGE Charge LED 204 DVSEL1 Drive Select 1 205 SCSIIC SCSI LED 206 MOT1 FDD Motor 1 207 DSPCI PCI Bus VCC 208 PDATA0 Printer Data 0 209 AUTOFD Printer Auto Fee...

Страница 128: ...RROR Printer Error 220 PDATA6 Printer Data 6 221 PE Printer Paper Empty 222 PDATA7 Printer Data 7 223 NC Not Used 224 PSTROBE Printer Data Strobe 225 GND Digital GND 226 PSELIN Printer Select Input 227 to 231 GND Digital GND 232 MIDIN MIDI In 233 JOYF3 Joystick 234 to 235 AGNDS Analog GND for Sound 236 JRC3 Joystick 237 DSCDL Docking Station CD In Left 238 DSOUTR Barrack Board Out Right 239 DSCDR ...

Страница 129: ...ersa is connected properly to the docking station n Check that NEC Versa power is turned on and that the NEC Versa is not in a power saving state such as Sleep mode n Verify that the electrical outlet to which the docking station is connected is working Test the outlet by plugging in a lamp or other electrical device n Make sure all cables are connected tightly TROUBLESHOOTING n While trying to re...

Страница 130: ...n does not output sound to the speakers when headphones are in use n The power went out and you need to undock the NEC Versa See Emergency Undocking in Chapter 2 for instructions about un docking the NEC Versa manually n The NEC Versa is stuck on the docking station and normal undocking procedures are not working See Emergency Undocking in Chapter 2 for instructions about un docking the NEC Versa ...

Страница 131: ...re calling please have ready your system name model number serial number and purchase date Also have ready as much information as possi ble about the problem you are having including any message errors that oc curred Free technical specifications troubleshooting tips and other helpful information for out of warranty products are available through NEC FastFacts at 1 800 366 0476 and requesting cata...

Страница 132: ... Mouse 5 6 Connecting an External SCSI Device 5 13 Connecting Audio Options 5 6 Connecting the Power Cable 2 1 Cover 4 2 removal 4 2 replacement 4 4 D Dimensions A 2 Diskette Drive Cabling 4 18 Docking Station 4000 Software Setup 3 2 Docking Station Care 1 11 1 12 Docking Station Precautions 1 11 Docking the NEC Versa 2 6 Drive Cage Removal 4 13 Drives 4 1 hard disk drive installation 4 32 interfa...

Страница 133: ...nd Play Option Configuration 3 6 Non Plug and Play Setup 3 2 Normal Undocking 2 10 O Operating Environment 1 11 A 3 Option Configuration 3 5 Options 4 1 board installation 4 8 board removal 4 11 diskette drives 4 13 expansion boards 4 6 hard disk drives 4 32 installing 4 1 P Parallel Port 5 10 Peripheral Devices 5 1 CRT base 5 3 external CRT 5 2 keyboard 5 5 mouse 5 6 parallel printer 5 10 RS 232C...

Страница 134: ...lems C 1 Sound System Specifications A 1 Speakers External 5 8 Specifications for I O Facilities A 1 Start Up Configuration Choices 3 5 Storage Devices 4 12 CD ROMs 4 12 diskette drives 4 12 docking station capacity 4 12 hard disk drives 4 12 tape drives 4 12 with external access 4 12 Storage Environment A 3 T Troubleshooting C 1 U Undocking 2 10 Using the Eject Button 2 10 Using the Undocking Lev...

Страница 135: ... an outlet on a circuit different from the one to which the receiver is connected n Consult the dealer or an experienced radio TV technician for help Use shielded and properly grounded I O cables and power cable to ensure compliance of this unit to the specified limits of the rules FCC Modem Connection Requirements The Federal Communications Commission FCC has established Rules that permit this de...

Страница 136: ...ot exceed five 5 If too many devices are attached they may not ring properly Modem Service Requirements If the modem malfunctions all repairs should be performed by NEC Technologies or an NEC Authorized Service Center It is the responsibility of users requiring service to report the need for service to NEC Technologies or to an NEC Authorized Service Center Phone 1 800 632 4525 ...

Страница 137: ...elephone extension cord The customer should be aware that compliance with the above conditions may not prevent degradation of service in some situations Repairs to certified equipment should be made by an authorized Canadian maintenance facility designated by the supplier Any repairs or alterations made by the user to this equipment or equip ment malfunctions may give the telecommunications compan...

Отзывы: