2-44
System Configuration and Setup
3.
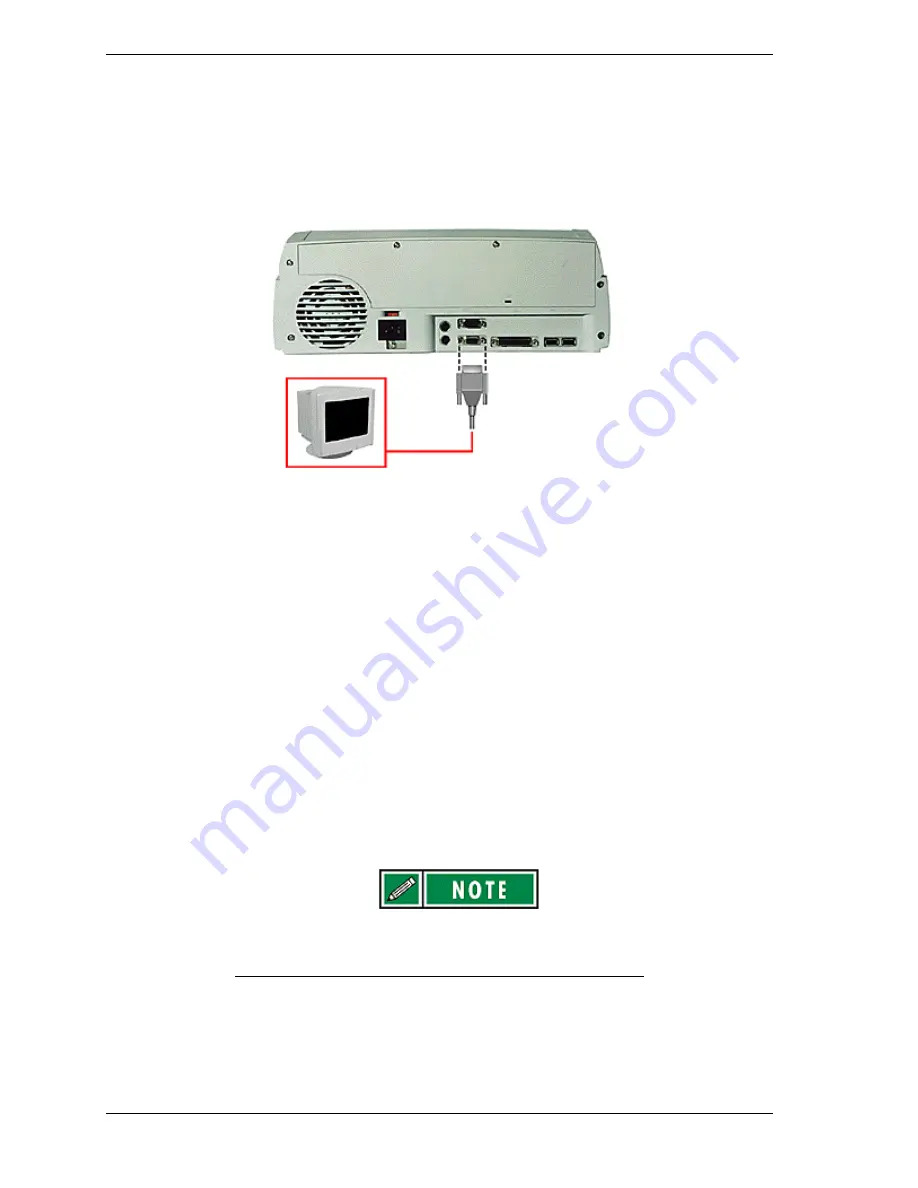
Attach the 15-pin cable connector to the monitor port on the NEC Versa
Dock.
4.
Secure the cable connection with the screws provided on the cable.
Connecting a monitor cable
5.
Connect the monitor power cable and plug it into a properly grounded wall
outlet.
6.
Follow any setup instructions in the monitor’s user’s guide.
7.
Power on the monitor.
8.
Power on the NEC Versa.
Press Fn-F3 to toggle between the LCD, CRT, simultaneous CRT/LCD display,
and TV Out (on systems that support TV Out).
Parallel Devices
To install a parallel device such as a printer, you need a cable with a male 25-
pin connector for the system and, for most parallel printers, a Centronics®-
compatible 36-pin connector.
When you connect a printer, be sure to install the
appropriate printer driver through the Windows Control
Panel.
Connect a parallel device to the NEC Versa Dock as follows.
1.
Check that both NEC Versa and the parallel device power are off.
Содержание VERSA DOCK - SERVICE
Страница 7: ...1 Introducing the NEC Versa Dock n Carton Contents n NEC Versa Dock Features n The Right Environment ...
Страница 33: ...System Configuration and Setup 2 17 ...
Страница 67: ...3 Disassembly and Reassembly n Required Tools and Equipment n Disassembly n Reassembly ...
Страница 74: ...3 8 Disassembly and Reassembly Removing the bracket ...
Страница 83: ...4 System Board Layout n Main Board n LED Board n PCI Expansion Board ...
Страница 84: ...4 2 System Board Layout Main Board LED Board ...
Страница 85: ...System Board Layout 4 3 PCI Expansion Board ...
Страница 86: ...5 Illustrated Parts Breakdown n NEC Versa Dock Illustrated Parts Breakdown n Parts List ...
Страница 87: ...5 2 Illustrated Parts Breakdown NEC Versa Dock Illustrated Parts Breakdown ...
Страница 88: ...Illustrated Parts Breakdown 5 3 ...
Страница 95: ...7 Troubleshooting n Quick Troubleshooting n Helpful Questions ...


