Connecting the Voice Mail to a Phone System
Connecting Analog VANGARD Mail Ports
Chapter 2: Installing the Voice Mail
VANGARD Mail/i-Series Quick Setup Guide
◆
23
Connecting Analog VANG ARD Mail Ports
Connecting Analog VANGARD Mail Ports to the i-Series
To connect Voice Mail ports to an i-series phone system:
1.
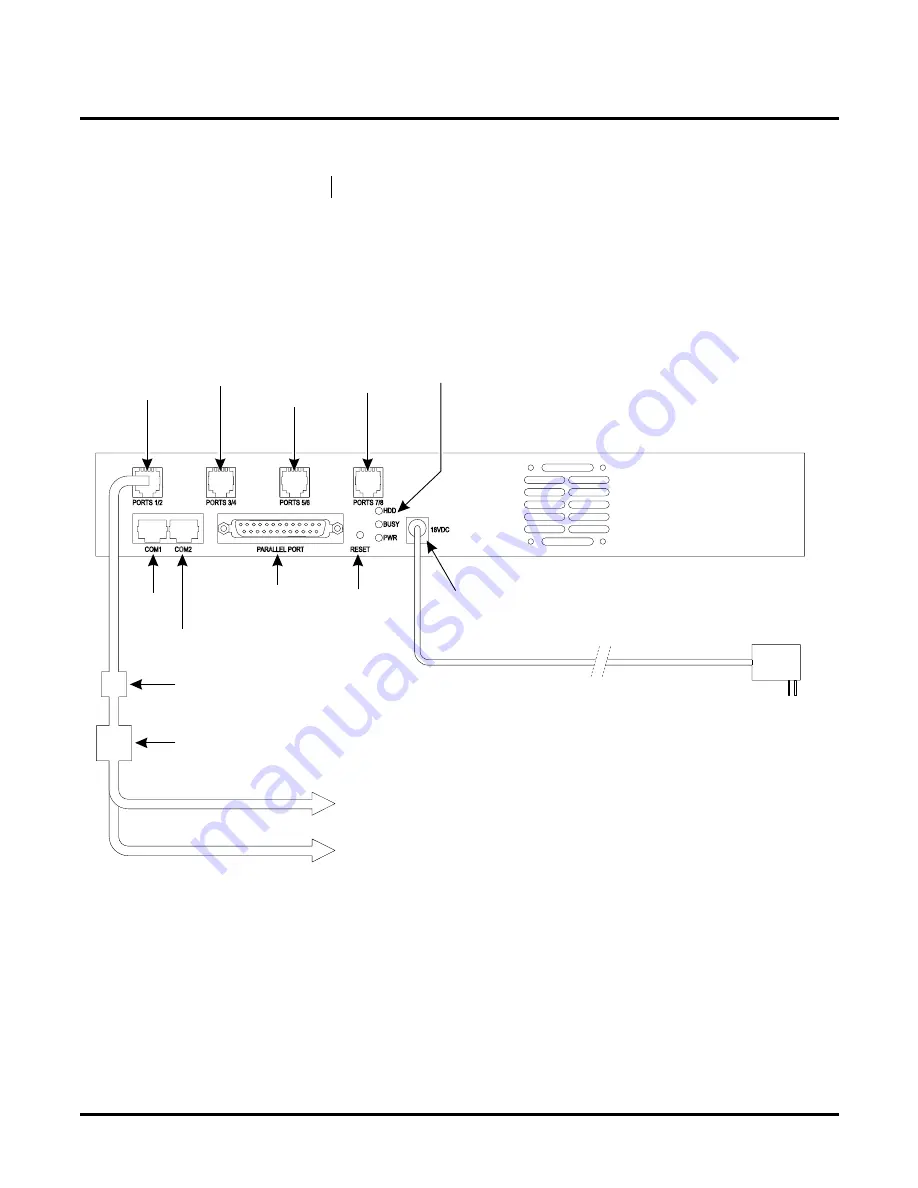
Refer to the illustration below:
Plug one end of the line cord (where the ferrite bead is connected) into the Ports 1/2 connec-
tor. Plug the other end of the cord into an RJ14-to-RJ11 adaptor or RJ14 jack.
Be sure you have already installed a ferrite bead on this line cord. If you haven’t, see “Install-
ing a Ferrite Bead on Each Line Cord” on page 22.
Figure 19: Connecting Analog Voice Mail Ports 1 and 2 to the Phone System
2.
Plug L1 (or the RD/GR pair) into an analog station port.
L1 connects to the lower-numbered port in the port connector.
3.
Repeat steps 1 and 2 for each pair of analog Voice Mail ports, using the appropriate Ports
connector on the back of the cabinet.
Be sure that you remember the slot where you installed a 2-port or 4-port card. You need to
keep in mind the following:
■
A 2-port card in the first position supports ports 1and 2, and skips ports 3 and 4.
■
A 4-port card in the first position supports ports 1 through 4.
■
A 2-port card in the second position supports 5 and 6, and skips ports 7 and 8.
■
A 4-port card in the second position supports ports 5 through 8.
Availability:
Analog VANGARD Mail version 9.08 or higher.
Ports
1 & 2
Ports
3 & 4
Ports
5 & 6
Ports
7 & 8
Status
LEDs
AC Power
Connector
AC Power Cord
External
Power Supply
Reset
Printer
Port
CONSOLE / COM2
(reserved for HOSTKEY use)
COM
1
Ferrite Bead
RJ14 to RJ11 adapter
or RJ14 jack
L1
L2
To Analog Port or OPX 1
To Analog Port or OPX 2


