Connect the Power & System Start Up
Quick Install Guide
– SL2100 Terminals Type B rev 1.0
15
7- Connect the Power & System Start Up
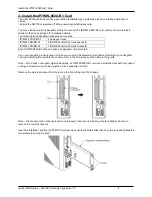
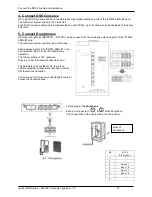
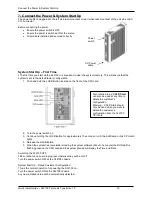
The power cable is plugged into the left side (wall mounted) or rear (when rack mounted) of the unit via an IEC-
C13 connector.
Before connecting the power:
Ensure the power switch is OFF
Ensure the power is switched off at the source
All cards are installed and secured correctly
System Start Up
– First Time
!
The first time you start up the SL2100 it is important to clear the system memory. This will ensure that the
system is set to the default/factory configuration.
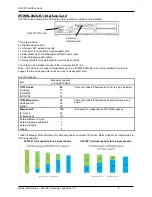
1. Push and hold the LOAD Button located on the front of the CPU card.
2. Turn the power switch on
3. Continue holding the LOAD Button for approximately 10 seconds or until the ALM lamp on the CPU card
lights.
4. Release the LOAD Button
5. When the system has completed reloading the system software (about one minute) the RUN LED is
flashing green on the CPU card and the system phones will display the Time and Date.
Switching the SL2100 OFF
!
Be sure that no calls are in progress otherwise they will be cut off.
Turn the power switch OFF at the SL2100 chassis.
System Start Up
– Retain Customer Configuration
This is the normal operation for powering the SL2100 on.
Turn the power switch ON at the SL2100 chassis.
Any new installed cards will be automatically detected.
Also referred to as ‘
COLD Start
’
can also be used at any time to
delete the customer’s
configuration.
Warning
– COLD Start should
only be used when you want to
delete the customer’s
configuration from the SL2100
CPU card.
AC Power
cable
Power
switch


