64
4. Multi-Screen Projection
2. Use the
◀
,
▶
,
▼
or
▲
button to select an item and use the
◀
or
▶
to adjust the black level.
Do this for the other projector if necessary.
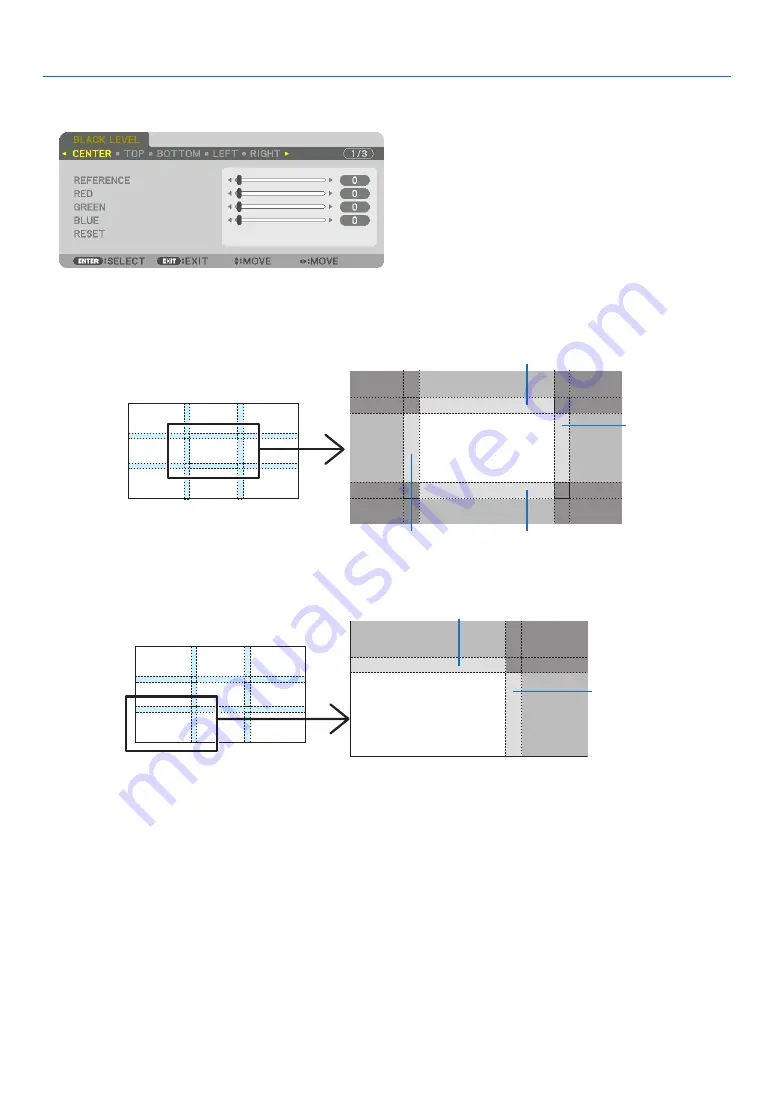
9-segmented portions for Black Level adjustment
The black level of the center projector is adjusted as shown in the figure.
CENTER
BORDER(BOTTOM)
BORDER(LEFT)
BORDER(TOP)
TOP
BOTTOM
RIGHT
LEFT
BORDER(RIGHT)
The black level of the lower left projector is adjusted as shown in the figure.
CENTER
TOP
RIGHT
BORDER(TOP)
BORDER(RIGHT)
TIP:
• The number of black level division screens changes depending on the number of edge blending positions selected (top, bottom,
right, left). In addition, when the top / bottom and left / right ends are selected, the corner division screen appears.
• The edge blending width is the width set in the range and the corner is formed by the intersecting area of the top / bottom ends
or left / right ends.
• The [BLACK LEVEL] can be adjusted to make it brighter only.
Содержание PH3501QL
Страница 8: ...vi Important Information Label Information Label A Label A Risk Group Lamp Safety Label...
Страница 10: ...viii Important Information Label C PH2601QL Label D Label E...
Страница 137: ...120 5 Using On Screen Menu HDBaseT SIGNAL QUALITY OPERATION MODE LINK STATUS HDMI STATUS...
Страница 173: ...NEC Display Solutions Ltd 2018 7N952671...


