33
3. Convenient Features
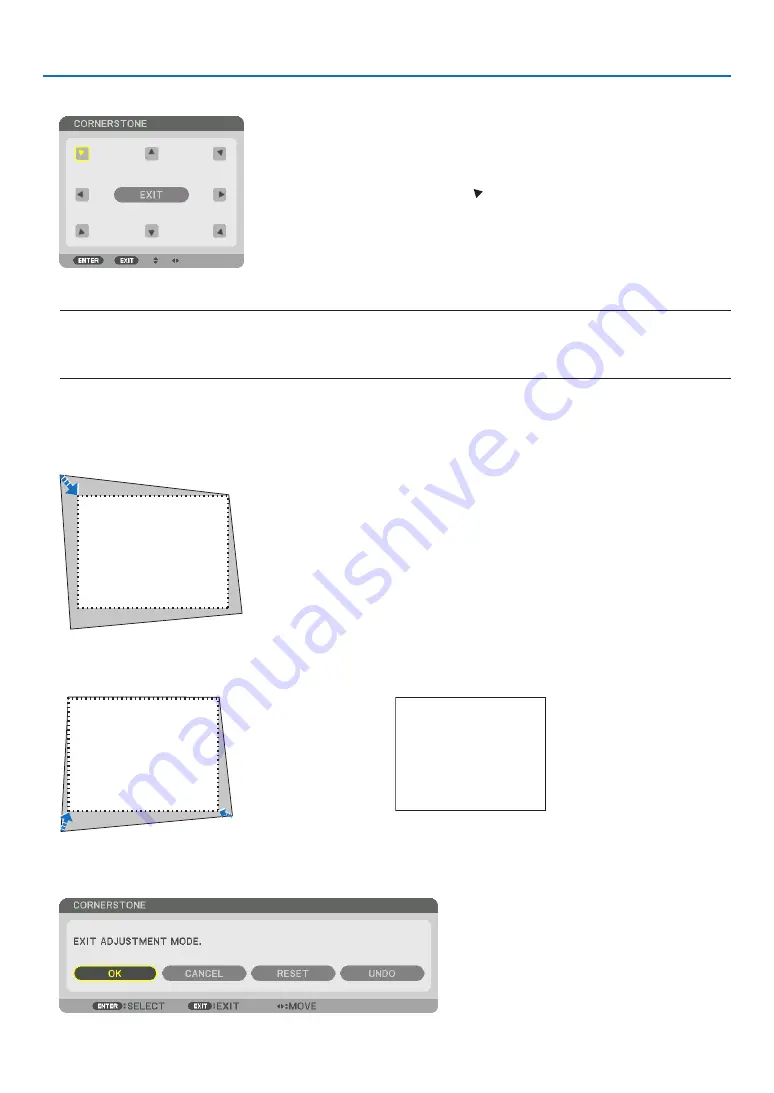
5. Press the
▼
button to align with the [CORNERSTONE] and then press the ENTER button.
The drawing shows the upper left icon ( ) is selected.
The screen will switch to the [CORNERSTONE] screen.
NOTE:
• When a [GEOMETRIC CORRECTION] function other than [CORNERSTONE] has been set up, the [CORNERSTONE] screen
will not be displayed. When the screen is not displayed, either press the 3D REFORM button for 2 or more seconds, or run
[RESET] in[GEOMETRIC CORRECTION] to clear the adjustment value of [GEOMETRIC CORRECTION].
6. Use the
▲▼◀▶
button to select one icon (
▲
) which points in the direction you wish to move the projected
image frame.
7. Press the ENTER button.
8. Use the
▲▼◀▶
button to move the projected image frame as shown on the example.
9. Press the ENTER button.
10. Use the
▲▼◀▶
button to select another icon which points in the direction.
11. Repeat steps from 7 to 10 to complete the cornerstone adjustment.
12. On the [CORNERSTONE] screen, select [EXIT] or press the EXIT button on the remote control.
The confirmation screen is displayed.


