English-4
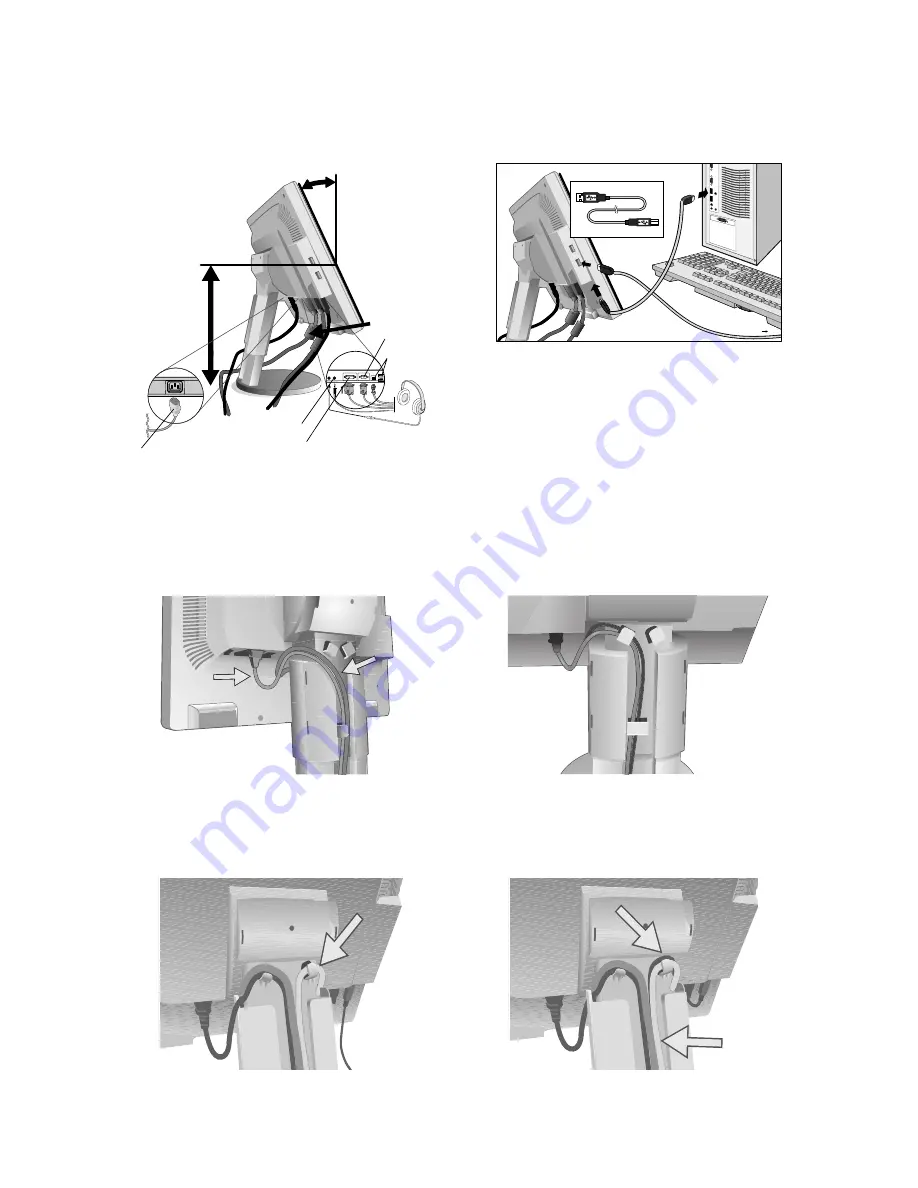
3. Place hands on each side of the monitor to tilt the LCD panel 30-degree angle and lift up to the highest position (
Figure B.1
).
4. Connect all cables to the appropriate connector on the back of the monitor (
Figure B.1
). Using the USB cable, connect the
B type connector to the USB upstream port on the bottom of the monitor and A type connector to the downstream port on
the computer (
Figure C.1
). If you can use the cord from the USB device, use one of the downstream ports on the side or
bottom of the monitor. Connect Headphones (not included) to the appropriate connector at the rear side of the monitor, if
desired (
Figure B.1
).
Input2 (D-Sub)
USB
(LCD205WNXM/LCD225WNXM only)
DVI Cable
Input1 (DVI)
Highest
Stand
Position
Power cord
30° Tilt
A Type
A Type
A Type
B Type
B Type
USB Device
Figure B.1
Figure C.1
Figure C.2
Power cord
DVI Cable
Figure C.3
NOTE:
If connecting both DVI and D-Sub cables, the DVI cable must be connected along side the rib on the power cord
side (
Figure C.2
).
5. For successful cable management, place the cables in this order into the cable management: power cable and DVI cable.
6. Place DVI cable and power cable into the specific hooks as indicated in
Figure C.3
.
7. Place the D-Sub and the USB cables (LCD205WNXM/LCD225WNXM only) into the specific hooks indicated in
Figure C.4
.
8. Make sure all cables are resting flat against the stand (
Figure C.4
).
Figure C.4
D-Sub Cable
USB
(LCD205WNXM/
LCD225WNXM only)
Flat
Audio Input
Headphone


