background image

English-4

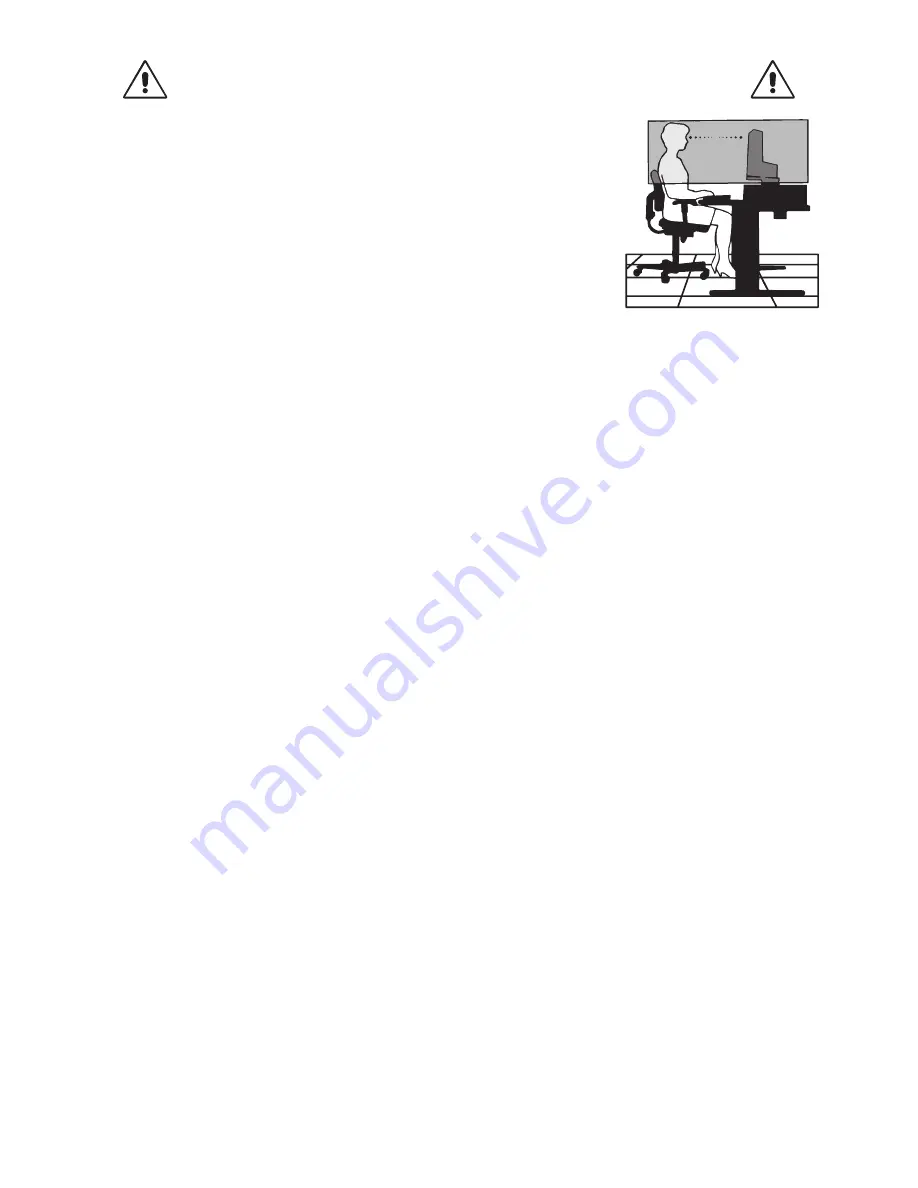
CORRECT PLACEMENT AND ADJUSTMENT OF THE MONITOR CAN

REDUCE EYE, SHOULDER AND NECK FATIGUE. CHECK THE

FOLLOWING WHEN YOU POSITION THE MONITOR:

•  For optimum performance, allow 20 minutes for the display to warm up.
•  Adjust the monitor height so that the top of the screen is at or slightly below eye level.  

Your eyes should look slightly downward when viewing the middle of the screen.

•  Position your monitor no closer than 40 cm (15.75 inches) and no further away than  

70 cm (27.56 inches) from your eyes. The optimal distance is 50 cm (19.69 inches).

•  Rest your eyes periodically by focusing on an object at least 20 feet away. Blink often.
•  Position the monitor at a 90° angle to windows and other light sources to minimize glare  

and reflections. Adjust the monitor tilt so that ceiling lights do not reflect on your screen.

•  If reflected light makes it hard for you to see your screen, use an anti-glare filter.
•  Clean the LCD monitor surface with a lint-free, non-abrasive cloth. Avoid using any  

cleaning solution or glass cleaner!

•  Adjust the monitor’s brightness and contrast controls to enhance readability.
•  Use a document holder placed close to the screen.
•  Position whatever you are looking at most of the time (the screen or reference material) directly in front of you to minimize  

turning your head while you are typing.

•  Avoid displaying fixed patterns on the monitor for long periods of time to avoid image persistence (after-image effects).
•  Get regular eye checkups.

Ergonomics

To realize the maximum ergonomics benefits, we recommend the following:
•  To avoid eye fatigue, adjust the brightness to a moderate setting. Place a sheet of white paper next to the LCD screen for 

luminance reference.

•  Do not position the Contrast control to its maximum setting.
•  Use the preset Size and Position controls with standard signals.
•  Use the preset Color Setting.
•  Use non-interlaced signals with a vertical refresh rate of 60 Hz.
•  Do not use primary color blue on a dark background, as it is difficult to see and may produce eye fatigue due to insufficient 

contrast.

Cleaning the Panel

•  When the panel is dusty, please gently wipe with a soft cloth.
•  Please do not rub the panel with hard or coarse material.
•  Please do not apply pressure to the panel surface.
•  Please do not use OA cleaner as it will cause deterioration or discoloration on the panel surface.

Cleaning the Cabinet

•  Unplug the power supply
•  Gently wipe the cabinet with a soft cloth
•  To clean the cabinet, dampen the cloth with a neutral detergent and water, wipe the cabinet and follow with a dry cloth. 

NOTE: 

Many plastics are used on the surface of the cabinet. DO NOT clean with benzene, thinner, alkaline detergent, 

alcoholic system detergent, glass cleaner, wax, polish cleaner, soap powder, or insecticide. Do not touch rubber or  

vinyl to the cabinet for a long time. These types of fluids and fabrics can cause the paint to deteriorate, crack or peel.

For more detailed information on setting up a healthy work environment, write to the American National Standard for Human

Factors Engineering of Computer Workstations - ANSI/HFES 100-2007 - The Human Factors Society, Inc. P.O. Box 1369, Santa

Monica, California 90406.

Содержание MultiSync E232WMT

Страница 1: ...MultiSync E232WMT User s Manual ...

Страница 2: ...mation English 2 Recommended use English 3 Contents English 5 Quick Start English 6 Controls English 10 Specifications English 13 Troubleshooting English 14 TCO Certified Displays 6 English 16 Manufacturer s Recycling and Energy Information English 17 ...

Страница 3: ...the safety standard of your particular country Plug Type North America European Continental U K Chinese Japanese Plug Shape Country U S A Canada EU except U K U K China Japan Voltage 120 230 230 220 100 When operating the monitor with its AC 125 240V power supply use a power supply cord that matches the power supply voltage of the AC power outlet being used NOTE This product can only be serviced i...

Страница 4: ... turning the equipment off and on the user is encouraged to try to correct the interference by one or more of the following measures Reorient or relocate the receiving antenna Increase the separation between the equipment and receiver Connect the equipment into an outlet on a circuit different from that to which the receiver is connected Consult your dealer or an experienced radio TV technician fo...

Страница 5: ...asures to prevent falling Immediately turn off the power unplug your monitor from the wall outlet and move to a safe location then refer servicing to qualified service personnel under the following conditions If the monitor is used in this condition the monitor may cause fall fire and electric shock If the monitor stand has been cracked or peeled If the monitor has been wobbled If the monitor has ...

Страница 6: ...ics To realize the maximum ergonomics benefits we recommend the following To avoid eye fatigue adjust the brightness to a moderate setting Place a sheet of white paper next to the LCD screen for luminance reference Do not position the Contrast control to its maximum setting Use the preset Size and Position controls with standard signals Use the preset Color Setting Use non interlaced signals with ...

Страница 7: ...B 15 pin Audio Cable DVI D to DVI D cable 2 USB Cable 3 Setup Manual Setup Manual Power Cord 1 Remember to save your original box and packing material to transport or ship the monitor 1 The type and number of power cords included will depend on the where the LCD monitor is to be shipped When more than one power cord is included please use the power cord that matches the AC voltage of the power out...

Страница 8: ...al output Connect the DVI signal cable to the connector of the display card in your system Figure A 1 Tighten all screws For a PC with Analog output Connect a 15 pin mini D SUB signal cable to the connector of the display card in your system Figure A 2 For a PC with HDMI output Connect the HDMI cable to the connector of the display card in your system Figure A 3 Figure A 1 Figure A 2 Figure A 3 HD...

Страница 9: ...r cord 5 Connect one end of the power cord to the AC inlet on the back of the monitor and the other end to the power outlet NOTE Please refer to Caution section of this manual for proper selection of AC power cord 6 Turn on the computer and the monitor by pressing the power key on the side bezel Figure E 1 7 No Touch Auto Adjust automatically adjusts the monitor to optimal settings upon initial se...

Страница 10: ...n raising or lowering the monitor screen Figure RL 1 Tilt Grasp both sides of the monitor screen with your hands and adjust the tilt as desired Figure TS 1 Figure TS 1 NOTE Handle with care when tilting the monitor screen Flexible Arm Installation This LCD monitor is designed for use with a flexible arm To prepare the monitor for alternate mounting purposes Follow the instructions provided by the ...

Страница 11: ...ables to the back of the monitor NOTE Handle with care when removing monitor stand Figure S 2 Figure S 3 Figure S 4 Mount Flexible Arm This LCD monitor is designed for use with a flexible arm 1 Follow the instructions on how Remove Monitor Stand for Mounting to remove the stand 2 Use the 4 screws removed from the stand to attach the arm to the monitor Figure F 1 Caution Use ONLY the screws 4 pcs t...

Страница 12: ...hile the OSD menu is off HDMI input with audio only 2 t DOWN Navigates down or decreases values through the OSD Control menu Select the Eco Mode directly while the OSD menu is off 3 AUTO EXIT Exits the OSD sub menu Exits OSD Control menu Selects the video input connectors directly while the OSD menu is off Hold the button to adjust H SIZE Fine and H V Position automatically while the OSD menu is o...

Страница 13: ...y Controls horizontal image position within the display area of the LCD V Position Analog input only Controls vertical image position within the display area of the LCD Expansion Sets the zoom method FULL The image is expanded to full screen regardless of the resolution ASPECT The image is expanded without changing the aspect ratio Color Color Color presets select the desired color setting Warm Wa...

Страница 14: ...llows you to reset all OSD control settings back to the factory settings Information Provides information about the current resolution display and the horizontal and vertical frequencies Indicates the model name and serial numbers of your monitor OSD Warning No signal This function gives a warning when there is no horizontal or vertical sync Out of Range This function gives a warning when the inpu...

Страница 15: ... Hub I F Port Load Current USB Specification Revision 3 0 Upstream 1 USB 3 0 Downstream 4 Maximum 0 9 A per port for USB 3 0 AUDIO AUDIO Input STEREO Mini Jack HDMI Connector Analog Audio Digital Audio Stereo L R 500mV rms 20 Kohm PCM 2ch 32 44 1 48 kHz 16 20 24bit Headphone Output STEREO Mini Jack Headphone Impedance 32 Ohm Speakers Practical Audio Output 1 0 W 1 0 W Camera 2 0 Mp 1920 x 1080 up ...

Страница 16: ...s either blank or shows rough images only Image is displayed only roughly pixels are missing and OSD warning Out of Range is displayed Either signal clock or resolution is too high Choose one of the supported modes OSD warning Out of Range is displayed on a blank screen Signal frequency is out of range Choose one of the supported modes Image is unstable unfocused or swimming is apparent Signal cab...

Страница 17: ...ed position Make an adjustment calibration in the Tablet PC settings of the Windows Control Panel A part of the touch panel does not react Press the POWER key to restart the display Do not touch the touch panel until the screen is displayed The speaker volume is too high or low Press the UP key to adjust the volume Adjust the speaker volume in the sound settings of the Windows Control Panel The ca...

Страница 18: ...Back Minimum one year product warranty Minimum three year availability of spare parts Product takeback Packaging Limits on hazardous substances in product packaging Packaging prepared for recycling Ergonomic User centered design Visual ergonomics in products with a display Adjustability for user comfort displays headsets Acoustic performance protection against sound spikes headsets and fan noise p...

Страница 19: ...greencompany in Europe http www nec display com in Japan or http www necdisplay com in USA Energy Saving This monitor features an advanced energy saving capability When a VESA Display Power Management Signalling DPMS Standard signal is sent to the monitor the Energy Saving mode is activated The monitor enters a single Energy Saving mode Mode Power consumption LED colour Maximum Operation 52 W Blue...

Отзывы: