background image

E – 2

IMPORTANT INFORMATION

Precautions

Please read this manual carefully before using your NEC MT1056 Pro-
jector and keep the manual handy for future reference.
Your serial number is located under the name plate label on the left
side of your MT1056. Record it here:

CAUTION

To turn off main power, be sure to remove the plug from
power outlet.
The power outlet socket should be installed as near to
the equipment as possible, and should be easily acces-
sible.

CAUTION

TO PREVENT SHOCK, DO NOT OPEN THE CABINET.
NO USER-SERVICEABLE PARTS INSIDE.
REFER SERVICING TO QUALIFIED NEC SERVICE
PERSONNEL.

This symbol warns the user that uninsulated voltage
within the unit may be sufficient to cause electrical shock.
Therefore, it is dangerous to make any kind of contact
with any part inside of the unit.

This symbol alerts the user that important information
concerning the operation and maintenance of this unit
has been provided. The information should be read care-
fully to avoid problems.

WARNING

TO PREVENT FIRE OR SHOCK, DO NOT EXPOSE THIS UNIT TO
RAIN OR MOISTURE.
DO NOT USE THIS UNIT’S GROUNDED PLUG WITH AN EXTEN-
SION CORD OR IN AN OUTLET UNLESS ALL THREE PRONGS CAN
BE FULLY INSERTED.
DO NOT OPEN THE CABINET. THERE ARE HIGH-VOLTAGE COM-
PONENTS INSIDE. ALL SERVICING MUST BE DONE BY QUALI-
FIED NEC SERVICE PERSONNEL.

DOC Compliance Notice

This Class B digital apparatus meets all requirements of the Canadian
Interference-Causing Equipment Regulations.

3. GSGV Acoustic Noise Information Ordinance:

The sound pressure level is less than 70 dB (A) according to ISO 3744
or ISO 7779.

RF Interference

WARNING

The Federal Communications Commission does not allow any
modifications or changes to the unit EXCEPT those specified by
NEC Technologies in this manual. Failure to comply with this gov-
ernment regulation could void your right to operate this equip-
ment.
This equipment has been tested and found to comply with the
limits for a Class B digital device, pursuant to Part 15 of the FCC
Rules. These limits are designed to provide reasonable protection
against harmful interference in a residential installation. This equip-
ment generates, uses, and can radiate radio frequency energy
and, if not installed and used in accordance with the instructions,
may cause harmful interference to radio communications. How-
ever, there is no guarantee that interference will not occur in a
particular installation. If this equipment does cause harmful inter-
ference to radio or television reception, which can be determined
by turning the equipment off and on, the user is encouraged to try
to correct the interference by one or more of the following mea-
sures:

• Reorient or relocate the receiving antenna.
• Increase the separation between the equipment and receiver.
• Connect the equipment into an outlet on a circuit different from that to

which the receiver is connected.

• Consult the dealer or an experienced radio / TV technician for help.

In UK, a BS approved power cable with moulded plug has a Black (five
Amps) fuse installed for use with this equipment. If a power cable is not
supplied with this equipment please contact your supplier.

C A U T I O N

• IBM is a registered trademark of International Business Machines

Corporation.

• Macintosh and PowerBook are registered trademarks of Apple Com-

puter, Inc.

• Other product and company names mentioned in this user’s manual

may be the trademarks of their respective holders.

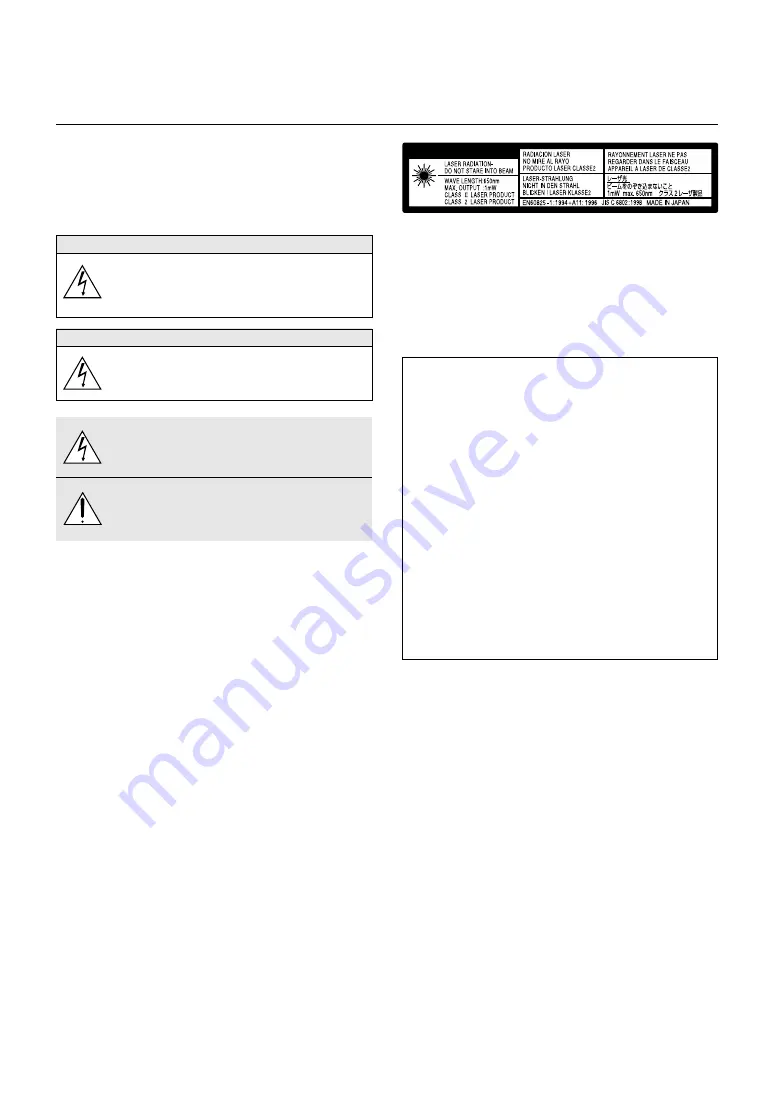
This label is located on the back of the remote control.

Содержание MT1056 - MultiSync XGA LCD Projector

Страница 1: ...T U S O N S T A N D B Y S O U R C E A U T O A D J U S T AC IN S VIDE O VIDE O AU DIO RG B INPU T 2 AU DIO RG B INPU T 1 L MO NO R AU DIO RG B MO NITO R OU TP UT US B PC CAR D C CO NT RO L MO US E OU T...

Страница 2: ...ons Commission does not allow any modifications or changes to the unit EXCEPT those specified by NEC Technologies in this manual Failure to comply with this gov ernment regulation could void your righ...

Страница 3: ...e projector is turned off Immediately after the power cable is plugged into the wall outlet the POWER indicator has not changed to a steady orange glow Immediately after the cooling fan stops working...

Страница 4: ...Management E 34 Gamma Correction E 34 Color Correction E 34 Color Matrix E 35 White Balance E 35 Projector Options E 35 Sleep Timer E 35 Menu E 35 Menu Mode E 35 Advanced Menu Basic Custom Menu Langua...

Страница 5: ...nced AccuBlend 2 Macintosh component signal YCbCr YPbPr or any other RGB signals within a horizontal frequency range of 15 to 100 kHz and a vertical frequency range of 50 to 120 Hz This includes NTSC...

Страница 6: ...E OU T RE MO CO NT R INPU PJ FO CU S ZO OM VO L SH IFT HE LP POINTER KEYSTONE MAGNIFY FREEZE PIC MUTE O F F V ID E O A U T O A D J S V ID E O R G B 1 R G B 2 L A S E R P O W E R O N PC CARD SLIDE FOL...

Страница 7: ...AC Input Connect the supplied power cable s three pin plug here Adjustable Tilt Foot Lens Ventilation outlet Carrying Handle Terminal Panel Air Filter Slot for Kensington Micro saver Security System P...

Страница 8: ...tems selected from the menu Top Features 6 Cancel Button Press this button to exit Menus Press this button to return the adjust ments to the last condition while you are in the adjustment or setting m...

Страница 9: ...nal monitor from the RGB input source 9 RGB Audio Input 1 Connector This is where you connect RGB audio output from a computer or an other RGB source RGB Input 1 Connector Mini D Sub 15 pin Connect yo...

Страница 10: ...B 1 port 10 RGB 2 Button Press this button to select a video source from computer or compo nent equipment connected to your RGB 2 port 11 AUTO ADJ Button Use this button to adjust an RGB source for an...

Страница 11: ...image is magnified about the center of the pointer When the pointer is not displayed the image is magni fied about the center of the screen When the image is magnified the pointer is changed to the ma...

Страница 12: ...teries Note on Remote Control Operation Pressing and holding the Select Mouse button while installing new batteries may cause malfunction or no operation Should this happen remove the batteries and th...

Страница 13: ...hen the PJ button is lit if you want to use the mouse function immediately press the PJ button to return to the Computer mode not lit Works as the Select button on the projector MENU ENTER CANCE L PJ...

Страница 14: ...feet 1 3 m from the wall or screen The largest the image can be is 300 7 6 m when the projector is about 36 8 feet 11 2 m from the wall or screen Using a Tabletop or Cart 1 Place your projector on a f...

Страница 15: ...UR CE AU TO AD JU ST AC IN Adjusting the Tilt Foot Press and hold the Tilt button on the left side of the projector Lift the front edge of the projector to the height you want and release the button...

Страница 16: ...H 487 7 W 365 8 H 192 W 144 H 304 8 W 228 6 H 120 W 90 H 243 8 W 182 9 H 96 W 72 H 203 2 W 152 4 H 80 W 60 H 162 6 W 121 9 H 64 W 48 H 121 9 W 91 4 H 48 W 36 H 81 3 W 61 0 H 32 W 24 H 67 1 W 50 3 H 2...

Страница 17: ...inch mm inch mm inch mm inch mm inch mm inch mm inch mm inch mm inch mm inch mm inch mm inch mm inch mm inch mm 1 8 45 3 2 7 68 0 3 0 75 9 3 2 81 5 3 7 95 1 4 0 101 9 4 5 113 3 5 4 135 9 6 7 169 9 8...

Страница 18: ...erDisc Player Monitor Remote Control Guideline 1 Plug the supplied serial cable with the mouse output port of the pro jector into your computer s mouse port and restart your computer to gain remote mo...

Страница 19: ...Macintosh Notebook type 1 ON DIP 2 3 4 5 6 Pin adapter for Macintosh not supplied For older Macintosh use a commercially available pin adapter to connect to your Mac s video port The new Macintosh co...

Страница 20: ...ons To connect the mouse output port 1 Turn off your computer 2 For PCs Remove your current mouse and connect the supplied serial cable from the mouse output to your PC s mouse port Use the 6 pin adap...

Страница 21: ...INPUT 2 AUDIO RGB INPUT 1 L MONO R AUDIO RGB MONITOR OUTPUT RGB INPUT RGB OUTPUT AUDIO IN AUDIO OUT Connecting an External Monitor You can connect a separate external monitor to your MT1056 to simult...

Страница 22: ...projector and DVD player 2 If your DVD player has the component video Y Cb Cr output use a commercially available component video cable RCA 3 and the optional 15 pin to RCA female 3 cable to connect...

Страница 23: ...to connect your VCR laser disc player or document camera to your projector To make these connections simply 1 Turn off the power to the projector and VCR laser disc player or document camera 2 Connect...

Страница 24: ...d Japanese To select a menu language follow these steps 1 Use the Select or button to select one of the seven languages for the menu 2 Press the Enter button to execute the selection 3 The Basic Custo...

Страница 25: ...Do not disconnect the power cable during this time Using the Menus NOTE The on screen menu may not be displayed correctly while interlaced motion video image is projected 1 Press the Menu button on t...

Страница 26: ...clock fre quencies that eliminate the horizontal banding in the image This func tion also adjusts the clock phase to reduce video noise dot interfer ence or cross talk This is evident when part of you...

Страница 27: ...Pointer You can use one of eight pointers to draw your audience s attention to the portion of a projected image you want Press the Pointer button to display the pointer Use the Select button to move t...

Страница 28: ...t placing a check mark on the main menu item NOTE Up to 12 main menu items within Basic Custom Menu Edit not including submenu items can be selected 4 Return the image to the original size Correcting...

Страница 29: ...cancel the changes on the Menu screen However you can re edit the menu items over again as described in the steps above NOTE If the Advanced Menu item has been selected on the Menu mode you get the C...

Страница 30: ...age 2 Page 3 Page 4 Page 5 Page 6 Menu Mode Advanced Menu Basic Custom Menu Basic Custom Menu Edit Language English German French Italian Spanish Swedish Japanese Projector Pointer Pointer 1 8 Menu Di...

Страница 31: ...cates settings or the direction of adjustment OK button Press to confirm your setting You will return to the previous menu Cancel button Press to cancel your setting You will return to the previous me...

Страница 32: ...layer NOTE A frame may freeze for a brief period of time when a video is played back in fast forward or fast rewind with a Video or S Video source PC Card Viewer This feature enables you to make prese...

Страница 33: ...NOTE If you have selected the Eco mode the lamp lights in Normal mode for 3 minutes after the projector is turned on After 3 minutes the lamp will change to Eco mode Lamp Mode Noise Reduction You can...

Страница 34: ...tings Color Correction OFF Turns off the Color Correction You obtain the brightest image Mode 1 Recommended for true flesh tones Mode 2 Recommended for turf color Mode 3 Recommended for deep red sRGB...

Страница 35: ...es are Manual Auto 5 sec Auto 15 sec and Auto 45 sec The Auto 45 sec is the factory preset Manual The menu can be turned off manually Auto 5 sec The menu will automatically be turned off in 5 seconds...

Страница 36: ...e to display a blue black screen or logo when no signal is available The default background is blue You can change the logo screen using the PC Card Files feature See page E 39 Mouse Settings This opt...

Страница 37: ...the pro jector is installed on the ceiling Auto Mute for Built in Speaker This option allows you to mute the built in speakers automatically when you connect an audio cable to the AUDIO OUT terminal C...

Страница 38: ...PC Control port Mini DIN 8 Pin It supports data rates from 4800 to 38400 bps The default is 38400 bps Select the appropriate baud rate for your equipment to be connected depending on the equipment a...

Страница 39: ...The ChalkBoard feature is available only when a USB mouse is used Free hand drawings cannot be saved or captured The menu is not available while you display the ChalkBoard screen The Capture function...

Страница 40: ...tered trademarks of Microsoft Corporation Inserting and Ejecting a PC Card A PC card is used to view presentation data prepared on the computer and to capture and play images projected with the projec...

Страница 41: ...5 Starting Up the PC Card Viewer Software on your PC PC Card Viewer Utility 1 0 Use the PC Card Viewer Utility 1 0 for creating viewer slides To start the PC Card Viewer software Select Start Programs...

Страница 42: ...or manually depending on the set ting on PC Card Viewer Options of the menu This allows you to move on to the next slide when Manual Play is selected Stop This allows you to stop Auto Play while you a...

Страница 43: ...pictures from a VCR etc it is possible to switch from a PC Card Viewer slide to the video picture then back to the PC Card Viewer slide simply by using a source button and PC CARD button NOTE Even if...

Страница 44: ...f the PC card data is damaged use a computer to repair the data NOTE The folder in the right bottom is always a folder exclusively for captured images To display the list of folders when there are 13...

Страница 45: ...software Use the procedure described below to uninstall the PC Card Viewer software files 1 From the Start menu select Settings then Control Panels 2 In the Control Panels dialog box double click on A...

Страница 46: ...A specifications It is one fourth the volume of a PCMCIA card PCMCIA 2 1 PC cards are divided into three types according to their thickness Type I 3 3 mm Type II 5 0 mm and Type III 10 5 mm A type of...

Страница 47: ...4 MAINTENANCE ENTER C A N C E L S E L E C T P O W E R S T A T U S S O N S T A N D B Y M ENU S O U R C E A U T O 2 Loosen the two screws securing the lamp housing until the screw driver goes into a fr...

Страница 48: ...on or off using the Menu Filter Clean Message option on the Setup menu See page E 36 After cleaning the filters and resetting the filter usage time to zero the message will not be displayed See page E...

Страница 49: ...page E 14 Use the Keystone to correct the trapezoid distortion See page E 28 or 33 Adjust the focus See page E 25 Reposition the projector to improve its angle to the screen See page E 14 Ensure that...

Страница 50: ...troyed While an image with over 1024 768 dots is projected several lines of information will be lost Use the supplied software to change the image to 1024 768 dots in size Use a computer etc to repair...

Страница 51: ...SECAM RGB 1024 dots horizontal 768 dots vertical Power Requirement 100 120 200 240 VAC 50 60 Hz Input Current 3 5 A 100 120 VAC 1 7A 200 240 VAC Mechanical Dimensions 11 1 W 4 8 H 14 9 D 281mm W 121mm...

Страница 52: ...ER STATUS ON STAND BY SOURCE AUTO ADJUST AC IN USB S VIDEO VIDEO AUDIO RGB INPUT 2 AUDIO RGB INPUT 1 L MONO R PC CARD AUDIO RGB MONITOR OUTPUT 1 5 0 06 281 11 06 73 5 2 89 121 4 76 4 0 16 7 5 0 3 39 5...

Страница 53: ...ound 5 Ground 6 Red Ground Cr Ground 7 Green Ground Y Ground 8 Blue Ground Cb Ground 9 No Connection 10 Sync Signal Ground 11 Ground 12 Bi directional DATA SDA 13 Horizontal Sync or Composite Sync 14...

Страница 54: ...75 108 MAC 1152 870 68 681 75 06 100 SUN 1152 900 61 796 65 95 92 94 SGI 1152 900 71 736 76 05 105 6 VESA 1280 960 60 60 108 VESA 1280 1024 63 981 60 02 108 MAC 1280 1024 69 89 65 2 118 5 HP 1280 102...

Страница 55: ...UTE ON 02H 10H 00H 00H 00H 12H PICTURE MUTE OFF 02H 11H 00H 00H 00H 13H SOUND MUTE ON 02H 12H 00H 00H 00H 14H SOUND MUTE OFF 02H 13H 00H 00H 00H 15H ON SCREEN MUTE ON 02H 14H 00H 00H 00H 16H ON SCREEN...

Отзывы: