5
User Controls
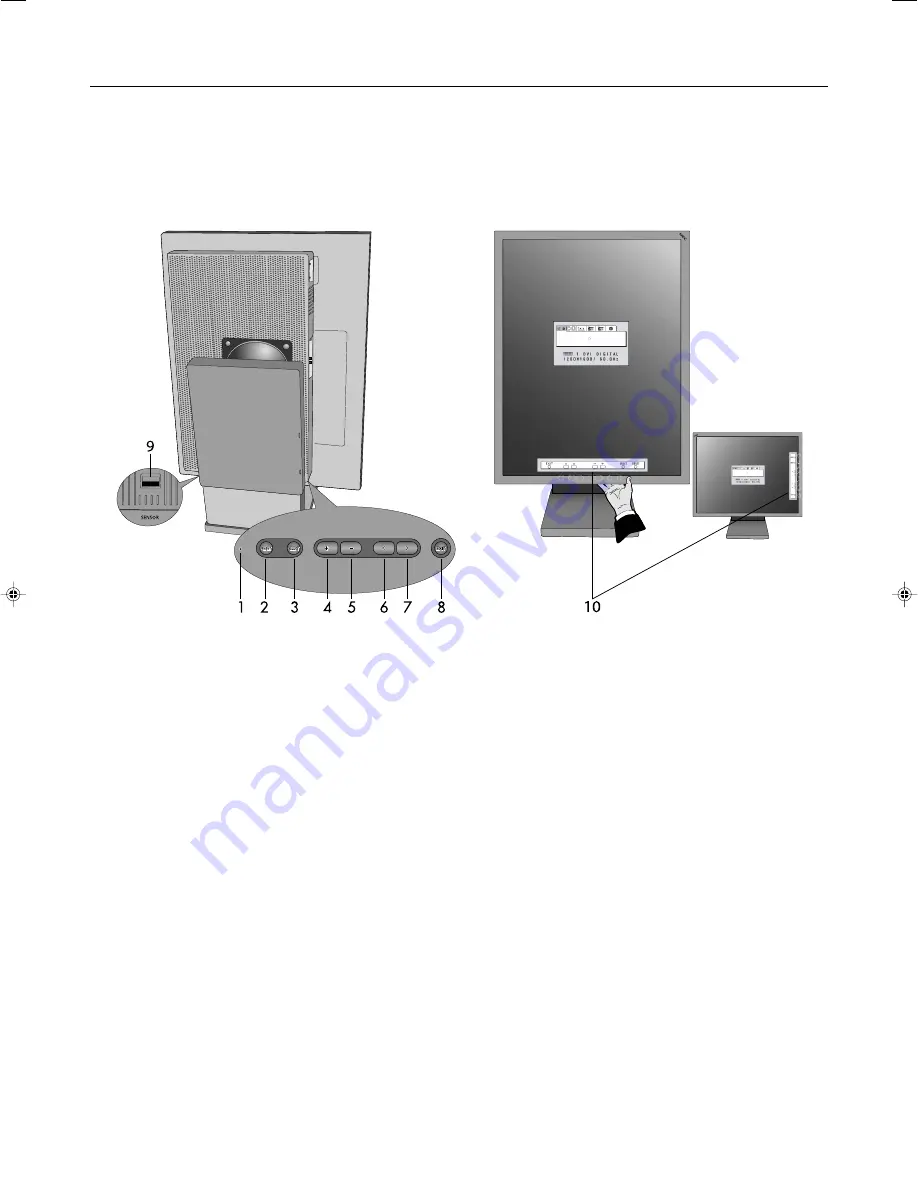
The On-Screen Manager (OSM) control buttons are located on the back of the display. To access the OSM menu, press
any of the user control buttons (
<
,
>
,
–
,
+
).
1. LED
Indicates power on and signal condition. The LED can be turned on, off, or dimmed. Please
refer to the Advanced OSM section/LED Brightness for further information.
Green – signal is present and power is on
Orange – no signal
2. RESET
Resets the highlighted control menu to the factory setting.
3. SELECT
Enters the OSM controls and OSM sub menu.
Changes signal input.
4/5. ADJUST -/+
Moves the bar left/right to increase or decrease the adjustment.
6/7. CONTROL </>
Moves the highlighted area left/right to select control menus.
Moves the highlighted area up/down to select one of the controls.
8. EXIT
Exits the OSM Controls and OSM Main Menu.
9. Sensor Port
For optional external sensor used for self calibration and copy calibration.
10. On-Screen
The key guide will automatically appear on the screen when any control button on the
Key Guide
back is pressed. The key guide will change orientation along with the OSM.
NOTE:
When
RESET
is pressed in the main and sub-menu, a warning window will appear allowing you to cancel the
RESET
function by pressing the EXIT button.
Portrait Mode
Landscape Mode
01_MD21GS2MPINSTALL_EN.P65
14/10/2004, 22:33
6


