background image

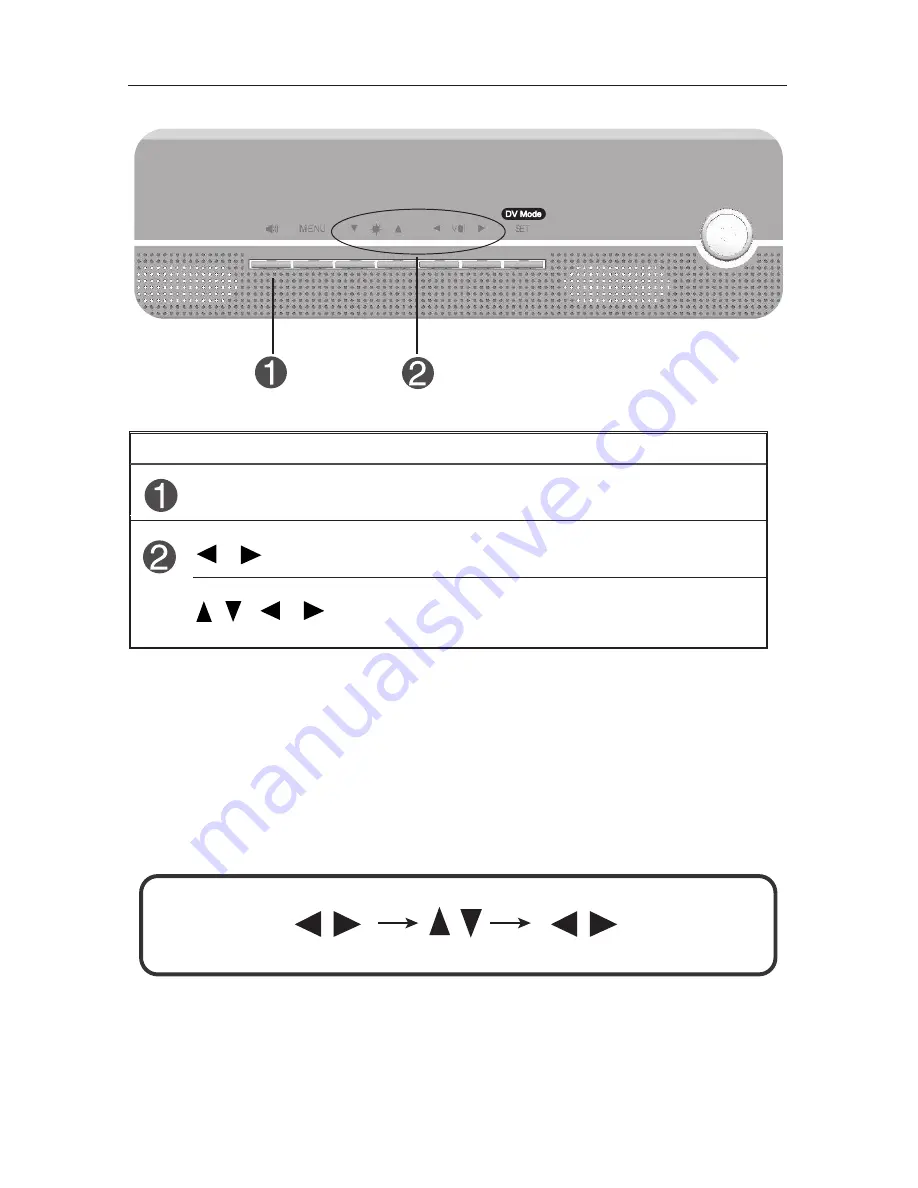
Use to mute audio source.

Audio Mute

Use these buttons to choose or adjust items in
the on screen display.


Control 

Function


Button

Brings up to the audio menu.


Button

/

Audio Selection and Adjustment

You were introduced to the procedure of selection and adjusting an item using the OSD 

system. Listed below are the icons, icon names, and icon descriptions of the items shown in 

the main Menu.

To make adjustments in the On Screen Display, follow these steps:

 Audio Functions

Содержание FE772M-BK - MultiSync - 17" CRT Display

Страница 1: ...772M User s Manual Manuel d utilisation To learn about other special offers register online at www necdisplay com Pour en savoir plus long sur d autres offres spéciales inscrivez vous en ligne à www necdisplay com ...

Страница 2: ...ecifications 18 Features 19 Troubleshooting 20 References 21 Limited Warranty 22 Avertissement 24 Contenu 25 Mise en marche rapide 26 Commandes 29 Utilisation des fonctions audio 36 Usage recommandé 39 Fiche techniques 41 Fonctions 42 Dépannage 43 Références 44 Garantie limitée 45 Index ...

Страница 3: ...quivalent to ensure FCC compliance 2 Please use the supplied shielded video signal cable Use of other cables and adapters may cause interference with radio and television reception 2 This equipment has been tested and found to comply with the limits for a Class B digital device pursuant to part 15 of the FCC Rules These limits are designed to provide reason able protection against harmful interfer...

Страница 4: ...ay com Your new NEC MultiSync monitor box should contain the following MultiSync Monitor with tilt swivel base Power Cord Captive Signal Cable User s Manual Remember to save your original box and packing material to transport or ship the monitor Power Cord User s Manual Captive Signal Cable FPO ...

Страница 5: ...pletely attach tilt swivel base to the monitor NOTE To avoid self injury or damage to the monitor attach and remove tilt swivel base with care CAUTION Make certain that the tilt swivel base is locked firmly into place before turning the monitor upright Removing the Tilt Swivel stand 1 With the monitor unplugged from your system and the wall outlet carefully turn the monitor upside down on a firm t...

Страница 6: ...onitor connector on the Macintosh Figure B 1 Attach the 15 pin mini D SUB end of the video signal cable to the Macintosh cable adapter on the computer Figure B 1 Tighten all screws NOTE To obtain the Macintosh cable adapter call NEC Display Solutions of America Inc at 800 632 4662 4 Connect one end of the power cord to the MultiSync monitor and the other end to the power outlet Figure C 1 NOTE If ...

Страница 7: ... Figure A 1 15 pin mini D SUB Captive Signal Cable 15 pin mini D SUB Mac Adapter Not Included Captive Signal Cable Figure B 1 Figure C 1 Power Cord Power Outlet Quick Start continued ...

Страница 8: ...e monitor operates normally If the monitor is in DPMS Energy Saving mode this indicator will flicker Power DPMS Indicator Use this button to turn the monitor on or off Power Button Use this button to enter a selection in the on screen display SELECT or SET Button Buttons Control Function Controls OSD On Screen Display control buttons on the front of the monitor function as follows ...

Страница 9: ...u can unlock the OSD controls at any time by pushing the MENU button and u button for 3 seconds The message CONTROLS UNLOCKED will appear CONTROLS UNLOCKED CONTROLS LOCKED Button Bring up Brightness adjustment Allows you to select the suitable setting for Movies Photos etc DV Mode TEXT PHOTO MOVIE NORMAL Controls continued MODE DESCRIPTION TEXT For use with word processing spreadsheets etc PHOTO T...

Страница 10: ...sing the OSD NOTE Allow the monitor to stabilize for at least 30 minutes before making image adjustments Case 1 Case 2 Controls continued To make adjustments in the On Screen Display follow these steps 1 Press the MENU or OSD Button then the main menu of the OSD appears 2 To access a control use the p or q Buttons When the desired icon is highlighted press the SELECT or SET Button 3 Use the pq tuB...

Страница 11: ...lt Side Pincushion S Pincushion Balance Parallelogram Trapezoid Top Corner Bottom Corner COLOR PRESET 6500K 9300K Temp R G B User Control SETUP Video Level Language OSD Time SPECIAL Degauss Recall Reset Moire H Moire V Moire To adjust the position of the screen To adjust the size of the screen To adjust the shape of the screen To customize the color of the screen To customize the screen status for...

Страница 12: ...cal Size To adjust image height Horizontal Size To adjust image width Tilt To correct image rotation Side Pincushion To correct a concave or convex bowing of the image Side Pincushion Balance To correct the balance of both sides bowing Parallelogram To correctly adjust the skew of the im age Trapezoid To correct geometric distortion Top Corner Bottom Corner To correct an irregular distortion of th...

Страница 13: ...nish Portuguese Korean Chinese Russian and Polish Set the OSD time i e the length of time a menu will remain on screen before it shuts off automatically Adjust the time to 5 10 20 30 or 60 seconds To manually demagnetize the screen to avoid showing incorrect images or colors You can use this function to reload the modified parameters for screen display operation as specified by the user after purc...

Страница 14: ...12 Controls continued This is to adjust the alignment of red and blue fields Use to adjust the purity on the screen if the color appears uneven CONVER GENCE PURITY H ...

Страница 15: ...erminal of the PC sound card is checked before connecting If the Audio Out of PC sound card has only Speaker Out reduce the PC volume NOTE If the Audio Out of the PC sound card supports both Speaker Out and Line Out convert to Line Out using the card jumper of the program Refer to the Sound Card Manual Automatically mutes the speaker volume when the headphones are plugged in Can be used instead of...

Страница 16: ...Brings up to the audio menu Button Audio Selection and Adjustment You were introduced to the procedure of selection and adjusting an item using the OSD system Listed below are the icons icon names and icon descriptions of the items shown in the main Menu To make adjustments in the On Screen Display follow these steps Audio Functions ...

Страница 17: ...s audio level Raises or lowers treble level Raises or lowers bass level Changes levels of left right speaker Enables or disables microphone usage Adjustable Main menu Description VOLUME TREBLE BASS BALANCE MICROPHONE Audio Functions ...

Страница 18: ...ed for use with this monitor If a power cord is not supplied with this monitor please contact your supplier Do not place any objects onto the monitor and do not use the monitor outdoors Cleaning Your Monitor A special coating is provided on the glass CRT surface of this monitor to reduce a reflection and static electricity on the glass surface Due to the delicate coating on the glass surface use a...

Страница 19: ...g at most of the time the screen or reference material directly in front of you to minimize turning your head while you are typing Get regular eye checkups Ergonomics To realize the maximum ergonomics benefits we recommend the following Adjust the Brightness until the background raster disappears Do not position the Brightness control to its maximum setting Use the preset Size and Position control...

Страница 20: ...2 x 864 55Hz to 77Hz 1280 x 1024 55Hz to 66Hz Max VESA 1280 x 1024 66Hz Recommend VESA 1024 x 768 85Hz Dimensions Weight with tilt swivel stand Width 400 mm 15 8 inches Height 401mm 15 8 inches Depth 411 mm 16 2inches Net 15 0 kg 33 0 lbs Power Input AC 100 240V 50 60Hz Current Rating 2 0A 100 240V Environmental Conditions Operating Conditions Temperature 0 C to 40 C Humidity 10 to 90 non Condensi...

Страница 21: ...you to quickly and easily adjust all elements of your screen image via simple to use on screen menus ErgoDesign Features Enhance human ergonomics to improve the working en vironment protect the health of the user and save money Examples include OSD controls for quick and easy image adjustments tilt swivel base for preferred angle of vision and compliance with MPRII guidelines for lower emissions P...

Страница 22: ...re is fuzzy or color looks blotchy Adjust Brightness and Contrast Controls Access the Degauss Control through OSD controls Activate the Degauss Control CAUTION A minimum interval of 20 minutes should elapse before the Deguass Control is used a second time when not switching between modes Picture bounces or a wavy pattern is present in the picture Move electrical devices that may be causing electri...

Страница 23: ...ne Technical Support www necdisplay com Sales and Product Information Sales Information Line 888 632 6487 Canadian Customers 866 771 0266 Ext 4037 Government Sales 800 284 6320 Government Sales email gov necdisplay com Electronic Channels World Wide Web www necdisplay com Product Registration www necdisplay com European Operations www nec display solutions com Drivers and Downloads www necdisplay ...

Страница 24: ...Y SOLUTIONS for service MUST have prior approval which may be obtained by calling 1 800 632 4662 The Product shall not have been previously altered repaired or serviced by anyone other than a service facility authorized by NEC DISPLAY SOLUTIONS to render such service the serial number of the product shall not have been altered or removed In order to be covered by this warranty the Product shall no...

Страница 25: ...or if applicable follow any agreements made between yourself and NEC The mark on electrical and electronic products only applies to the current European Union Member States Outside the European Union If you wish to dispose of used electrical and electronic products outside the European Union please contact your local authority so as to comply with the correct disposal method Declaration of the Man...

Страница 26: ...rmité FCC 2 Prière d utiliser le câble de signal captif L utilisation d autres câbles et adaptateurs peut provoquer des interférences avec la réception radio et télévision 2 Cet appareil a été testé et s avère conforme avec les spécifications d équipements de Classe B section 15 de la réglementation FCC Ces spécifications ont été établies pour garantir une protection raison nable contre les interf...

Страница 27: ...r NEC MultiSyncMC contient Moniteur MultiSync avec socle inclinable rotatif Cordon d alimentation Câble d interface captif Manuel de l utilisateur FPO Ne pas oublier de conserver la boîte et le matériel d emballage d origine pour transporter ou expédier le moniteur Cordon d alimentation Manuel de l utilisateur Câble d interface captif ...

Страница 28: ...Hook Latch Hook Table solide Raccorder Socle Inclinable Rotatif 1 Le moniteur étant débranché du système et de la prise de courant renverser soigneusement le moniteur sur une table solide 2 Alignez les crochets du socle inclinable et pivotant par rapport aux logements correspondants dans la base du moniteur 3 Insérez les crochets dans les logements 4 Faites glisser le socle vers l avant du moniteu...

Страница 29: ...le d interface à l adaptateur de câble Macintosh sur l ordinateur Figure B 1 Serrer toutes les vis REMARQUE Pour obtenir un adaptateur de câble Macintosh appeler NEC Display Solutions of America Inc au 800 632 4662 4 Connecter une extrémité du cordon d alimentation au moniteur et l autre extrémité à la prise de courant Figure C 1 NOTA Si vous utilisez ce moniteur à AC125 240V s il vous plaît faite...

Страница 30: ...B à 15 broches Adaptateur Mac non fourni Câble d interface captif Figure B 1 Figure C 1 Cordon d alimentation Prise de courant Figure A 1 Mini fiche D SUB à 15 broches Câble d interface captif Mise en marche rapide suite ...

Страница 31: ...est en mode de fonctionnement normal S il passe en mode DPMS économie d énergie la diode prend la couleur orange Témoin d alimentation DPMS Ce bouton permet d allumer et éteindre le moniteur Bouton d alimentation Ce bouton permet de saisir et valider les valeurs choi sies dans le menu affiché Bouton SELECT ou SET Control Function Commandes Les boutons de réglage OSD situés sur l avant du moniteur ...

Страница 32: ... menu à l écan an appuyant sur les boutons MENU et u pendant 3 secondes le message DE VEROUILLAGE CONTROLLÉ Contrôles déverrouillés s affiche VEROUILLAGE CONTROLLÉ DE VERROUILLAGE CONTROLLÉ TEXT PHOTO MOVIE NORMAL MODE ENVIRONNEMENT TEXT PHOTO MOVIE NORMAL Utile pour l utilisation de documents de traitement de texte ou de feuilles de calculs Permet d afficher des images ou des dessins avec une hau...

Страница 33: ...es et des sélections que vous pouvez effectuer avec l OSD NOTE Permettez au moniteur de stabiliser pendant au moins 30 minutes avant de faire des ajustements d image Pour effectuer des réglages dans l OSD procédez comme suit 1 Appuyez sur le bouton MENU ou OSD Le menu principal de l OSD ap paraît 2 Pour accéder aux commandes utilisez les boutons et Lorsque l icône que vous désirez apparaît en surb...

Страница 34: ...ATION SPÉCIAL Luminosité Contraste Position V Position H Taille V Taille H Prédéf 6500K 9300K Temp R V B Couleur Usager Démagnét Rappeler Reset Moirage Moirage H Moirage V Réglable Réglage de la luminosité et du contraste de l image Réglage de la position de l écran Réglage de la taille de l écran Réglage de la forme de l écran Personnalisation de la couleur de l écran Personnalisation du statut d...

Страница 35: ...lage de la hauteur de l image Taille H Réglage de la largeur de l image Inclinaison Correction de l inclinaison de l image Coussin Latéral Correction des images concaves ou convexes Coussin Balance Correction de l équilibre des lignes incurvées Parallélogramme Correction de l obliquité de l image Trapèze Correction de la distortion géomé trique Angle Supérieur Angle Inférieur Correction des distor...

Страница 36: ...D sont dis ponibles dans les 12 langues suivantes anglais allemand français espagnol italien suédois finlandais portugais coréen chinois russe et polonais Définissez le temps d OSD c est à dire le temps pendant lequel les menus restent affichés avant de disparaître automa tiquement Les valeurs possibles sont de 5 10 20 30 et 60 secondes Démagnétisation automatique de l écran Cette fonction permet ...

Страница 37: ...35 Commandes suite Permet de régler l alignement des faisceaux rouges et bleus Réglage de la pureté de l image en cas d inégalité de couleur CONVER GENCE PURETÉ H ...

Страница 38: ...nnecter Si la sortie audio de la carte son du PC ne comporte qu une prise pour haut parleur diminuez le volume REMARQUE Si la sortie audio de la carte son du PC prend en charge la prise pour hautparleur et la sortie de ligne sélectionnez la sortie de ligne à l aide du cavalier de la carte du programme reportez vous au manuel de la carte son Automatically mutes the speaker volume when the headphone...

Страница 39: ...Fait apparaître le menu audio Boutons Sélection et paramétrage de l audio Maintenant que vous connaissez la procédure de sélection et de réglage des éléments à l aide du système OSD voici la liste de tous les icônes ainsi que leur nom et description présents dans le menu OSD Pour effectuer des réglages dans l OSD procédez comme suit Utilisation des fonctions audio suite ...

Страница 40: ...me sonore Augmente ou réduit le volume des fréquences aiguës Augmente ou réduit le volume des basses fréquences Modifie les niveaux sonores des haut parleurs droit et gauche Active ou désactive le microphone Réglable Menu principal Description Utilisation des fonctions audio suite ...

Страница 41: ...on pays Au Royauma Uni utiliser un cordon d alimentation certifié BS avec une prise mouiée ayant un fusible noir 5A installé pour l utilisation avec ce moniteur Si un cordon d alimentation n est pas fourmi avec ce moniteur veuiller contacter votre fournisseur Ne placer aucun objet sur le moniteur et ne pas l utiliser en extérieur Nettoyer votre moniteur La surface en verre écran cathodique de votr...

Страница 42: ...tionner ce que l on regarde le plus souvent l écran ou les documents de référence directement devant soi pour réduire au maximum les mouvements de la tête lorsque l on dactylographie Consulter régulièrement un ophtalmologiste Ergonomie Pour des raisons ergonomiques nous vous recommandons de régler la luminosité de façon à faire desparaître la trame de fond de ne pas régler le contröle de contraste...

Страница 43: ...24 50Hz à 66Hz Max VESA 1280 x 1024 à 66Hz Recommend VESA 1024 x 768 à 85Hz Dimensions et poids avec socle Largeur 400 mm 15 8 inches Hauteur 401 mm 15 8 inches Profondeur 411 mm 16 2 inches Poids net 15 0 kg 33 0 lbs Alimentation CA 100 240 V 50 60 Hz Tension d alimentation 2 0A à 100 240V Environnement Conditions de fonctionnement Température 0 C à 40 C Humidité 10 à 90 sans condensation Conditi...

Страница 44: ...s les éléments de l image de l écran via les menus à l écran simples à utiliser Fonctions ErgoDesign Améliore l ergonomie humaine pour améliorer l environnement de travail protéger la santé de l utilisateur et épargner de l argent On peut citer comme exemple les commandes OSD pour un réglage rapide et aisé de l image une base d inclinaison de rotation pour un angle de vision préféré et la conformi...

Страница 45: ...cté L image est floue ou les couleurs semblent brouillées Régler les commandes de luminosité et de contraste Accéder à la commande Degauss via les commandes OSD Activer la commande Degauss ATENTION Un intervalle d au moins 20 minutes doit s écouler avant que la commande Degauss ne soit utilisée une seconde fois lorsqu il n y a pas de commutation entre les modes L image danse ou une trame onduleuse...

Страница 46: ...sistance technique en ligne www necdisplay com Ventes et information produit Ligne d information sur les ventes 888 888 632 6487 Clientèle canadienne 866 771 0266 Ext 4037 Ventes au gouvernement 800 284 6320 Adresse électronique du service des ventes au gouvernement gov necdisplay com Courrier électronique World Wide Web www necdisplay com Produit enregistré www necdisplay com Opérations Européenn...

Страница 47: ...ez d abord obtenir une autorisation de retour de marchandise en composant le 1 800 632 4662 Le produit ne pourra avoir été enlevé ou modifié réparé ou entretenu au préalable par personne d autre que du personnel technique autorisé par NEC DISPLAY SOLUTIONS et le numéro de série du produit ne pourra pas avoir été enlevé Pour être couvert par cette garantie le produit ne pourra pas avoir été soumis ...

Страница 48: ...niques portant le symbole ci contre à gauche ne soient pas mélangés au reste des déchets ménagers lors de leur élimination Ceci inclut notomment les moniteurs et accessoires électriques tels que les cˆsbles signaux et les cordons d alimentation Lorsque vous a vendu le produit en question Vous pouvez oussi respecter tout accord passé entre NEC et vous même le cas éché ant Ce symbole présent sur les...

Страница 49: ...it peuvent être déterminées par le client et ne sont pas garanties par NEC Display Solutions of America Inc Afin de permettre l amélioration du design et des caractéristiques techniques les informations contenues dans ce document sont sujettes à modifications sans préavis La reproduction totale ou partielle de ce document sans l accord préalable de NEC Display Solutions of America Inc est interdit...

Страница 50: ...customer and is not warranted by NEC Display Solutions of America Inc To allow for design and specification improvements the information in this document is subject to change at any time without notice Reproduction of this document or portions thereof without prior approval of NEC Display Solutions of America Inc is prohibited DECLARATION OF CONFORMITY This device complies with Part 15 of FCC Rule...

Отзывы: