72
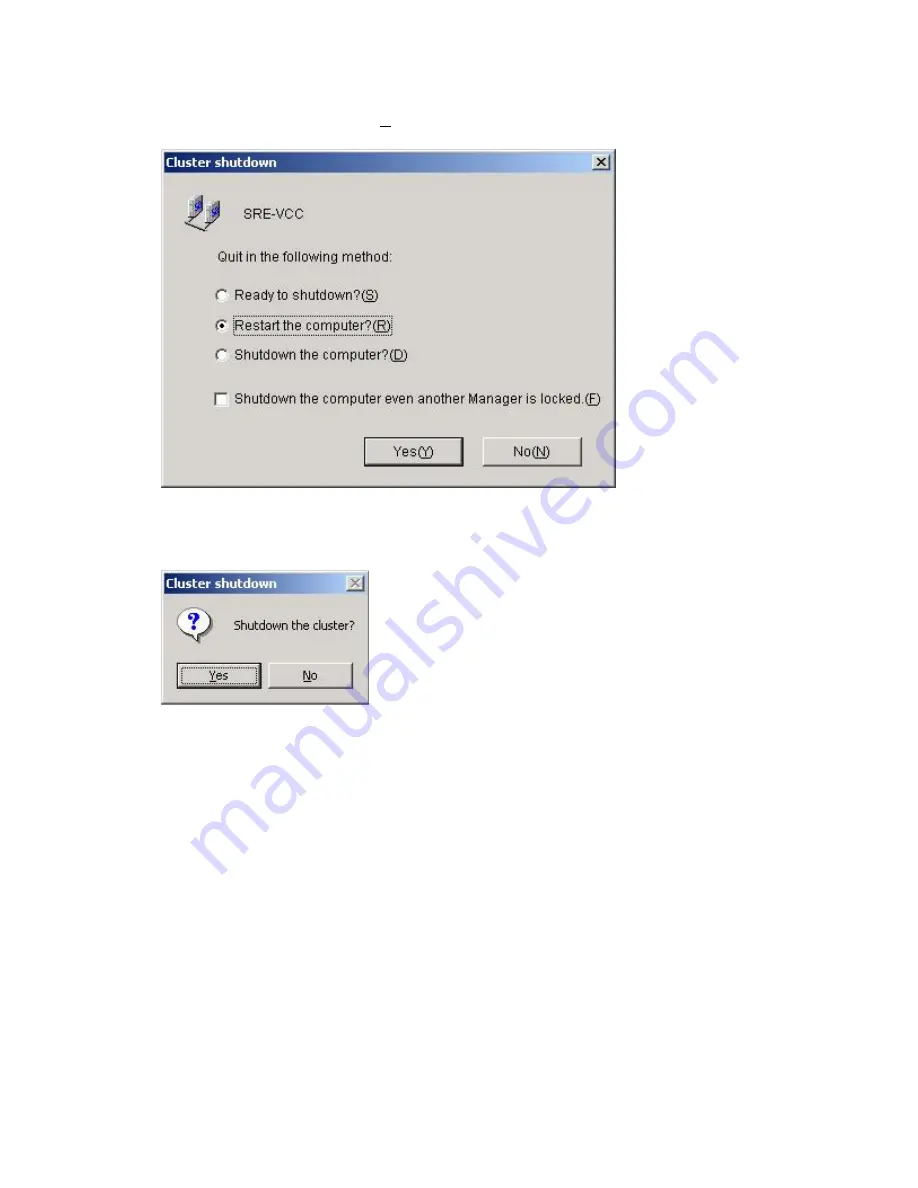
Select
Restart the Computer?(R)
and click
Yes
:
Step 8:
Click
Yes:
Step 9:
After the server reboots, start the command prompt (using
Start-> Programs-
>Accessories-> Command Prompt
) and type in the following command and hit
enter:
armem /M reboot
You see the following text:
Command succeeded.
Note:
This command configures the server for automatic reboot incase a process
terminates more than x times in y hours. These threshold values are specified
using the armload command. Please see section ARMLOAD in Chapter 8 for the
explanation of these threshold parameters.
Содержание ExpressCluster SRE
Страница 1: ...NEC ExpressCluster SRE Version 7 0 Installation and Configuration Guide Windows edition ...
Страница 10: ...10 Step 2 Click the Registration button ...
Страница 11: ...11 Step 3 Click the License item is inputted button ...
Страница 13: ...13 Step 5 Select the Node unit radio button type in 1 as the Node licenses number and click Next ...
Страница 16: ...16 Step 8 Confirm the license information and click Next on the following screen ...
Страница 19: ...19 Step 2 Click the Create cluster C button on the following screen ...
Страница 20: ...20 Step 3 Select NEC ExpressCluster Standard SE SX S and click Next on the following screen ...
Страница 23: ...23 Click Next Step 5 On the following screen click the Add A button ...
Страница 26: ...26 Step 8 Click Next on the screen below ...
Страница 27: ...27 Step 9 Select No NP resolution mode O and click Next on the screen below ...
Страница 28: ...28 Step 10 Click Next on the screen below ...
Страница 29: ...29 Step 11 Click Next on the screen below ...
Страница 30: ...30 Step 12 Click Next on the screen below ...
Страница 31: ...31 Step 13 Click Finish on the screen below ...
Страница 34: ...34 Step 2 Click Yes below Step 3 Select Detailed set up D and click OK ...
Страница 35: ...35 Step 4 Select the Return mode tab and select Auto return N as below ...
Страница 40: ...40 Step 5 Select the server from the Server list S and click the Add A button ...
Страница 41: ...41 Step 6 Click OK on the following screen ...
Страница 43: ...43 Click OK The Failover Group icon should be Green and all the resources should be Online as below ...
Страница 44: ...44 ...
Страница 47: ...47 Step 2 Click the Registration button ...
Страница 49: ...49 Step 5 Select the Node unit radio button type in 1 as the Node licenses number and click Next ...
Страница 52: ...52 Step 8 Confirm the license information and click Next on the following screen ...
Страница 58: ...58 Click Next Step 5 On the following screen click the Add A button ...
Страница 61: ...61 Step 8 Click Next on the screen below ...
Страница 62: ...62 Step 9 Select No NP resolution mode O and click Next on the screen below ...
Страница 63: ...63 Step 10 Click Next on the screen below ...
Страница 64: ...64 Step 11 Click Next on the screen below ...
Страница 65: ...65 Step 12 Click Next on the screen below ...
Страница 66: ...66 Step 13 Click Finish on the screen below ...
Страница 69: ...69 Step 2 Click Yes below Step 3 Select Detailed set up D and click OK ...
Страница 70: ...70 Step 4 Select the Return mode tab and select Auto return N as below ...
Страница 75: ...75 Step 5 Select the server from the Server list S and click the Add A button ...
Страница 76: ...76 Step 6 Click OK on the following screen ...
Страница 78: ...78 Click OK The Failover Group icon should be Green and all the resources should be Online as below ...
Страница 79: ...79 ...
Страница 82: ...82 Step 4 Click on the Replace button This takes you to the following screen ...
Страница 86: ...86 Step 11 Click on the Replace button This takes you to the following screen ...
Страница 89: ...89 Step 16 Close the file and click OK on the following screen ...
Страница 90: ...90 Step 17 Click OK again on the following screen ...
Страница 96: ...96 Step 3 Select the Scripts tab and highlight the start bat script The Screen shot is as shown ...
Страница 97: ...97 Step 4 Click on the Replace button This takes you to the following screen ...
Страница 101: ...101 Step 11 Click on the Replace button This takes you to the following screen ...
Страница 104: ...104 Step 16 Close the file and click OK ...
Страница 105: ...105 Step 17 Click OK again on the following screen ...
Страница 114: ...114 Step 3 Select the Scripts tab and highlight the start bat script The Screen shot is as shown ...
Страница 117: ...117 Step 8 Save the file and click OK Click OK again on the following screen ...
Страница 123: ...123 Step 2 Windows 2003 Select Internet Protocol TCP IP and click the Properties button ...
Страница 124: ...124 Windows 2000 Select Internet Protocol TCP IP and click the Properties button ...
Страница 125: ...125 Step 3 Change the IP Address to it IP 20 20 20 1 The image is as below ...
Страница 126: ...126 Step 4 Click on the Advanced button select 192 168 93 1 and click the Edit button as below ...
Страница 127: ...127 Step 5 Change the second IP Address to IP 131 241 74 17 and Click OK Step 6 Click OK on the following screen ...
Страница 128: ...128 Step 7 Click OK on the following screen ...
Страница 129: ...129 This completes the steps to change the default IP addresses ...


