background image

2

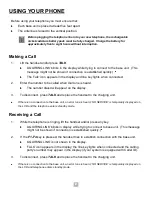
USING YOUR PHONE

Before using your telephone you must ensure that:

!

Each base unit is placed at least five feet apart.

!

The antenna is raised to the vertical position. 

Making a Call

1.

Lift the handset and/or press TALK.  

!

‘AQUIRING LINK’ blinks in the display while trying to connect to the base unit.  (This 
message might not be shown if connection is established quickly.)  

,

!

The ‘Talk’ icon appears in the display and line key lights when connected.

2.

Enter the number to be called when dial tone is heard.

!

The number dialed will appear on the display.

3.

To disconnect, press TALK and replace the handset to the charging unit.

,

If there is no connection to the base unit, an error tone is heard, ‘NO SERVICE’ is temporarily displayed on 
the LCD and the telephone enters standby mode.

Receiving a Call

1.

While the telephone is ringing, lift the handset and/or press any key. 

!

‘AQUIRING LINK’ blinks in display while trying to connect to base unit.  (This message 
might not be shown if connection is established quickly.) 

,

2.

If  the F1-F4 key is pressed, the handset tries to establish connection with the base unit. 

!

‘AQUIRING LINK’ is not shown in the display.

!

‘TALK’ icon appears in the display, the line key lights when connected and the calling 
party’s number may appear in the display (if your system is equipped with Caller ID).

3.

To disconnect, press TALK and replace the handset to the charging unit.

,

If there is no connection to the base unit, an error tone is heard, ‘NO SERVICE’ is temporarily displayed on 
the LCD and telephone enters standby mode.

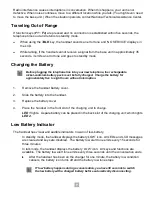
Before plugging the telephone line into your new telephone, the rechargeable 
nickel-cadmium battery pack must be fully charged.  Charge the battery for 
approximately five to eight hours without interruption.

Содержание Dterm Cordless II DTR-4R BK

Страница 1: ... may occur causing slight variations When viewing and printing this document we cannot guarantee that your specific PC or printer will support all of the fonts or graphics Therefore when you view the document fonts may be substituted and your individual printer may not have the capability to print the document correctly ...

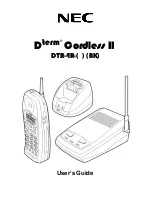
Страница 2: ...User s Guide Dterm Cordless II DTR 4R BK ...

Страница 3: ......

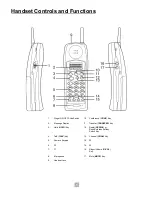
Страница 4: ...ence CONF Key 2 Message Display 11 Transfer TRANSFER Key 3 Hold HOLD Key 12 Redial REDIAL or Desk Cordless Softkey Switch Key 4 Talk TALK Key 13 Channel CHAN Key 5 Numeric Keypad 14 F3 6 F2 15 F4 7 F1 16 Ringer Volume R VOL Key 8 Microphone 17 Mute MUTE Key 9 Headset Jack ...

Страница 5: ... mode Receiving a Call 1 While the telephone is ringing lift the handset and or press any key AQUIRING LINK blinks in display while trying to connect to base unit This message might not be shown if connection is established quickly 2 If the F1 F4 key is pressed the handset tries to establish connection with the base unit AQUIRING LINK is not shown in the display TALK icon appears in the display th...

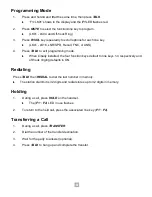
Страница 6: ...d the four function keys default to line keys 1 4 respectively and off hook ringing defaults to ON Redialing Press TALK then REDIAL to dial the last number in memory The station dial limit is 32 digits and redial stores up to 32 digits in memory Holding 1 During a call press HOLD on the handset The F1 F4 LED in use flashes 2 To return to the held call press the associated line key F1 F4 Transferri...

Страница 7: ...ress R VOL to change the ear speaker volume setting The telephone has four receiver volume levels Low Medium High Maximum 2 Continue to press R VOL until the desired volume is selected When you hang up the telephone retains the last selected volume Ring Tone Volume In standby mode press R VOL to change the ring tone and volume In standby mode press R VOL The selected tone and volume rings for abou...

Страница 8: ...the handset rings as Ring Type A Low Ring Tone Volume Setting Table The following table shows how the handset rings in each setting Desk Cordless Switching When the Dterm Cordless II is associated with a multiline telephone the base unit can be used for switching between Cordless and Desk modes Press Cordless to select Dterm Cordless II mode OR Press Desk to select multiline telephone mode The RED...

Страница 9: ... mode 9 To test this feature press REDIAL once The base unit automatically changes from Desk to Cordless This is a one time switching operation only If necessary F1 F4 can be programmed for redial function 10 The REDIAL key can be restored for redial function only by entering setup mode pressing F3 and then HOLD The handset displays Digital Redial This means that the REDIAL key has been restored f...

Страница 10: ...it to charge LED 1 lights A spare battery can be placed in the back slot of the charging unit which lights LED 2 Low Battery Indicator The handset has visual and audible indicators to warn of low battery In standby mode the handset displays the battery LOW icon All LEDs and LCD messages are cleared and keys are disabled The battery low alert tone emits every 15 seconds for three minutes In talk mo...

Страница 11: ...emove the beltclip pull both sides of the beltclip out of the holes Headset Installation Your telephone can be used with an optional headset To use this feature simply plug the headset into the headset jack on the handset Your telephone is ready for handsfree conversation Dterm Cordless II is hearing aid compatible Optional Available Parts Part Description Stock Number Headset 730602 Charging Unit...

Страница 12: ...Notes ...

Страница 13: ...Notes ...

Страница 14: ......

Страница 15: ...ct to change without prior notice at the sole discretion of NEC Unified Solutions Inc Dterm is a registered trademark of NEC Corporation Document Revision 2 For more information contact NEC Unified Solutions Inc 6555 N State Highway 161 Irving TX 75039 2402 www necunified com cng ...

Отзывы: