
3-8
Disassembly and Reassembly
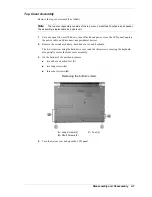
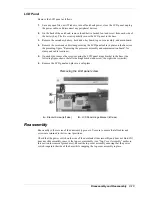
5.
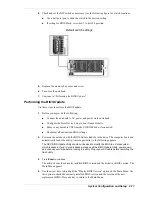
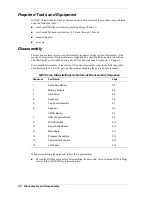
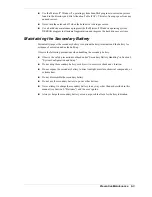
Open the LCD panel approximately half way. Remove the left and right inside caps by
carefully pushing each cap towards the middle of the notebook until it pops off the top
cover assembly. The caps are held tightly in place by three internal tabs.
Removing the inside cap
A
– Left Inside Cap (right side similar)
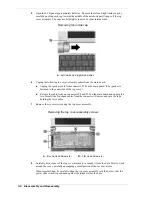
6.
Unplug the following top cover assembly cables from the main board.
!
Unplug the speaker cable from connector P18 on the main board. (The speaker is
fastened to the underside of the top cover.)
!
Release the cable locks on connectors P9 and P10 on the main board and unplug the
two VersaGlide Touchpad cables from the connectors. Remove and save the tape
holding the two cables.
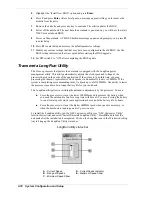
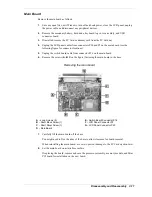
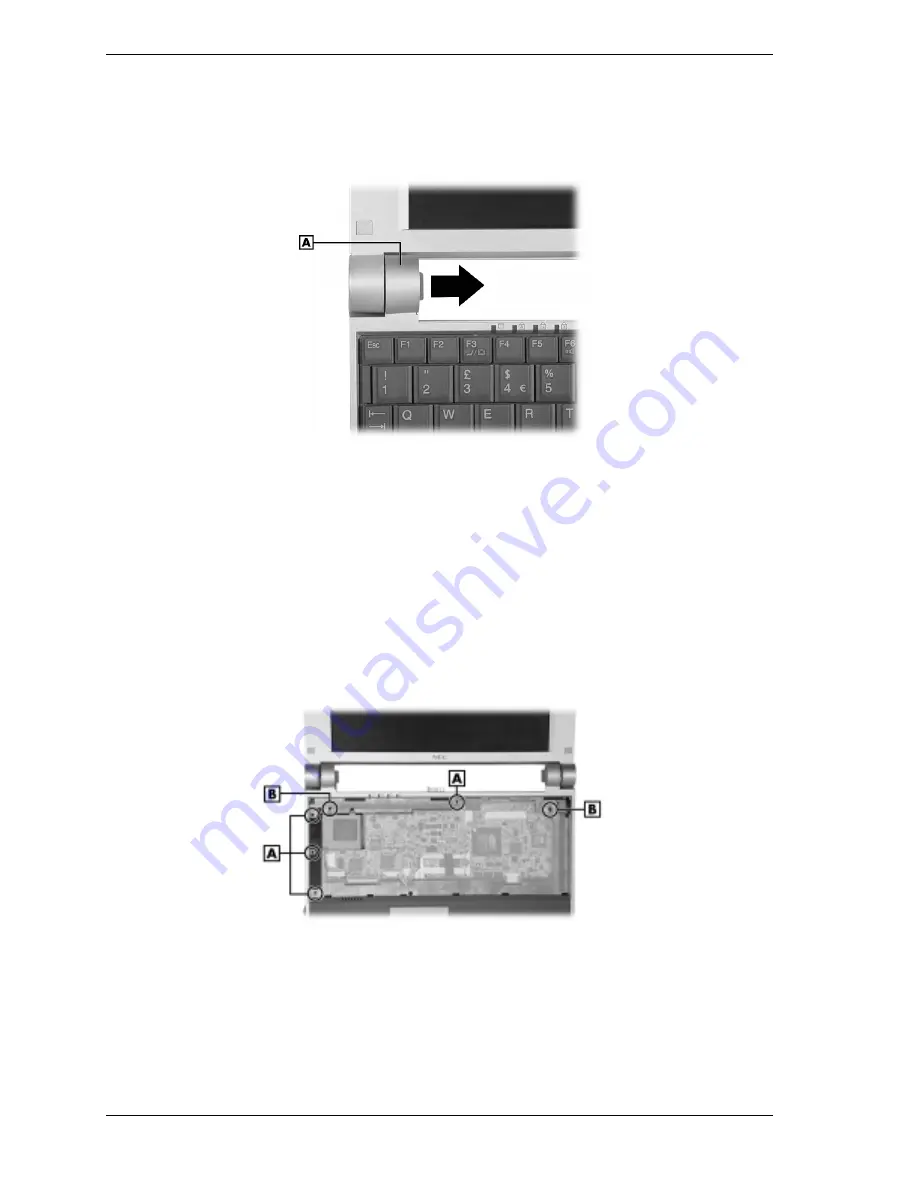
7.
Remove the six screws securing the top cover assembly.
Removing the top cover assembly screws
A
– Round Head Screws (4)
B
– Flat Head Screws (2)
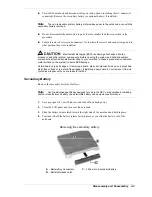
8.
Carefully lift a corner of the top cover assembly to unsnap it from the base. Slowly work
around the cover, carefully unsnapping a small portion of the cover at a time.
When reassembling, be careful to align the top cover assembly with the base so that the
power slide switch is positioned against the inside wall of the base.
Содержание DayLite Series
Страница 42: ...3 Disassembly and Reassembly Required Tools and Equipment Disassembly Reassembly ...
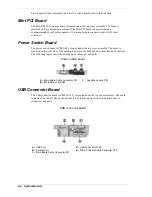
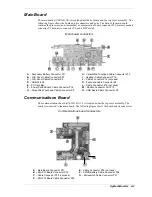
Страница 55: ...4 System Boards Mini PCI Board Power Switch Board USB Connector Board Main Board Communications Board ...
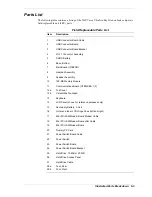
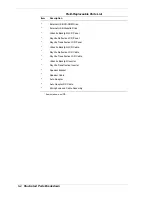
Страница 58: ...5 Illustrated Parts Breakdown Illustrated Parts Breakdown Parts List ...
Страница 65: ...7 Troubleshooting Problem Checklist Startup Problems Diagnostics ...
Страница 73: ...8 NEC Computers Information Services Service and Support Functions Technical Support ...
Страница 76: ...9 Specifications System Components Memory Map Interrupt Controllers ...
Страница 95: ...NEC Computers Inc 15 Business Park Way Sacramento CA 95828 819 200725 000 8 2001 819 200725 000 ...


