


36
NEC D3-10i Quick Start Guide
36
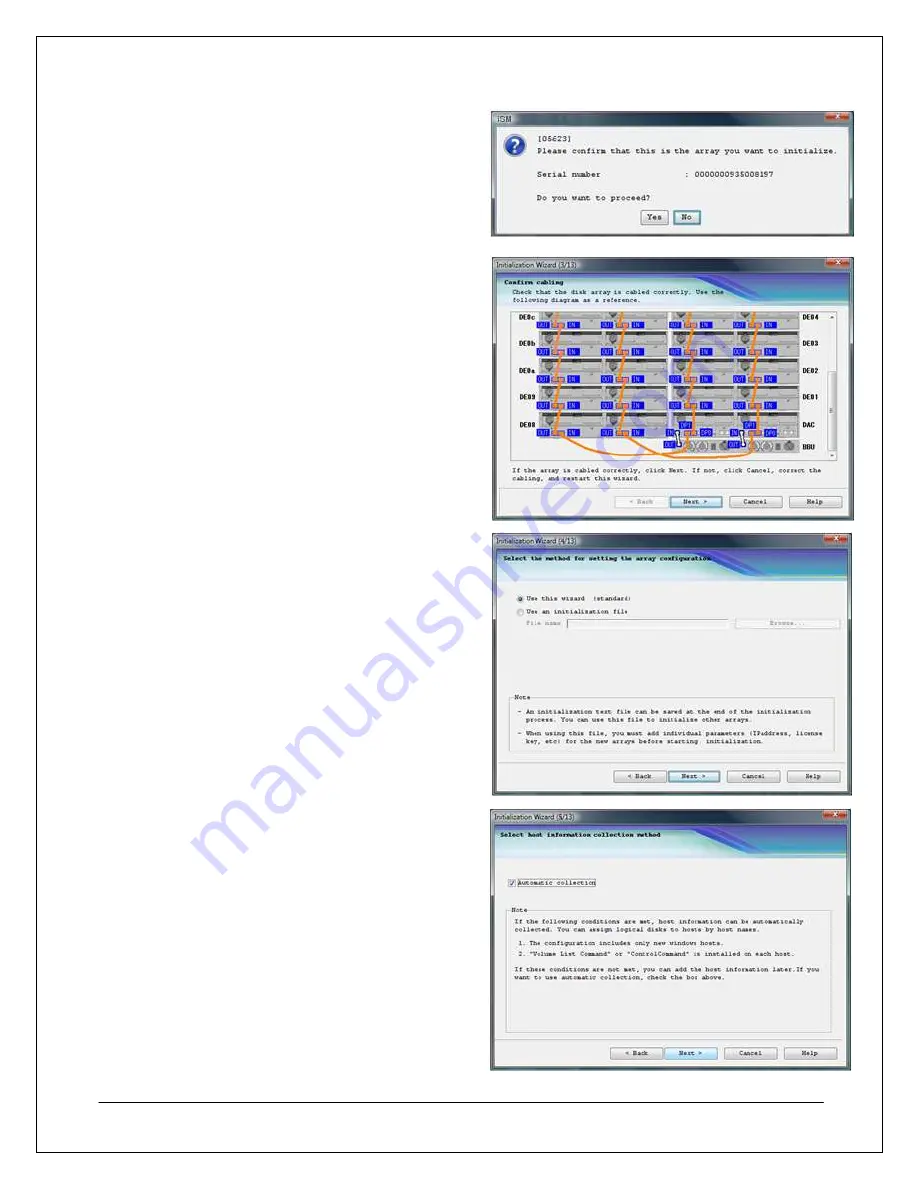
6. After selecting the array, a confirmation window
will appear. Confirm that the correct array was
selected and click
Yes
to continue. Otherwise,
click
No
to go back and then select the correct
array.
7. The Disk Array Connection State Confirmation
window displays an example of how an array
should be cabled. Verify that the array is cabled
correctly and click
Next
, or click
Cancel
if there
is a problem with your array’s connections.
Note:
This screen shows a fully configured array
only. It does not show your specific
configuration.
8. After completing an initialization, an initialization
file can be generated and used to configure
other arrays or reconfigure the existing array.
This step allows you to choose between using
the initialization wizard or a previously generated
installation file from another array to configure
this array.
During an initial setup of an array, choose
Use
this wizard
. Otherwise, select
Use an
initialization file
and type the location of that file
in the field below.
After the appropriate option has been selected,
click
Next
to continue.
9. At the Host Information Collection window, you
can select Automatic collection as long as the
application servers to be configured have not
been configured for use with an array
previously, and as long as the Volume List
Command or ControlCommand software has
been installed on the desired application
server(s).
If these conditions have not been met, the host
information will have to be gathered and typed in
manually during the initialization process.
After selecting or clearing the Automatic
collection field as appropriate, click
Next
to
continue.


