background image

Quick 

Start 

Guide

1

Gather the tools and materials
for the installation

Caution: 

Observe all safety  precautions

when you are  operating electrical tools
or hand tools.

The following installation instruc-
tions  are  recommendations  for
typical  installations.  Please  refer
to  project plans and specs for any
deviation to these instructions.

2

Excavate  a  trench  for  the 

channels

Excavate  a  trench  with  a  minimum  concrete-
 surround, by load class:

n

Class A: each side 4", depth below 4"

n

Class B: each side 4", depth below 4"

n

Class C: each side 6", depth below 6"

n

Class D: each side 8", depth below 8"

Note:

The  channel  must  be  recessed  1/8”  for

pedestrian traffic and 1/4” for vehicular traffic. 

Note:

The  channel  must  be  surrounded on  all

sides by a minimum of 4" of concrete for a Class
A  installation.  For  a   complete  description  of
installation types, see 

Load Class Installation

on 

page 4

.

n

Shovel

n

Hammer

n

Butyl caulk or adhesive  silicone sealant

n

Caulking gun 

n

Stringline

n

Level or laser line

n

Phillips screwdriver

n

Concrete vibrator

n

#4 rebar (

1/2

")

n

Tie wire and self-tapping screws

n

Pliers and cordless  screwdriver

Содержание Dura Slope

Страница 1: ...side 4 depth below 4 n Class B each side 4 depth below 4 n Class C each side 6 depth below 6 n Class D each side 8 depth below 8 Note The channel must be recessed 1 8 for pedestrian traffic and 1 4 for vehicular traffic Note The channel must be surrounded on all sides by a minimum of 4 of concrete for a Class A installation For a complete description of installation types see Load Class Installati...

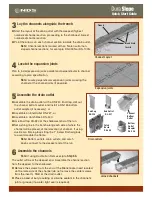
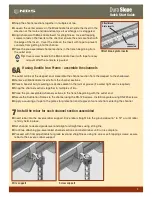
Страница 2: ...ts Expansion joints End Cap DS 224 End Outlet DS 227 Catch Basin DS 340 Bottom Outlet Adapter DS 126 Channel Bottom Outlet Quick Start Guide 3 Lay the channels alongside the trench n Start the layout at the drain outlet with the deepest highest numbered channel section proceeding to the shallowest lowest numbered channel section n Point the arrows on each channel section towards the drain outlet N...

Страница 3: ...ctions together in multiples of two n Place the pre assembled channel sections in the trench beginning with the outlet end n Secure the Ductile Iron Frames to the channel using the DS 123 screws Install iron grates using DS 225 screws n Apply a covering or tape to the grates for protection and to prevent concrete from entering the channel Quick Start Guide n Snap the channel sections together in m...

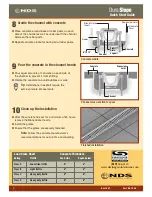
Страница 4: ...ading Rev 1007 Part No 1930 4 L oad Class Chart Concrete Thickness Rating Traffic Each side Depth below Class A Pedestrian traffic 4 4 Class B Light traffic 4 4 Class C Heavy duty traffic 6 6 Class D Heavy duty traffic 8 8 Finished installation Channel cross section for pour 8 Cradle the channel with concrete n Place concrete around base of rebar posts on each side of the channel as well as undern...

Отзывы: