Chapter 7:
BIOS Setup
Entering Setup
1. Connect an alphanumeric USB keyboard to the terminal.
2. Apply power to the terminal.
3. When you see the NCR logo displayed, press [
Del
] or [
F2
].
Selecting Menu Options
The following keyboard controls are used to select the various menu options and to
make changes to their values.
•
Use the arrow keys to select (highlight) options and menu screens.
•
Use the [
Enter
] key to select a submenu.
•
Use the [
+
] and [
-
] keys to change field values.
•
To view help information on the possible selections for the highlighted item, press
[
F1
].
•
To save the changes, move the cursor to the
Save and Exit Menu
, select
Save
Changes & Reset
, and press [
Enter
].
Restoring Factory Settings
To reset all values to their default settings, press [
F3
] and then [
Enter
] when the
confirmation message is displayed. The terminal automatically loads the BIOS default
values. To save the factory default values, go to the
Save and Exit Menu
,
select Save
Changes & Reset
, and select [
Enter
].
Содержание 7772 Series
Страница 1: ...User Guide NCR CX7 All in One POS 7772 BCC5 0000 5363 Issue A...
Страница 11: ...ix Revision Record Issue Date Remarks A Jul 2019 First Issue...
Страница 12: ...x...
Страница 25: ...Product Overview 1 13 Label Locations CX7 with Base...
Страница 26: ...1 14...
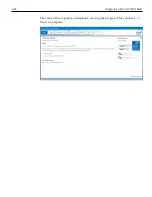
Страница 65: ...4 53 Disk Image Backup and Recovery Tool A message is displayed when the load is complete 5 Reboot the POS...
Страница 83: ...6 71 Power Management 2 Select Network adapters 3 Right click Intel R Ethernet Connection I219 LM Properties...
Страница 91: ...BIOS Updating Procedure 8 79 b Press Select to choose the image from the Boot Selection drop down list...
Страница 92: ...8 80 BIOS Updating Procedure c Press Start to load the image...


