background image


Getting Started 

Step 1:  Configuring Buttons 

Please note, that pairing of Key Fobs is easy, but not obvious.  It is necessary to follow 
these directions carefully as any mistake in these directions may result in some buttons 
not functioning properly.  

Before you can pair the Key Fob to the KFX Receiver, it is necessary to tell the Key Fob 
exactly which buttons you intend to use.  Follow these steps to configure the Key Fob 
BEFORE pairing with the KFX Receiver. 

Step 

1

:

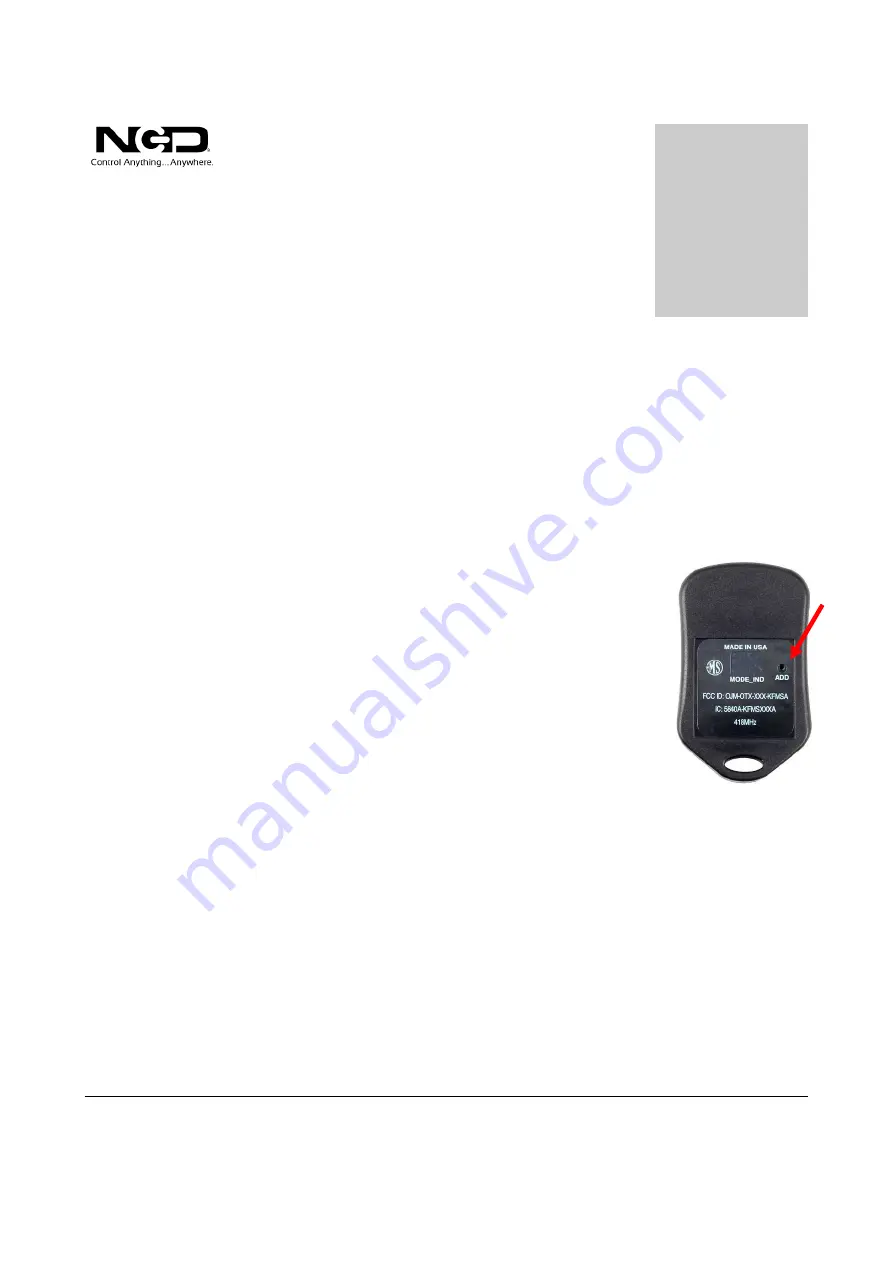
  On the back of the key fob, press the button labeled 

ADD with an unfolded paper clip.  A faint blue light 
will flash next to the ADD pin hole.  This blue LED 
will  only  flash  for  15  seconds,  so  it  is  important  to 
complete  the  next  step  before  the  blue  LED  stops 
flashing. 

Step


2

:  Push each button on the Key Fob that you wish to 

use.  You do not have to use all of the buttons that 
are available on your key fob. 

Step 

3

Press the ADD button again to stop the flashing blue 
LED and save your button selections.  Optionally, 
you may wait for the Blue LED to stop flashing. 


Repeat the previous steps for each key fob you wish to use. 

Note:  You should complete this step before pairing the Key Fob to the 
KFX Receiver. 


Note:  If the blue LED does not flash when pressed, pry the sides of the 
enclosure with a small flat-blade screwdriver or remote the single screw on 
the back of 8-button remotes.  Replace the battery with a CR2032 as 
necessary. 


Chapter 

Содержание KFX Series

Страница 1: ...NATIONAL CONTROL DEVICES KFX Series Quick Start Guide NATIONAL CONTROL DEVICES...

Страница 2: ...L D E V I C E S KFX Series Quick Start Guide National Control Devices LLC PO Box 455 Osceola MO 64776 Phone 417 646 5644 Fax 866 562 0406 Copyright 2014 All Rights Reserved Notice Portions of this man...

Страница 3: ...es 2 Getting Started 3 Step 1 Configuring Buttons 3 Step 2 Connecting to a Computer 4 Step 3 Pairing Key Fob with KFX Receiver 5 Step 4 Module Setup 6 Introduction to the KFX Module Operation 7 Key Fo...

Страница 4: ...entified and generate different data for Put simply every remote does exactly the same thing when paired with the same KFX Receiver The KFX Receiver Module is configured using our Base Station Softwar...

Страница 5: ...ssories RPSMAMF1 1 Meter Antenna Extension RPSMAMF3 3 Meter Antenna Extension RPSMAMF6 6 Meter Antenna Extension RPSMAMF9 9 Meter Antenna Extension OTX 418 HH KF1 MS 1 Button 418MHz MS Series Key Fob...

Страница 6: ...hole This blue LED will only flash for 15 seconds so it is important to complete the next step before the blue LED stops flashing Step 2 Push each button on the Key Fob that you wish to use You do no...

Страница 7: ...ur controller is not configured for 115 2K baud you may change the baud rate settings of the controller or the KFX receiver It is important that both the XBee target device such as an NCD relay board...

Страница 8: ...ined below Step 1 On the KFX module push the button labeled LEARN A Red LED will flash for 15 seconds The following step must be completed before the LED stops flashing Step 2 Press Every Button on th...

Страница 9: ...oftware NCDBaseStation zip 3 When the Select Connection window opens choose the COM port associated with the ZIGMO 4 Press OK when finished 5 In the next window under the command sets offered select K...

Страница 10: ...rollers When a Key Fob button is pressed the Press bytes are sent to the target device When a Key Fob button is released the Release bytes are sent to the target device Note data shown in this control...

Страница 11: ...number of bytes sent by the Key Fob This setting will enable more data groups check the large numbers at the far left of the screen shot to see which buttons are associated with the different data gro...

Страница 12: ...gly advised to test in the environment intended for your application as absolute best possible conditions do not typically favor real world applications Communicating through walls can severely limit...

Страница 13: ...Off Relay 2 Bank 1 3 254 102 1 Turn Off Relay 3 Bank 1 3 254 103 1 Turn Off Relay 4 Bank 1 3 254 104 1 Turn Off Relay 5 Bank 1 3 254 105 1 Turn Off Relay 6 Bank 1 3 254 106 1 Turn Off Relay 7 Bank 1 3...

Страница 14: ...lay 4 5 254 148 4 0 1 Pulse Relay 5 5 254 148 5 0 1 Pulse Relay 6 5 254 148 6 0 1 Pulse Relay 7 5 254 148 7 0 1 Pulse Relay 8 4 254 146 0 0 Turn Off All Relays Then Turn On Relay 1 4 254 146 1 0 Turn...

Страница 15: ...nd 4 as a Group 4 254 100 1 4 Turn Off Relays 1 2 3 4 and 5 as a Group 4 254 100 1 5 Turn Off Relays 1 2 3 4 5 and 6 as a Group 4 254 100 1 6 Turn Off Relays 1 2 3 4 5 6 and 7 as a Group 4 254 100 1 7...

Страница 16: ...14 0 Turn Off Relay 14 Flashing 4 254 145 15 0 Turn Off Relay 15 Flashing 4 254 145 16 0 Turn Off Relay 16 Flashing 4 254 145 1 1 Turn On Relay 1 Flashing 4 254 145 2 1 Turn On Relay 2 Flashing 4 254...

Страница 17: ...is command so the command parameters will be outlined briefly in this document 7 Total Number of Bytes 254 Byte 1 Header Byte 50 Byte 2 Timer Series Commands 50 65 Byte 3 Timer 1 to 16 Use a separate...

Страница 18: ...iott our technical engineer If you feel that you have discovered a bug in the firmware of our controllers contact Ryan Sheldon our hardware developer If you have programming related questions or have...

Страница 19: ...ct Information National Control Devices LLC PO Box 455 Osceola MO 64776 417 646 5644 phone 866 562 0406 fax Open 9 a m 4 p m CST All orders must be placed online at our website www controlanything com...

Отзывы: