System Hardware Configuration
– press the POS pushbutton twice;
– press the PS pushbutton then press the HOLD pushbutton.
In this case the current vessel position is get as the preset one.
The pushbutton backlight changes to green.
To set the offset values press the POS pushbutton once (in any control mode).
The Offset dialog appears on the panel LCD.
There are two way to change the value:
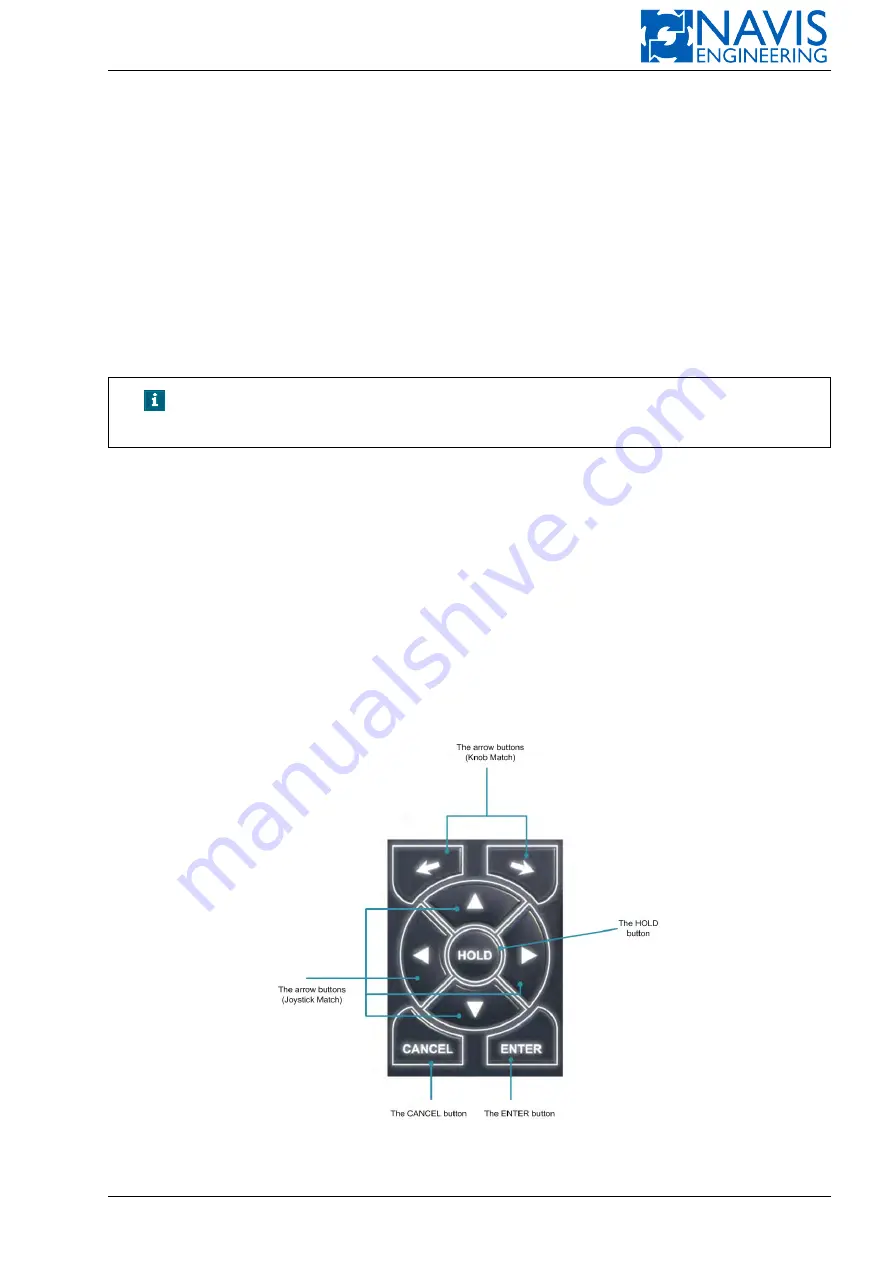
– with the Joystick match pushbuttons (see Figure 2.9): press and hold the pushbutton or press the pushbutton several
times until the required value is set. Then press the Enter pushbutton.
– with the rotary knob (see Figure 2.12) — turn the knob until the required value of the Sway or Surge parameters is
set. Then press the Enter pusbutton. Press the knob’s pushbutton to switch between the Surge and Sway fields.
NOTE!
The Offset settings dialog is called in any control mode by single press-
ing the POS pushbutton.
To switch off the AutoPOS mode press the POS pushbutton twice.
2.4.9
The Control Elements Group
The group is located at the right of the LCD screen and contains the following control elements (see Figure 2.9:
HOLD
Arrow buttons
Joystick match buttons
Cancel
Enter
Figure 2.9: The Control Elements Group
Doc. 000.JDP-10000-OME, rev.3.3.13/“2102.$–17A-Advanced”
28
Содержание NavDP 4000 Series
Страница 88: ...NAVIS NavDP 4000 Operation Manual Figure 5 35 Dark Theme 87 Doc 000 JDP 10000 OME rev 3 3 13 2102 17A Advanced...
Страница 222: ...NAVIS NavDP 4000 Operation Manual Figure 10 74 Drift Plot Window 221 Doc 000 JDP 10000 OME rev 3 3 13 2102 17A Advanced...
Страница 324: ...NAVIS NavDP 4000 Operation Manual Figure H 4 Remote DLS Mode 323 Doc 000 JDP 10000 OME rev 3 3 13 2102 17A Advanced...


