background image

NAVIN Corporation


w

ww.navin.com.tw


USING 

mini

HOMER 


After powering on the 

mini

Homer, you can select one of the four different operating 

modes by clicking the Power/Mode key and the corresponding icons will show up on 
the display one after another. 

1.


Homing mode 

  : Use the 

mini

Homer to mark 5 locations of your 

choice  and  later  get  back  to  the  locations  easily.  Five  different  icons  (Home, 
Car,  Waypoint,  Favorite  Spot,  and  Restaurant)  are  used  to  help  identify  the 
locations. 

2.


Compass mode    : Use the 

mini

Homer as a compass. 

3.


Clock mode 

  : Use the 

mini

Homer as a timepiece. 

4.


Satellite mode 

  : Use the 

mini

Homer to check the satellites. 

5.


Free Marking mode 

  : Manually enter destination coordinates. 

6.


Where-AM-i  Mode 

  :  Use  the  miniHomer  to  check  current  location 

coordinates. 

7.


Sports  mode 

  :  Use  the  miniHomer  to  check  speed,  pace,  traveled  time, 

distance. 

8.


Projection  mode 

  :  Manually  enter  heading  and  distance  to  check  the 

projection of current location coordinates. 


Marking a Location 


1.


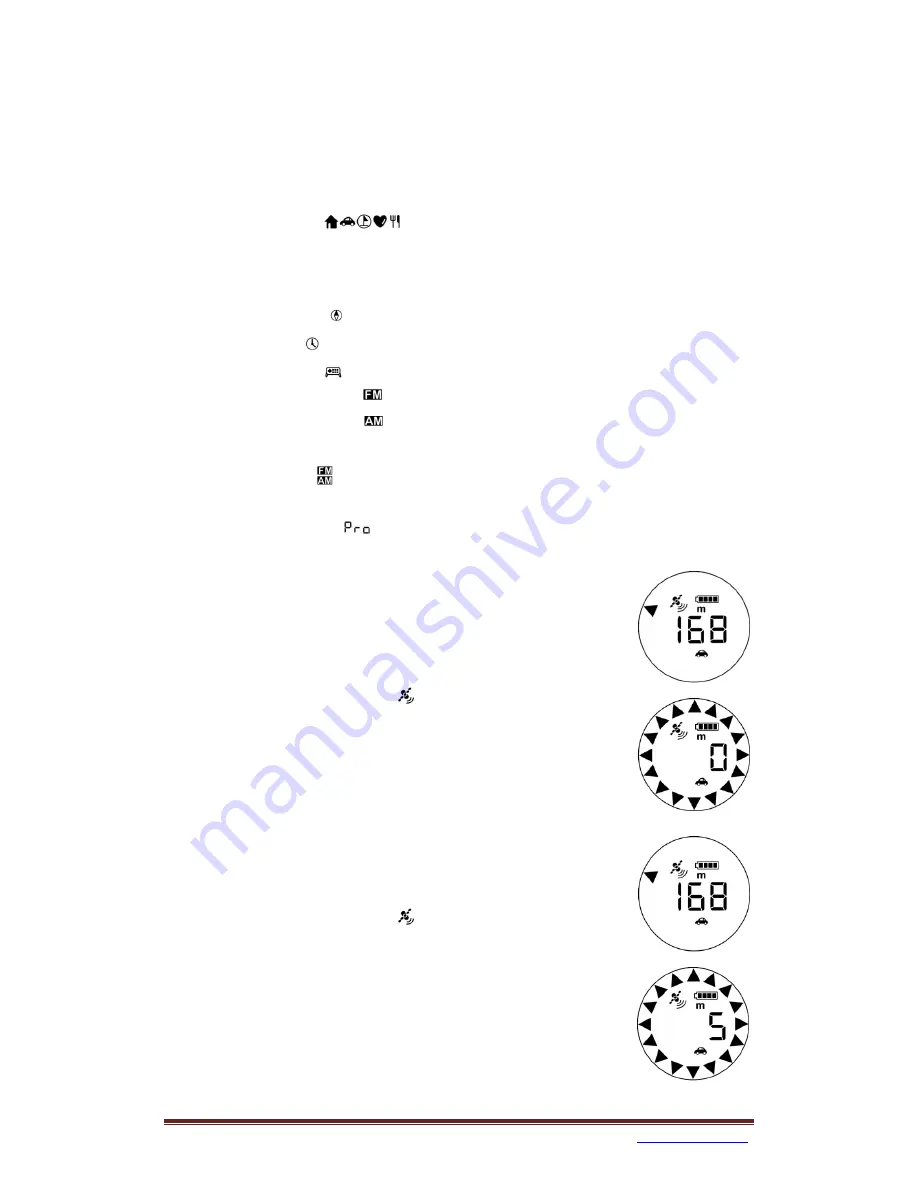
Click Power/Mode key to select one of the location icons 
(Home,  Car,  Way  Point,  Favorite  Spot,  Restaurant)  for 
storing the current location. 

2.


Make sure satellite icon 

  is not blinking. 

3.


Press and hold Mark key, wait until the circle of direction 
arrows shows up and then release Mark key. 

4.


The  current  location  coordinate  is  stored  with  the 
selected location icon. 


Getting Back to a Location 


1.


Click Power/Mode key to select one of the location icons 
to return to a previously stored location. 

2.


Make sure satellite icon 

  is not blinking. 

3.


The displayed number shows distance to the return 

point, and the direction arrow shows the direction to 
follow.   

4.


After reaching the destination, within a 5 meter (or 20 
feet) radius, the circle of direction arrows will show up. 


Note that the internal digital compass for showing direction 

Содержание miniHomer

Страница 1: ...NAVIN Corporation www navin com tw miniHomerTM User s Guide...

Страница 2: ...parked your car at a shopping mall or stadium finding way back to a hotel traveling in a foreign city getting back to a camp site while hiking in the woods or returning a favorite fishing spot miniHo...

Страница 3: ...NAVIN Corporation www navin com tw QUICK GUIDE...

Страница 4: ...he backlight will turn on and full LCD screen will be displayed Momentarily direction arrow formed circle will blink twice and then satellite icon will start blinking with distance showing blank At th...

Страница 5: ...se or counterclockwise 5 After the countdown is finished the LCD will display the direction triangle and heading number once again Setting Distance Unit The distance unit for the distance measured by...

Страница 6: ...3 seconds while the miniHomer is on Setting Log Interval 1 Click Power Mode key to select Log icon 2 Click Mark key to check current Log setting 3 Press and hold Mark key wait until an adequate digit...

Страница 7: ...check speed pace traveled time distance 8 Projection mode Manually enter heading and distance to check the projection of current location coordinates Marking a Location 1 Click Power Mode key to selec...

Страница 8: ...l be displayed Note that you can set the local time in this mode Checking Satellites for the technically curious users 1 Click Power Mode key to select satellite mode icon 2 Satellite number such as P...

Страница 9: ...ing you can click Mark key repeatedly to advance the digit for adjustment when the correct digit shows wait for 3 seconds and the first digit of latitude is entered Latitude in ddmm mmmm format is ent...

Страница 10: ...shown then the lower three decimal digits shown lastly with denoting western hemisphere and denoting eastern hemisphere Note that the unit of latitude and longitude coordinates used in miniHomer is d...

Страница 11: ...Note GPS altitude is much less accurate than horizontal position accuracy GPS receivers with more accurate altitude reading usually employ barometric pressure sensor for altitude measurement miniHome...

Страница 12: ...ance current speed current pace and back to accumulated time in sequence The accumulated time and accumulated distance can be cleared and restarted by pressing and holding Mark key wait until the circ...

Страница 13: ...Click Mark key until m or km shows without flashing under metric unit mode or ft or mi shows without flashing under English unit mode the accumulated distance is displayed 3 The accumulated distance c...

Страница 14: ...cle of direction arrows shows up and then release Mark key maximum altitude is cleared altogether Reading Maximum Altitude 1 Click Power Mode key to select Sports icon 2 Click Mark key until shows and...

Страница 15: ...in kkk kkk format is entered one by one in sequence 4 After distance is entered the heading in ddd d format is to be entered using the same method After the heading is entered circle of direction arr...

Страница 16: ...off under either one of the following conditions 1 No moving of the device for 2 minutes 2 No satellite signal acquired for 2 minutes and no key pressed 3 No position fix for 5 minutes and no key pres...

Страница 17: ...low moving car A4 At speed below 10km hr the miniHomer uses the internal digital compass to calculate direction to the return point if you are inside a car the metallic structure of the car will affec...

Страница 18: ...days from the date of the return shipment or for the warranty day s balance from the original date of purchase whichever is longer This limited warranty does not apply to damages caused by misuse abu...

Отзывы: