background image

4/8/16-CH DVR Quick Start Guide 

1.


Install Hard Drive &DVD Writer 

1.1


Install Hard Drive 

Notice

:  1.  Support  two  SATA  hard  drives.  Please  use  the  hard  drive  the  manufacturers 

recommend specially for security and safe field.


2. Please disconnect the power before being connected to other devices. Don't hot plug in/out


Step  1:

  Unscrew  and  Open  the  top  cover  to  connect  the  power  and  data 

cables. Place the HDD onto the bottom case as Fig 1-1. 

Step 2:

 Screw the HDD as Fig 1-2. 


Fig 1-1 Connect HDD        Fig 1-2 Screw HDD 

Notice: 1. For the convenience to install, please connect the power and data cables firstly, 
and then screw to fix. 


1.2


Install DVD Writer 

Step  1: 

Unscrew  and  Open  the  top  cover  to  connect  the  power  and  data 

cables. Place the DVD writer onto the bottom case as Fig 1-3. 

Step 2:

 Screw the DVD writer as Fig 1-4. 


Fig 1-3 Connect the DVD Writer      Fig 1-4 Screw the Writer 


2.


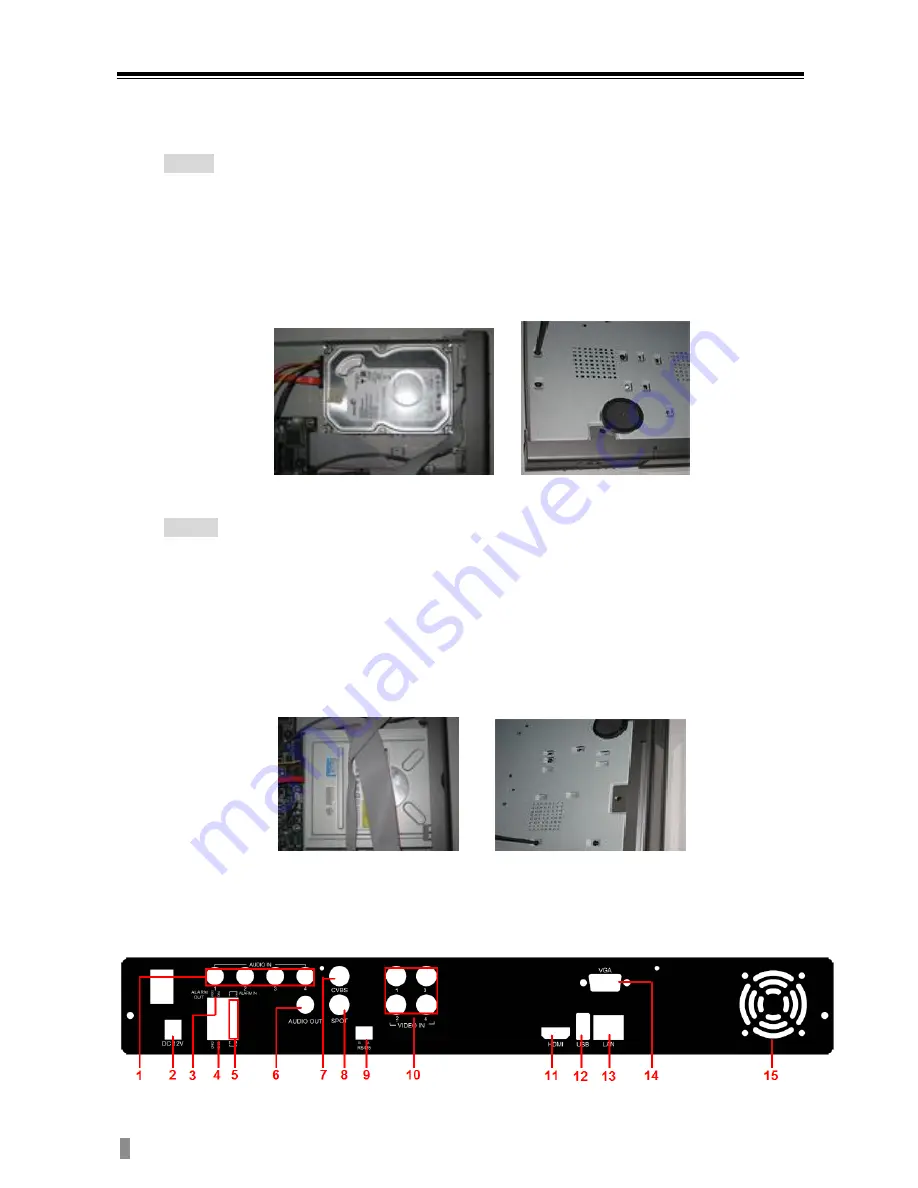
Rear Panel Instruction 


                                                Rear Panel Instruction for 4-CH 

http://www.e-camere.ro/dvr/Navaio/NAV-H16S

Содержание NAV-H16S

Страница 1: ...Quick Start Guide 4 8 16 CH DVR h t t p w w w e c a m e r e r o d v r N a v a i o N A V H 1 6 S...

Страница 2: ...h t t p w w w e c a m e r e r o d v r N a v a i o N A V H 1 6 S...

Страница 3: ...e the HDD onto the bottom case as Fig 1 1 Step 2 Screw the HDD as Fig 1 2 Fig 1 1 Connect HDD Fig 1 2 Screw HDD Notice 1 For the convenience to install please connect the power and data cables firstly...

Страница 4: ...work port 14 VGA output connect to monitor 15 For cooling the device Rear Panel Instruction for 8 CH 1 4 ch audio inputs 2 Power input 3 1 ch relay output Connect to external alarm 4 Grounding 5 Conne...

Страница 5: ...ternal USB devices like USB flash USB HDD for backup or update firmware or connect to USB mouse 13 Network port 14 VGA output connect to monitor 15 For cooling the device 3 Startup Shutdown 3 1 Startu...

Страница 6: ...ard After the device starts a setup wizard pops up You can set up time network record and disk management Click Device name box to popup a keyboard as follows It supports digits alphabets and symbols...

Страница 7: ...t See Section 10 for details Click Next button This will take you to record setup window Select resolution fps encode quality and max bitrate The higher the value is the clearer the recorded picture i...

Страница 8: ...y options on either VGA HDMI monitor or BNC monitor at a given point of time if there is live image display without menu options please check if there is display on other device monitor or long press...

Страница 9: ...gger and buzzer alarm Network configuration Users enable network function and configure IP address DDNS transmission video parameters here User configuration Administrator can add delete users and cha...

Страница 10: ...certain day schedule click button to delete the selected schedule Step 3 You can also double click the grid to pop up a week schedule window Select day and then click Add button to setup the start ti...

Страница 11: ...tion Motion tab as shown below Step 3 Enable motion alarm Please specify to channel and click Apply to save settings Step 4 Click Setting button under the Area to set Sensitivity and Detection area Le...

Страница 12: ...ording Step 1 Enter into Menu Setup Schedule Sensor tab The setup steps for schedule for sensor based recording are similar to normal schedule setup You can refer to 7 2 Schedule Recording for details...

Страница 13: ...tep 2 Select date and channels on the right hand side and press Search button A date with highlighted borderline indicates presence of data Step 3 Set the start time by clicking a particular grid or b...

Страница 14: ...based recording and sensor based recording Step 4 Press Search button to display the searched event information in the event list box Step 5 Double click the event item to play the record 8 4 Playbac...

Страница 15: ...a backup list box Step 3 Select a required file or checkmark All to select all data files Click Backup button to pop up Backup information window Step 4 In the backup information interface user can ch...

Страница 16: ...n both the DVR and the router Forward IP address and port number in Virtual Server setup of the router or virtual server Configure the firewall to allow accessing the DVR If the user has enabled the U...

Страница 17: ...ed by the DVR or router Then add to the DVR or router When accessing the remote interface of DVR user can input WAN IP domain name to access directly user can enter into Main menu Information Network...

Отзывы: