4/8/16-CH DVR Quick Start Guide
13
play the recording.
You can lock the image by clicking “Lock” button. Click “Save” button to copy
the image on the HDD. Click “Save All” to copy all images on the HDD.
Note: In order to take images on alarm, the snapshot feature should be
activated in “Alarm Handling” for different kind of alarms. Please refer to 4.5
Alarm Configuration for details.
9.
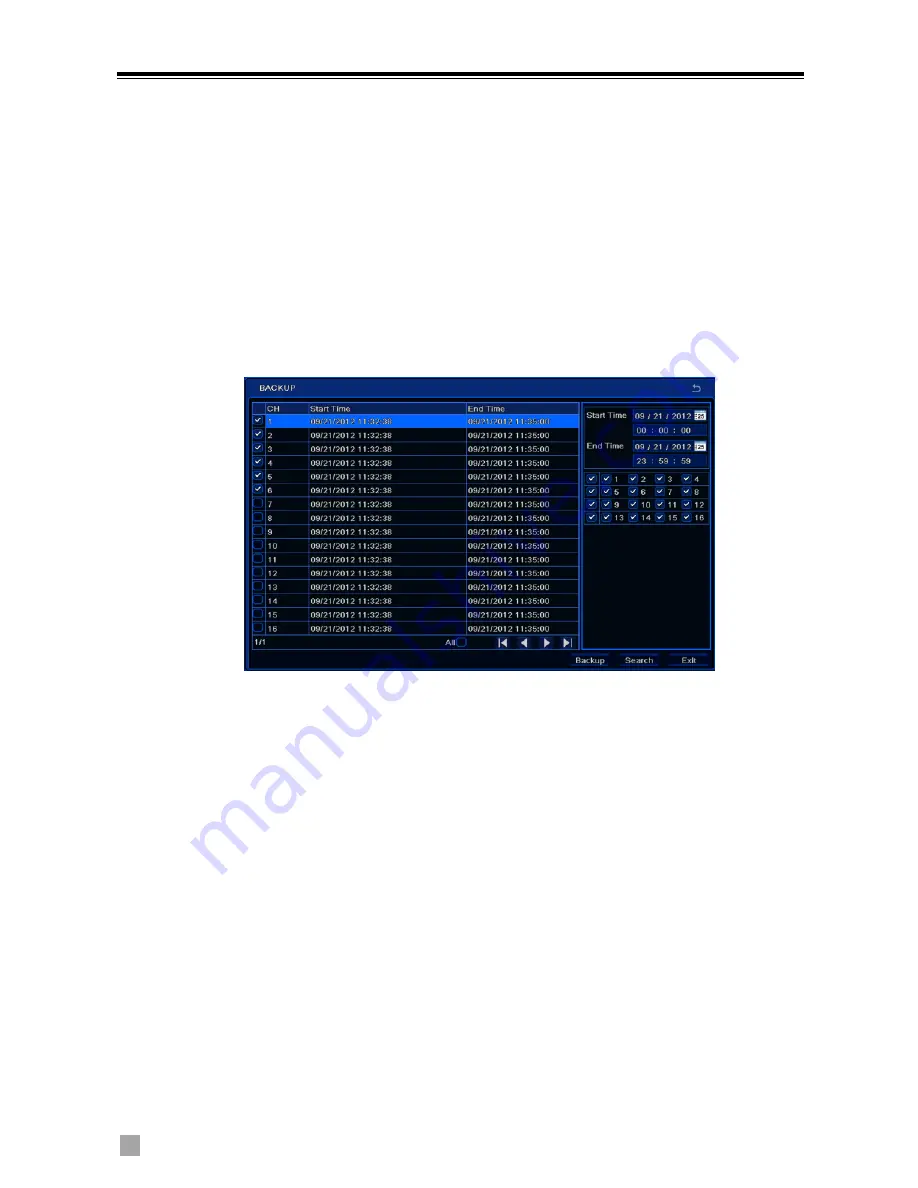
Back up
This unit supports backup by USB flash
,
DVD writer and USB HDD.
Step 1
:
Enter into Menu
Backup tab.
Step 2: Set the start & end time, select channels and click Search button to
display the searched data in the data backup list box
Step 3: Select a required file or checkmark “All” to select all data files. Click
Backup button to pop up Backup information window.
Step 4: In the backup information interface, user can check the relevant
options for backing up files. These options include storage Media, backup
player and save file type. Then click Start button to start backup.
10.
Remote Surveillance
In order to view the DVR from a network it must be connected to a LAN/WAN
or internet. The network setup should be done accordingly.
10.1
Access DVR on LAN
Please enter into Menu
Setup
Network Setup as shown below:
Input IP address, Subnet, Gateway. If using DHCP, please enable DHCP in
both the DVR and the router. Enter into Menu
Information
Network,
http://www.e-camere.ro/dvr/Navaio/NAV-H16S


