BHM
10/18/18
NTV-DOC281
Agreement
:
End user agrees to use this product in compliance with all State and Federal laws. NAV-TV Corp. would not be held liable for
misuse of its product. If you do not agree, please discontinue use immediately and return product to place of purchase. This product is
intended for off-road use and passenger entertainment only.
3 |
P a g e
W204-H Installation
1.
Remove the radio. This may require the Mercedes hook tool for removing vents on
some vehicles, others may just be clips and screws securing down dash panels. Remove
all harnesses and set the radio aside.
2.
Remove the factory screen. Disconnect all associated harnesses and set the screen
aside.
3.
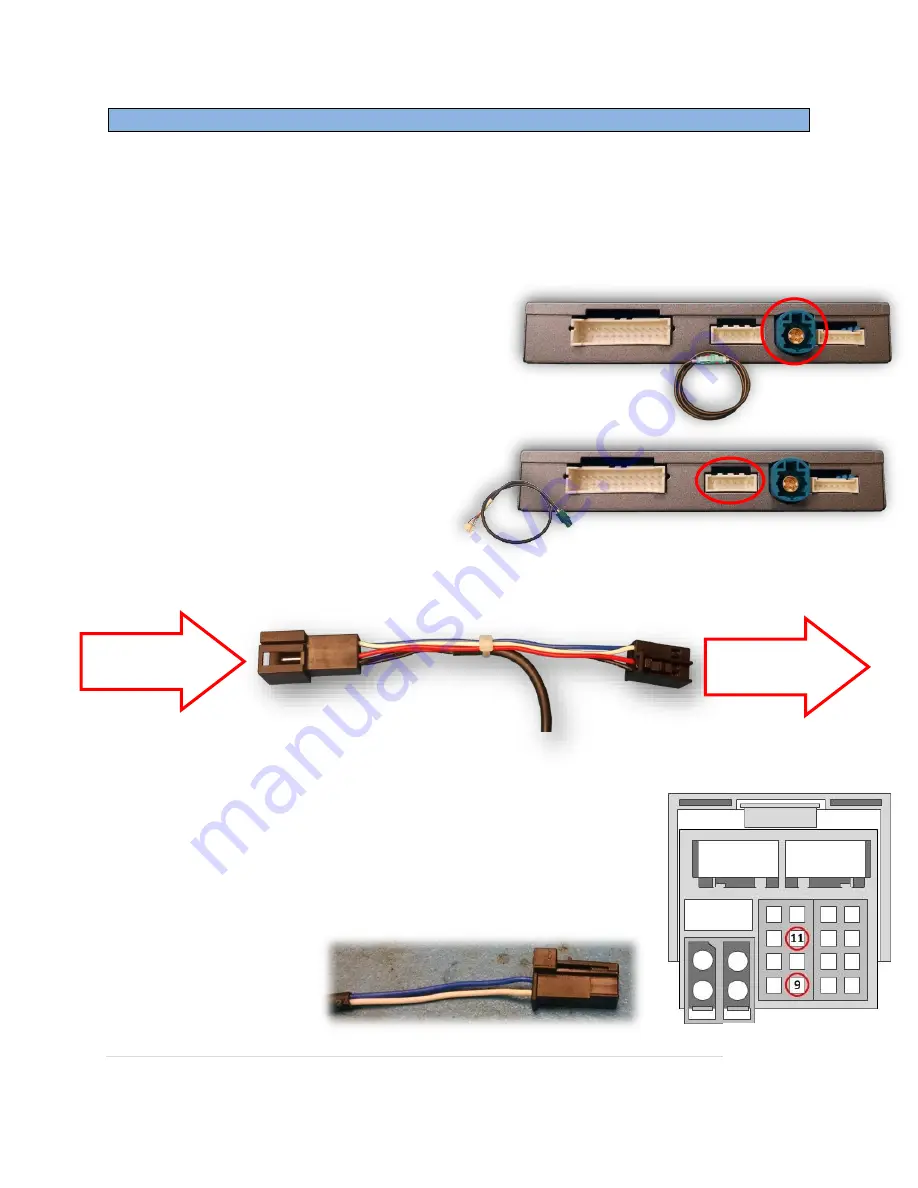
Behind the screen, connect the OEM 4-pin,
LVDS video cable previously removed from
the factory monitor and connect it to the
green port on the W204-H interface.
NOTE:
if required, use the provided LVDS Extension cable for ease of install.
4.
Connect the
provided
LVDS Video cable to
the OEM monitor (green plug). Connect the
other (white) end of this cable to the
W204-N interface here:
5.
Connect the provided Plug & Play T-Harness (CAN/Power) to the screen, from the blue
connector (previously connected to the screen).
6.
Locate this plug among the provided main power harness.
CUT
the
2-pin black plug off of these wires, and run down the dash to the
OEM main radio connector. Solder the
Blue wire
to
PIN 11 (CAN
HIGH).
Solder the
White wire
to
PIN 9 (CAN LOW)
.
NOTE:
You may have to shave the keyway of the OEM connector to fit it into the female
side of this connector for some vehicles.
From 8-pin
monitor plug
To Monitor
Wire side


