INSTRUCTIONS BOOK OF WELD POSITIONER TS10 14
MSD00 -> -> POSIT
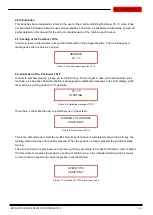
START TIME 3 S
MSD00 -> -> POSIT
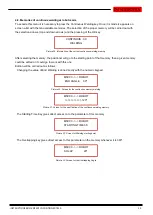
OVERLAP 20º
DESTINATION 360º
CURRENT 0º
Note:
Remember all signs coming from the Robot must be Potential free.
Parameters start time and overlap also works in robot mode.
Picture 26. Screen for Starting time of welding
Picture 27. Screen for Overlapping angle
When pressing the pedal and let it loose then afer having introduced the piece, the indicated welding cicle
starts.
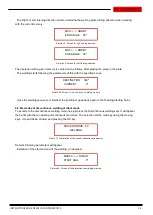
Picture 28. Screen for the discontinuous welding memory
When a welding operation ends, the plate will go again to the starting point of the memory currently
selected.
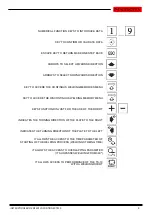
4.7. Robot mode
When pressing the Robot Key we are indicating the that the positioner will work with an outer welding
robot.In this case, the manual performance is cancelled. However the discontinuous and continuous
welding memories keep on performing exactly like in the Positioner Mode.
The only difference lies on how the Positioner operates, which is explained below.
· The positioner will go to absolute “0” or to the begining of the memory to be made.
· When pressing the pedal and let it loose again the welding cycle begins. The relay activates for the robot
to be placed in the starting point, make the linear welding and gives us the sign as it is in position to start
the rotary welding.
· Once it is detected that the robot is in that position, the second relay is used to indicate the moment
required for the robot to carry out the welding operation or not.
· When the welding is finished, the starting relay is cancelled so the robot goes to the rest position.
· The positioner will go back again in absolute “0” or Starting welding point.
Содержание TS10
Страница 2: ...Thank you for choosing our machines www nargesa com...
Страница 21: ...Technical annex Weld Positioner TS10 List of parts Electrical map Electric box connections Electronic plate...
Страница 22: ...INSTRUCTIONS BOOK OF WELD POSITIONER TS10 A 2 A1 List of parts...
Страница 23: ...INSTRUCTIONS BOOK OF WELD POSITIONER TS10 A 3...
Страница 24: ...INSTRUCTIONS BOOK OF WELD POSITIONER TS10 A 4 A2 Electrical map...
Страница 25: ...INSTRUCTIONS BOOK OF WELD POSITIONER TS10 A 5 A3 Electric box connections...
Страница 26: ...INSTRUCTIONS BOOK OF WELD POSITIONER TS10 A 6 A4 Electronic plate...


