Narex EV 13 G-2 Скачать руководство пользователя страница 16

English

16

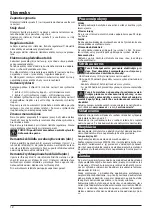
Switching on and off

By pressing the switch button (7) the machine activates and releas-

ing the button stops it.

Permanent run

By pressing the switch button  (7) to the stop and simultaneous 

pressing the latching pin (6) permanent run is achieved.

Repeated pressing the switch button (7) and its release the perma-

nent run is discontinued.

Speed control

By light and gradual pressing the controller button (7) you will 

achieve low speed and controlled continuous run-up.

By further gradual pressing the button the speed increases to the 

pre-selected speed.

Electronic speed pre-selection

Using the pre-selection wheel (8) the required pre-selected speed 

is set–even if the machine runs. The necessary speed depends 

on the type of the material drilled, and a practical test is recom-

mended to verify it.

If the machine is loaded considerably, adjust the pre-selection 

wheel (8) to the marginal position in the + direction (max speed 

– control disconnected).  

After a  longer work at low speed leave the machine run idle 

for 3 minutes at maximum speed to cool the engine down.

Gear shifting 

Use the speed lever (10) to adjust the 2nd speed gear:

1st Speed – lower speed gear – higher torque

2nd Speed – higher speed gear – lower torque

In any speed gear you can adjust the final speed by means of the 

electronic pre-selection. However, firstly select the mechanical 

speed gear.

Changing the gears can be done at slowing the machine down or 

in idle run but never when the machine is fully loaded. Once the 

gear is changed, leave the machine start up slowly

Change in rotation 

Adjust the rotation direction switch (9) to the right (left run) or to 

the left (right run). The left run allows e.g. cutting the threads and 

unscrewing of bolts or nuts.

Changing is blocked if the controller button is pressed. The rotation 

direction has to be changed when the machine is idle.

WARNING! If the left run is used, the chuck has to be 

screwed on very firmly.

Removing the chuck with ring gear (Fig.)

Hold the spindle on the surface (2) using an open wrench (13 mm). 

Insert the chuck hook (13) into a single opening on the chuck and 

by turning left screw the chuck out. Release the firmly clamped 

chuck by impacts of the hammer on the chuck hook (13).

Removing the quick-tightening chuck (Fig.)

Clamp the hexagonal wrench (15) into the chuck. Hold the spindle 

on the surface (2) using a spanner (13 mm). By turning the chuck 

to the left using the hexagonal wrench screw the chuck together. 

Release the firmly clamped chuck by impacts of the hammer on 

the hexagonal wrench.

Proceed in reverse sequence to screw the chuck on.

Work instructions

Drill bits

For steel use perfect and sharpened drill bits made of good-quality 

high-speed steel.

Drilling stands

For precise drilling on smaller parts, use of a drilling stand is rec-

ommended.

Clamping device

Clamp the worked pieces properly into the screw-type clamping 

unit. Thus turning of the piece is avoided, as well as a potential ac-

cident.

Drilling in tiles

Shift the impact gear lever (4) to the drill-bit symbol. Once the up-

per layer is drilled through, shift the impact gear lever to the ham-

mer symbol.

Thread cutting

Clamp the screw tap properly in the chuck using a considerable 

power, otherwise it will slide through.

Maintenance and service

Attention! Risk of el. shock. Prior to start any opera-

tion, pull the plug out of the socket!


‰

The vent holes (5) of the engine cover must not get plugged.


‰

After about 200 hours of operation the following works need 

to be done:

- Check of the brushes length Brushes shorter than 5 mm must 

be replaced with new ones.

- Exchange of lubricating grease in the gearbox and bearings.

To keep the protection class the machine needs to be checked in 

terms of safety, and therefore these works must be carried out in 

an authorised electric workshop holding the relevant licence to 

perform these kinds of activities.

Attention! With respect to protection from el. shock 

and preservation of the class of protection, all mainte-

nance and service operations requesting jig saw case 

removal must be performed by the authorized service centre 

only!

The current list of authorized service centres can be found at our 

website 

www.narex.cz

, section 

“Service Centres”

.

Storage

Packed appliance may be stored in dry, unheated storage place 

with temperature not lower than -5°C.

Unpacked appliance should be stored only in dry storage place 

with temperature not lower than +5°C with exclusion of all sudden 

temperature changes.

Environmental protection

Power tools, accessories and packaging should be sorted for envi-

ronmental-friendly recycling.

Only for EU countries:

Do not dispose of power tools into household waste!

According to the European Directive 2002/96/EC on waste electri-

cal and electronic equipment and its incorporation into national 

law, power tools that are no longer suitable for must be separately 

collected and sent for recovery in an environmental-friendly man-

ner.

Содержание EV 13 G-2

Страница 1: ...P vodn n vod k pou v n P vodn n vod na pou itie Original operating manual Instrucciones de uso originales p Pierwotna instrukcja obs ugi Eredeti haszn lati tmutat EV 13 G 2 EV 13 G 2A...

Страница 2: ...izika razu si pre tajte n vod Caution Read this manual to reduce the injury hazard Cuidado Lea las instrucciones para reducir los riesgos de que se produzcan da os Uwaga Dla zmniejszenia ryzyka urazu...

Страница 3: ...3...

Страница 4: ...4 1 2 3 5 5 6 7 8 9 10 11 12...

Страница 5: ...5 1 13 14 15 16 14...

Страница 6: ...z suvky a nebo p i zasouv n bateri i p i p en en n ad vypnut P en en n ad s prstem na sp na i nebo zapojov n vidlice n ad se zapnut m sp na em m e b t p inou nehod d P ed zapnut m n ad odstra te v ec...

Страница 7: ...adla lze zm nit polohu p davn ho dr adla a hloubkov ho dorazu Upnut vrt k Skl idlo s ozuben m v ncem Skl idlo natolik otev ete a lze nasadit n stroj N stroj nasa te Nasa te n stroj a pomoc kli ky skl...

Страница 8: ...ky z kvalitn rychlo ez n oceli Vrtac stojany Pro p esn vrt n na men ch d lech doporu ujeme pou t stojan pro vrt n Sv r k dn upn te obr b n d ly do roubov ho sv r ku T m zamez te oto en d lu a mo n mu...

Страница 9: ...vibrac a hlu nosti se vztahuj k hlavn mu pou it elektrick ho n ad P i jin m pou it elektrick ho n ad s jin mi n stroji nebo p i nedostate n dr b se zat en vibracemi a hlu kem m e b hem cel pracovn dob...

Страница 10: ...zas van bat ri i pri pren an n radia vypnut Pren anie n radia s prstom na sp na i alebo zapojovanie vidlice n radia so zapnut m sp na om m e by pr inou neh d d Pred zapnut m n radia odstr te v etky n...

Страница 11: ...utkovan sa sk idlo m e silne zahria V takomto pr pade odpo r ame pou va pracovn rukavice Ovl dacie prvky 1 Sk idlo s ozuben m vencom 2 Pl ky na vretene 3 Up nac krk 5 Vetracie otvory 6 Areta n kol k 7...

Страница 12: ...e V tacie stojany Pre presn v tanie do men ch dielov odpor ame pou i stojan na v tanie Zver k Riadne upnite obrobky do skrutkov ho zver ka T m zabr nite oto eniu obrobkov a mo n mu razu V tanie do obk...

Страница 13: ...i a hlu nosti sa vz ahuj k hlavn mu po u itiu elektrick ho n radia Pri inom pou it elektrick ho n radia s in mi n strojmi alebo pri nedostato nej dr be sa za a enie vibr ciami a hlukom m e po as cel h...

Страница 14: ...g the tool Carrying power tools with your finger on the switch or energising power tools that have the switch on invites accidents d Remove any adjusting key or wrench before turning the power tool on...

Страница 15: ...ick might get very hot In this case you are recommended to wear protective gloves Controls 1 Chuck with ring gear 2 Spots on spindle 3 Clamping neck 5 Air vents 6 Latching pin 7 Switch controller 8 Sp...

Страница 16: ...By turning the chuck to the left using the hexagonal wrench screw the chuck together Release the firmly clamped chuck by impacts of the hammer on the hexagonal wrench Proceed in reverse sequence to sc...

Страница 17: ...ear protection Vibration emission value ah vector sum for three directions and uncertainty K measured in accordance with EN 60745 Drilling ah D 1 2 m s2 In accuracy of measurements K 1 5 m s2 The emi...

Страница 18: ...as o porte las herra mientas Asimismo la causa de accidentes puede ser tambi n el por tar una herramienta con el dedo puesto en el pulsador o el conectar la clavija con el pulsador en posici n de enc...

Страница 19: ...o 3 Cuello de sujeci n 5 Orificios de ventilaci n 6 Perno de retenci n 7 Interruptor regulador 8 Ruedecilla de preselecci n de revoluciones 9 Manecilla del conmutador 10 Manecilla de cambio de velocid...

Страница 20: ...ave del mandril 13 en uno de los orificios del man dril y afloje girando el mandril hacia la izquierda Si el mandril est firmemente conectado lib relo con un martillazo en la llave del mandril 13 Reti...

Страница 21: ...bajo hay ruido Use protecci n para los o dos Valor de emisi n de vibraciones en ah suma vectorial de tres direc ciones e incertidumbre K determinada seg n EN 60745 Taladrado ah D 1 2 m s2 Incertidumbr...

Страница 22: ...o 22 1 2 a RCD RCD 3 a 4 a 5 a a...

Страница 23: ...0 760 760 1 0 600 1 0 600 1 2 0 1 750 1 0 1 750 1 1 0 1 100 1 0 1 100 1 2 0 3 050 1 0 3 050 1 1 5 13 1 5 13 1 2 20 UNF 1 2 20 UNF Auto Lock 13 13 25 25 45 45 43 43 2 0 2 1 II II 230 220 240 11 3 12 13...

Страница 24: ...o 24 7 7 6 7 7 8 8 3 10 2 1 2 9 2 13 13 13 15 2 13 4 5 200 5 www narex cz 5 C a 5 C 2002 96 ES...

Страница 25: ...A 81 A LwA 91 A K 3 A ah K EN 60745 ah D 1 2 2 K 1 5 2 EN 60745 60745 1 60745 2 1 2006 42 EC 50366 55014 1 55014 2 61000 3 2 61000 3 3 2004 108 EC 2013 Narex s r o Chel ick ho 1932 Anton n Pomeisl 470...

Страница 26: ...rzenoszenia narz dzia jest wy czony Prze noszenie narz dzia z palcem na wy czniku lub wtykanie wtyczki na rz dzia z w czonym wy cznikiem mo e by przyczyn wypadk w d Przed za czeniem narz dzia zdj wszy...

Страница 27: ...z batym 2 P aszczyzny na wrzecionie 3 Ko nierz do mocowania 5 Otwory wentylacyjne 6 Ko ek ustalaj cy 7 W cznik regulator 8 Pokr t o nastawienia obrot w 9 D wigienka prze cznika 10 D wigienka prze czan...

Страница 28: ...bkomocuj cego rys Umocowa klucz sze ciok tny imbus 15 w uchwycie Wrzeciono przytrzyma na p aszczyznach 2 kluczem p askim 13 mm Obra caj c uchwytem w lewo kluczem sze ciok tnym odkr ci uchwyt Mocno dok...

Страница 29: ...Warto emisji wibracji ah suma wektorowa w trzech kierunkach oraz nieoznaczono K ustalone wg normy EN 60745 Wiercienie ah D 1 2 m s2 Niedok adno pomiaru K 1 5 m s2 Podane parametry emisji wibracja ha a...

Страница 30: ...eszk z ket Munka k z ben mindig viseljen v d szem veget Az elektromos k ziszersz m jelleg t l f gg munkav delmi eszk z k p ld ul l gsz r maszk cs sz sg tl v d cip fejv d sisak f lv d stb el r sszer h...

Страница 31: ...unkav gz skor f leg tvef r skor a tok m ny er sen felmelegedhet Ebben az esetben aj nla tos a v d keszty viselete Kezel si elemek 1 Tokm ny fogazott koszor val 2 Sima fel letek az ors n 3 Nyak 5 Szell...

Страница 32: ...lba hib tlan s meg les tett min s gi gyorsv g ac lb l k sz lt sz rakat haszn ljon F r llv nyok A kisebb munkadarabokon v gzett pontos f r shoz aj nljuk a f r llv ny haszn lat t Szor t kapocs A munkad...

Страница 33: ...rt kel s hez A felt ntetett rezg s s zajszint rt kek az elektromos k ziszer sz m f felhaszn l s ra vonatkoznak M s felhaszn l s vagy egy b szersz m befog sa illetve a karbantart sok elhanyagol sa eset...

Страница 34: ...34...

Страница 35: ...35...

Страница 36: ...na na ich webov ch str nkach www narex cz v sekcii Servisn miesta The current list of authorized service centres can be found at our website www narex cz section Service Centres La lista actual de los...

Отзывы: