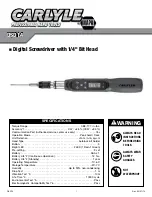
DSD14
3
Rev. 03/01/12
FEATURES AND FUNCTIONS
BATTERY INSTALLATION
• Remove the battery cap.
• Insert one AAA batteries (provided) matching the
-/+ polarities of the battery to the battery
compartment.
• Put on the battery cap and rotate it tightly according to the
following figures.
OPERATION
+
-
No other internal parts are available due to the sensitivity of this professional model.
Please utilize the repair facility listed under the warranty statement for all repairs in and out of warranty.
REPLACEMENT PARTS AVAILABLE AS:
RSDSD14BC
Battery Cap
RSDSD14CS
Blow Mold Case
for DSD14
1
9
12
3
2
5
8
6
4
7
13
15
11
10
16
14
1. Autolock Bit Holder
2. Communication Port
(Authorized service center use only)
3. LCD Readout
4. LED Indicator
5. Anti-slip Handle
6. Battery Cover
7. Buzzer
8. Calibration mark
9. Unit/Setting Button
10. Power On/Clear Button
11. Pre-setting Number Button
12. Up/Down Button
13. Torque Value
14. Units ( cN-m, in-lb, kg-cm)
15. Member Number
16. Peak/Track Mode


