background image

5

NOTES ON INSTALLATION

1.  It is advised that the Dash Camera is installed near the rear view mirror, at the top 

centre of the windshield for optimal operation.

2.  Make sure that the lens is within the range of the windscreen wiper to ensure a clear 

view when it rains.

3.  Do not touch the lens with your fingers. Finger prints left on the lens will result in 

unclear videos or photos. If photos or videos are blurred, please clean the lens gently 
with a microfibre cloth.

4.  Only use the included charging cable to power the Dash Camera.

4.0  INTRODUCTION

Thank you for purchasing a Nanocam Plus Dash Camera. We are certain that our product 
will give you trouble free operation while providing you with a safety feature that enhances 
your driving experience. Our products, like most after-market safety enhanced devices, 
are designed to assist and aid the driver, not to replace the manual function of the person 
operating the vehicle. Please read through these instructions before attempting to install this 
product.
For the latest manual and product updates, please visit our website at  

www.nanocamplus.com.au

 or 

www.nanocamplus.co.nz

Содержание NCP-DVR2K

Страница 1: ...2K QHD Discreet Barrel Dash Camera with inbuilt GPS WIFI NCP DVR2K USER MANUAL Your Safety Our Priority 5MP SENSOR...

Страница 2: ......

Страница 3: ...CTION 5 5 0 PACKAGE CONTENTS 6 6 0 PRODUCT OVERVIEW 6 7 0 INSTALLATION INSTRUCTIONS 7 7 1 NCP DVR2K installation 7 8 0 SOUND ALERTS 8 8 1 Real Time Audio Road Safety Alerts 8 8 1 1 Speed Camera Alert...

Страница 4: ...ALLING THE NCP LINK APP 11 11 0 NCP LINK APP OPERATION 13 11 1 APP Video Playback 13 11 2 Downloading videos from the APP 14 11 3 Sharing videos on Social Media 14 11 4 NCP LINK App Settings 15 12 0 W...

Страница 5: ...ed by the relevant laws Avoid using the Dash Camera in the vicinity of any devices that emit radio interference eg Microwave Ovens It is considered normal operation for the Dash Camera to get warm dur...

Страница 6: ...o be purchased separately 3 1 FORMATTING THE INSERTED MICRO SD CARD Please download the NCP LINK app and connect your Dash camera with the downloaded app by following the steps as mentioned on page 11...

Страница 7: ...loth 4 Only use the included charging cable to power the Dash Camera 4 0 INTRODUCTION Thank you for purchasing a Nanocam Plus Dash Camera We are certain that our product will give you trouble free ope...

Страница 8: ...er Guide x1 Spare 3M Adhesive x1 Electrostatic Film x2 3M Adhesive Mount x1 DASH CAMERA 8 7 9 4 3 2 1 6 5 1 Microphone 2 3M adhesive mount 3 Mini USB connector for power 4 Recording indicator LED 5 Re...

Страница 9: ...in the middle of the electrostatic film optional Press down on the base of the bracket by hand for 30 seconds to ensure that the adhesive mount is attached to the electrostatic film adjust the camera...

Страница 10: ...ded feature of providing real time road safety alerts An audio warning will alert you of your actual live speed speed limit if applicable and distance to the alert eg Speed Camera These alerts can be...

Страница 11: ...u before you enter a high accident zone 8 1 3 SCHOOL ZONE ALERT The School Zone alerts will appear 24 7 and cannot be set up to appear only during specific School Zone times 8 1 4 RAILWAY CROSSING ALE...

Страница 12: ...rd will delete all information on the inserted Micro SD Card and prepare the card to be used with the NCP DVR2K Restoring to default settings will also change the WIFI password to default 12345678 In...

Страница 13: ...s WiFi settings For Android devices Please search NCP LINK in the Google Play Store for installation Alternatively you can scan the QR code found in the system settings in your dash camera You can als...

Страница 14: ...4 When prompted enter the password 12345678 WIFI Name NCP DVR2K _XXXX XXXX is unique number to each Dash Camera Password 12345678 5 Once the connection has been made open the NCP LINK App You will no...

Страница 15: ...ion For instructions on connecting your dash camera to your smartphone s Wi Fi please follow the steps on the previous page 11 1 APP VIDEO PLAYBACK For Video Playback via the App please follow the ins...

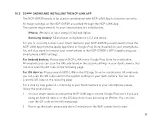
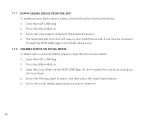
Страница 16: ...hone which can also be accessed through the NCP LINK App in the Folder name Local 11 3 SHARING VIDEOS ON SOCIAL MEDIA To share videos on Social Media please follow the instructions below 1 Open the NC...

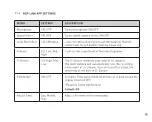
Страница 17: ...Off Low Mid High Controls the sound level of the inbuilt speaker G Sensor Off High Mid Low The G Sensor monitors your vehicle for impacts The dash camera will automatically lock the recording in the...

Страница 18: ...ormat SD Card Formats the Micro SD card Deletes all recorded data off the Micro SD Card WIFI Settings N A Change the dash camera s WIFI name and password from default Factory Settings N A Restore fact...

Страница 19: ...ated on the packaging This warranty is only valid where you have used the product in accordance with any recommendations or instructions provided by Directed Electronics This warranty excludes defects...

Страница 20: ...nless a longer warranty period is required by law The specifics of this Nanocam Plus limited warranty are covered in this manual To the extent possible under governing law other than the above product...

Страница 21: ...of such risk remains with you not Nanocam Plus Other than the above product warranty forNanocam Plus products its suppliers disclaim all warranties of any kind whether express implied or statutory re...

Страница 22: ...negligent breaches of any significant contractual duty or obligation on the part of Nanocam Plus Any liability for negligence is limited to direct losses usually and typically foreseeable in such case...

Страница 23: ...21...

Страница 24: ...com au www directed co nz All Images Information and Content are Copyright 2022 Directed Electronics Australia Pty Ltd All Rights Reserved V1 0 www nanocamplus com au www nanocamplus co nz Your Safety...

Отзывы: